Managing service-to-service communication between microservices can become complex as your AWS ECS architecture grows. ECS Service Connect simplifies this by offering built-in service discovery and secure connections without needing custom DNS setups or third-party tools.
In this guide, we’ll walk you through the steps to set up ECS Service Connect, securely connecting your microservices within ECS.
Overview of AWS ECS and Service Connect
Amazon Elastic Container Service (ECS) is a fully managed container orchestration service within the AWS services ecosystem, designed to deploy, manage, and scale containerized applications. Traditionally, managing microservices on ECS required complex networking setups, including service discovery, load balancing, and VPC DNS configurations for inter-service communication.
With Amazon ECS Service Connect, service discovery and a service mesh are integrated directly into the ECS configuration, removing the need for external DNS configurations. It also offers a unified approach to managing service communication, along with standardized metrics and monitoring logs.
Prerequisites
Before you start setting up ECS Service Connect, make sure you have the following:
- An AWS account with IAM permissions to manage ECS, ECR, and networking.
- AWS CLI and Docker installed on your local machine.
- Amazon Elastic Container Registry (ECR) repository for storing container images.
- A VPC with private and public subnets configured.
Steps to Set Up ECS Service Connect
Step 1: Create and Push an Nginx Image to Amazon ECR
Start by creating a basic Nginx image and pushing it to Amazon Elastic Container Registry (ECR), which stores container images for use in ECS.
# Authenticate Docker with ECR
aws ecr get-login-password --region us-east-1 | docker login --username AWS --password-stdin <AWS_ACCOUNT_ID>.dkr.ecr.us-east-1.amazonaws.com

# Create a new ECR repository
aws ecr create-repository --repository-name nginx-service

# Pull nginx docker image
docker pull nginx

# Tag the image for ECR
docker tag nginx:latest <AWS_ACCOUNT_ID>.dkr.ecr.us-east-1.amazonaws.com/nginx-service:latest

# Push the image to ECR
docker push <AWS_ACCOUNT_ID>.dkr.ecr.us-east-1.amazonaws.com/nginx-service:latest
Step 2: Create an ECS Cluster
Deploying and managing ECS services requires an ECS cluster. Here’s how to create one:
- Navigate to the ECS Console in your AWS Management Console.
- Click “Create Cluster.”
- Select the template that fits your use case: “Networking only” (for Fargate) or “EC2 Linux + Networking” (for EC2 instances).
- Provide a name for your cluster and configure any additional settings, like capacity providers.
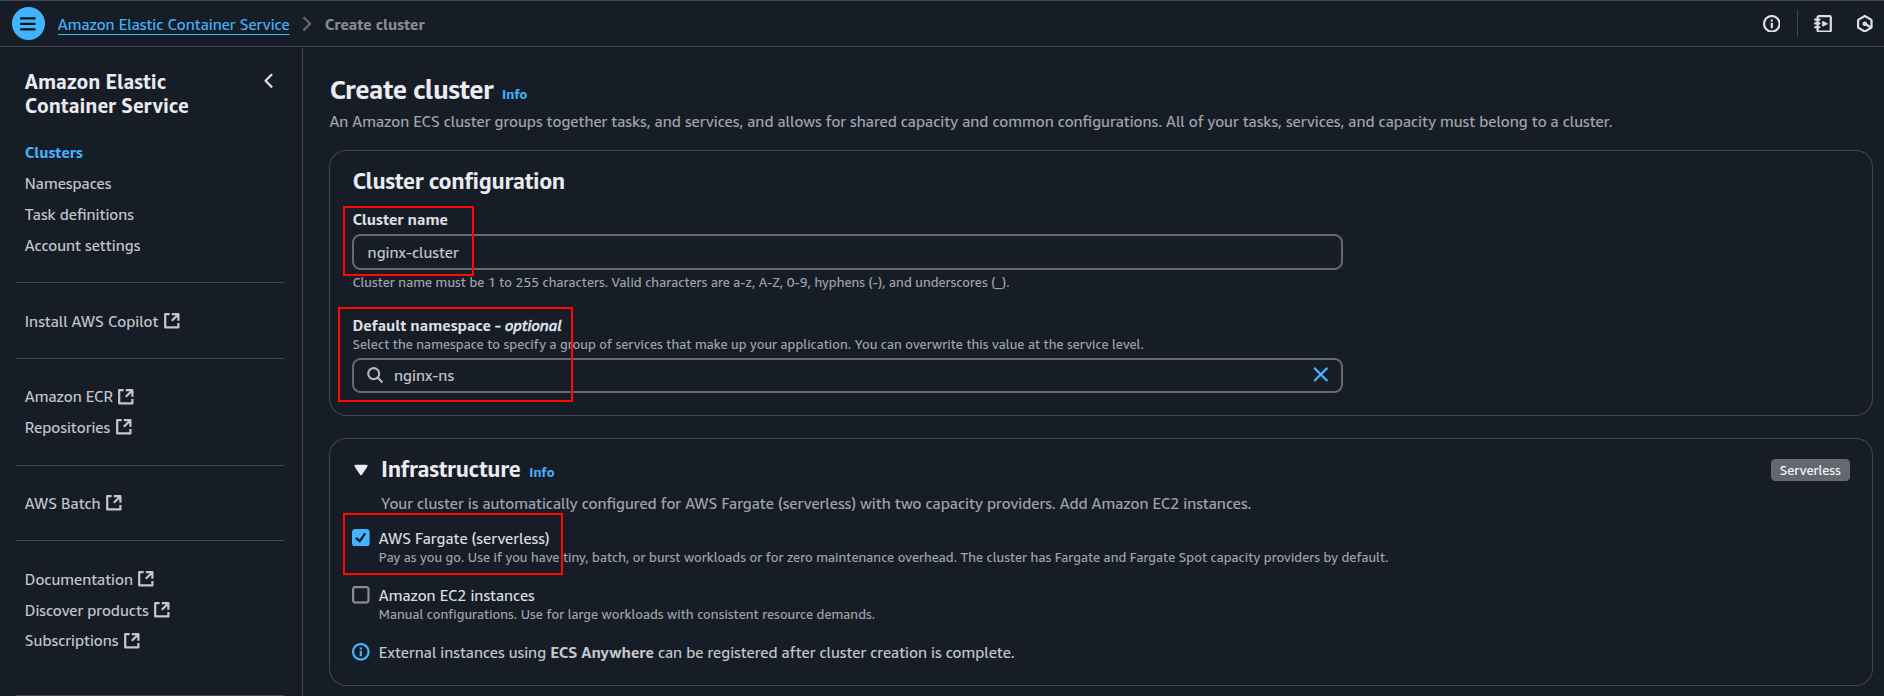
- Review the configuration and create your cluster.
Once the cluster is set up, you can run ECS tasks and services.
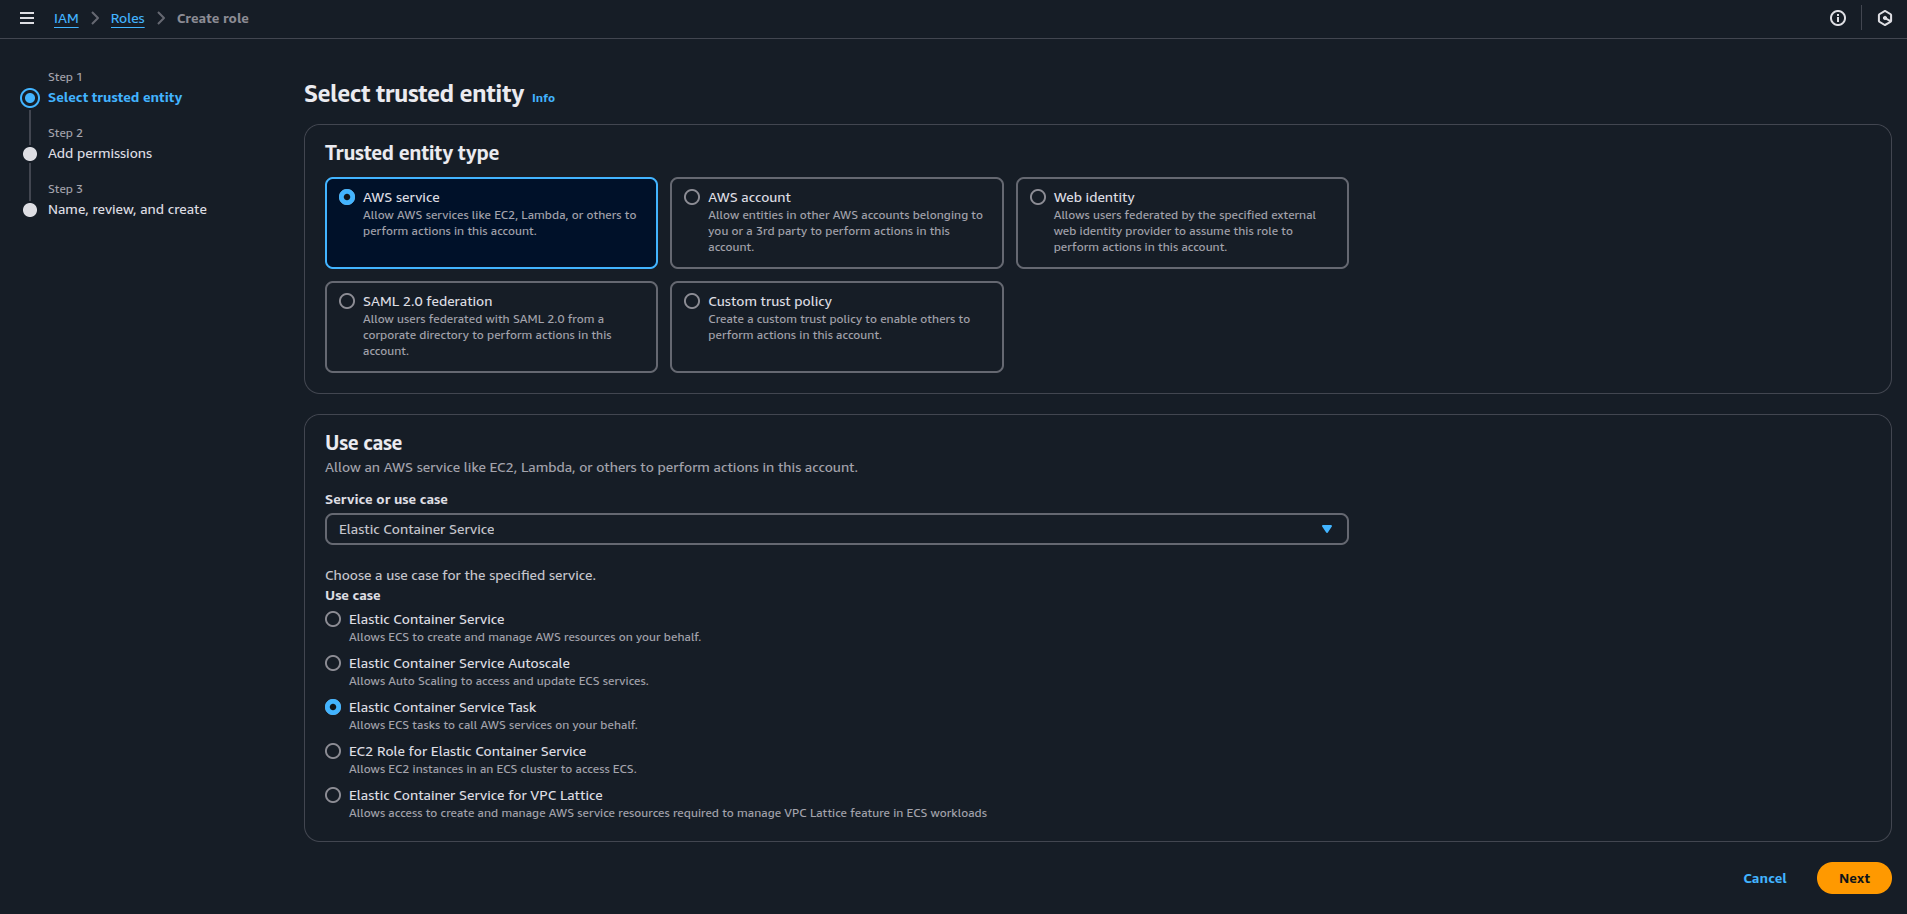
Step 3: Create Necessary IAM Roles
To ensure proper permissions, create two essential IAM roles: one for ECS task execution and one for ECS tasks.
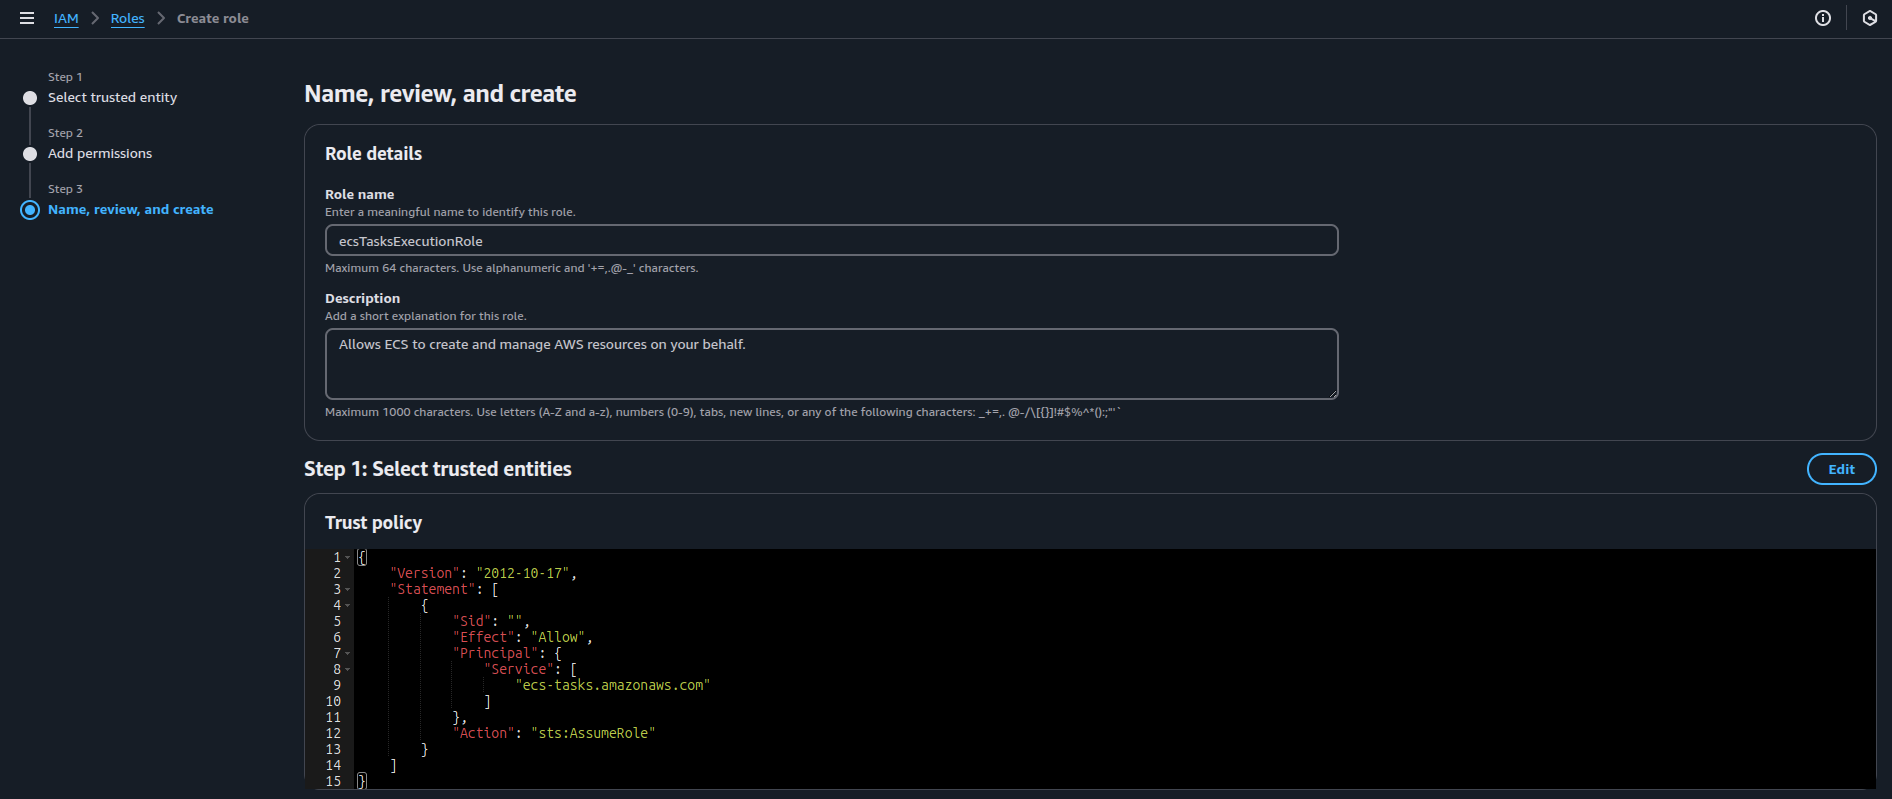
3. 1. Define the ECS Task Execution Role:
This role allows ECS to pull Docker images from Amazon ECR, fetch secrets, write logs to CloudWatch, and manage tasks on your behalf.
- Select Trusted Entity: In the IAM console, choose “AWS service” as the trusted entity and select “Elastic Container Service” as the service that will use this role.
- Attach Permission: Attach the
AmazonECSTaskExecutionRolePolicyfor this role. This AWS-managed policy grants ECS permission to pull container images from ECR and push logs to CloudWatch.
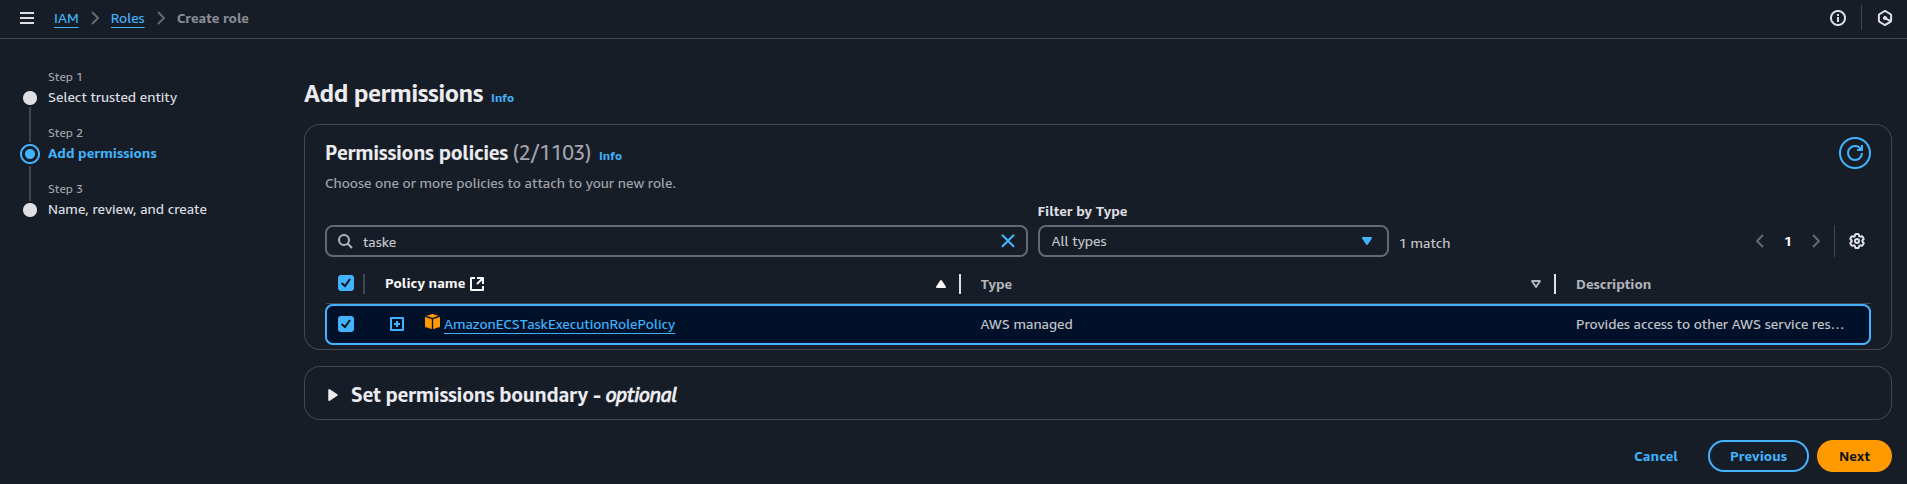
- Name the Role: Give the role a name (e.g., ecsTaskExecutionRole), review your settings, and click Create Role.
3.2. Define the ECS Task Role:
The ECS Task Role allows the application inside the container to interact with other AWS services as needed during runtime.
- Select Trusted Entity: Navigate to the IAM console, follow the same process as in Step 3.1 to select “AWS service” and then choose “Elastic Container Service.”
- Create a Policy: Create the
ecs-tasks-role-policyto grant permissions for using ECS Exec, allowing your container to open data and control channels for debugging with AWS SSM.
Here’s the policy:
{
    "Version": "2012-10-17",
    "Statement": [
        {
            "Action": [
                "ssmmessages:OpenDataChannel",
                "ssmmessages:OpenControlChannel",
                "ssmmessages:CreateDataChannel",
                "ssmmessages:CreateControlChannel"
            ],
            "Effect": "Allow",
            "Resource": "*",
            "Sid": "ECSExec"
        }
    ]
}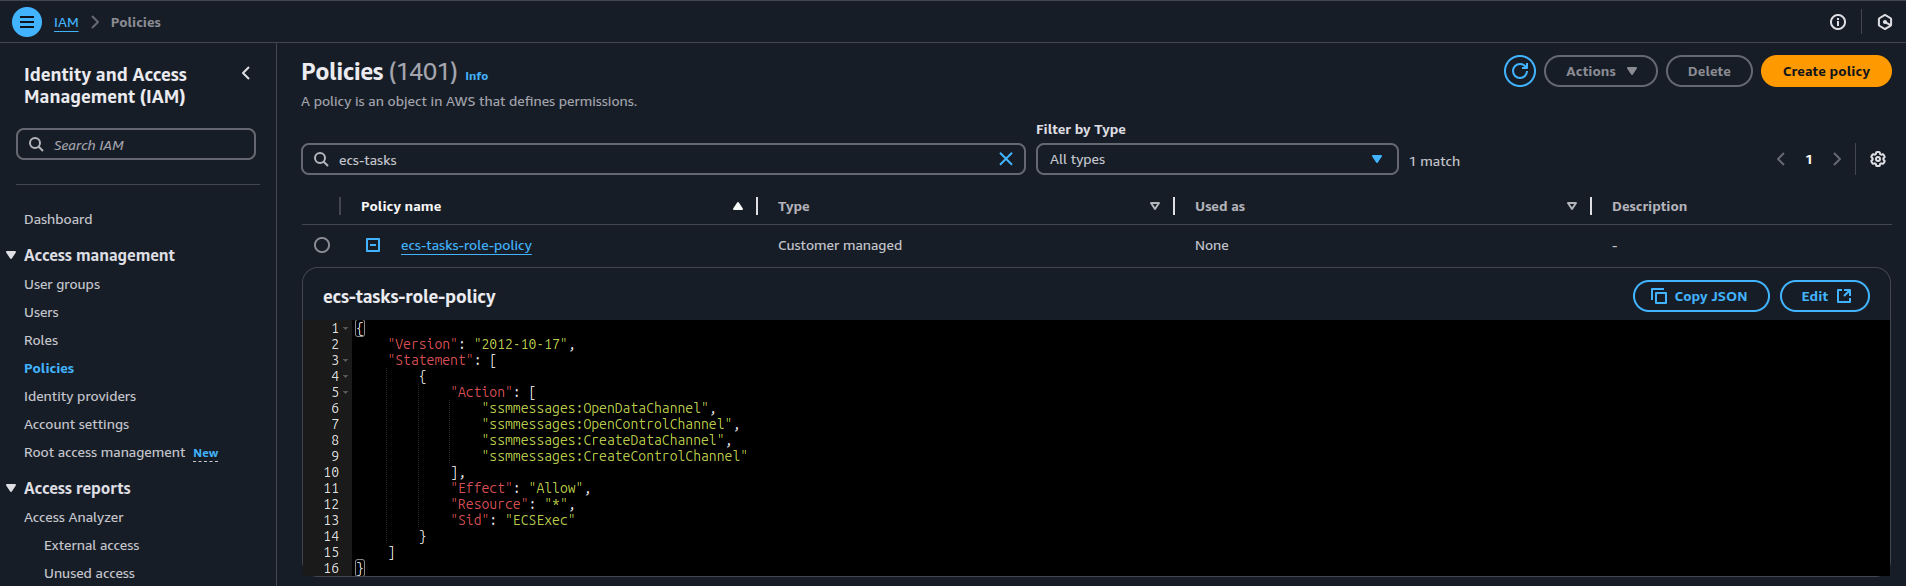
- Attach the Policy: Once the policy is created, attach it to the ECS Task Role.
- Name the role: Give the role a name (e.g., ecsTaskRole), review your settings, and click Create Role.
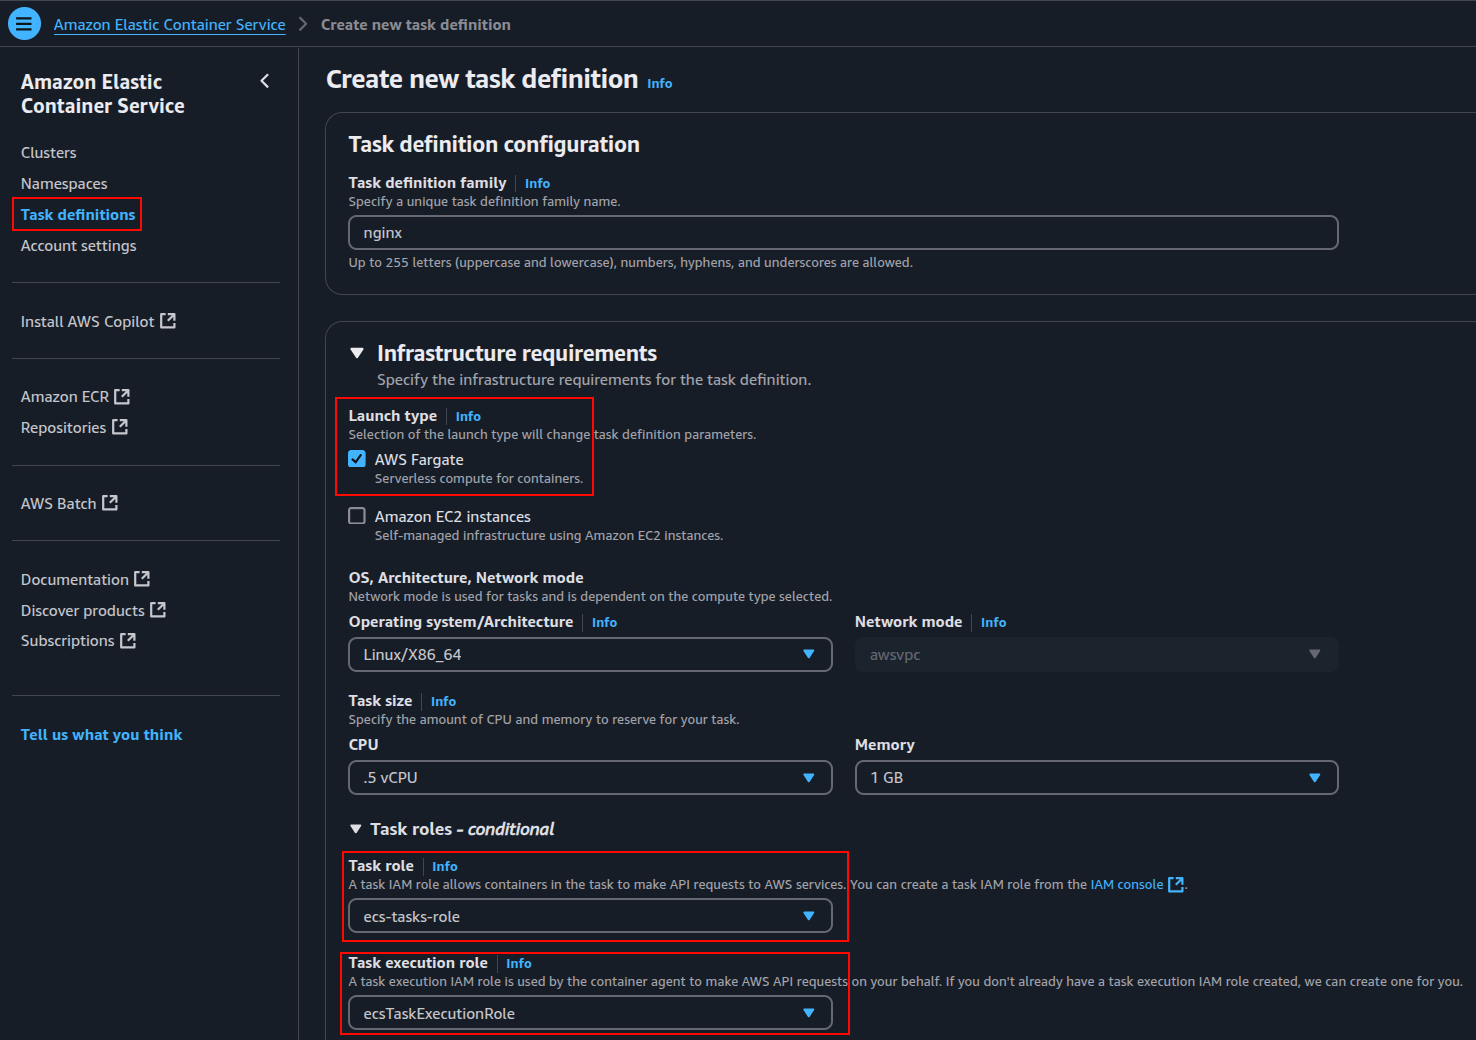
Step 4: Set Up an ECS Task Definition
The task definition specifies how your container runs in ECS.
- Navigate to ECS Console: In the Amazon Elastic Container Service (ECS) console, select “Task Definitions” and click “Create new task definition.”
- Task Definition Configuration: Specify a unique name for your task definition family (e.g.,
nginx). Choose the infrastructure requirements, including the launch type (Fargate or EC2) and network mode (e.g.,awsvpcfor Fargate). - Task Roles: Specify the ECS Task Role (
ecs-tasks-role) for API access to AWS services, and the ECS Task Execution Role (ecsTaskExecutionRole) for ECS agent API requests.
- Container Configuration: Add container details such as the container name (e.g.,
nginx), the image URI from ECR, and any necessary port mappings (e.g.,container port 80for HTTP traffic).
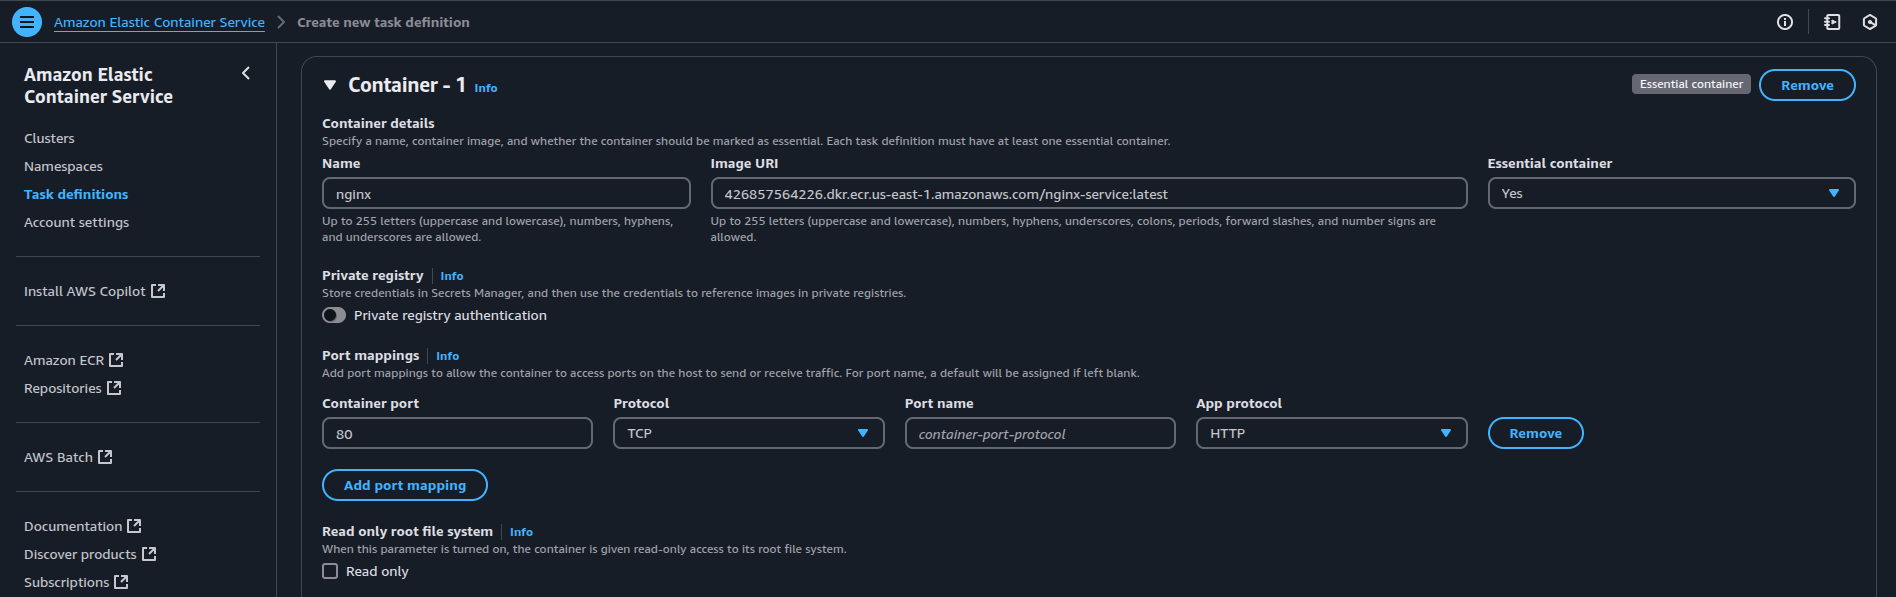
Note: In the Image URI section, use the Amazon Resource Name (ARN) of the image you uploaded to ECR. This ensures ECS is pulling the correct image from your private ECR registry.
- Logging Configuration: If IAM permissions are in place, enable CloudWatch logging; otherwise, disable it to avoid failures.

- Create the Task Definition: Review your settings and click “Create.”
Step 5: Create ECS Services and Enable Service Connect
5.1 Create the First ECS Service (nginx-a)
- From the ECS dashboard, select your cluster (eg:
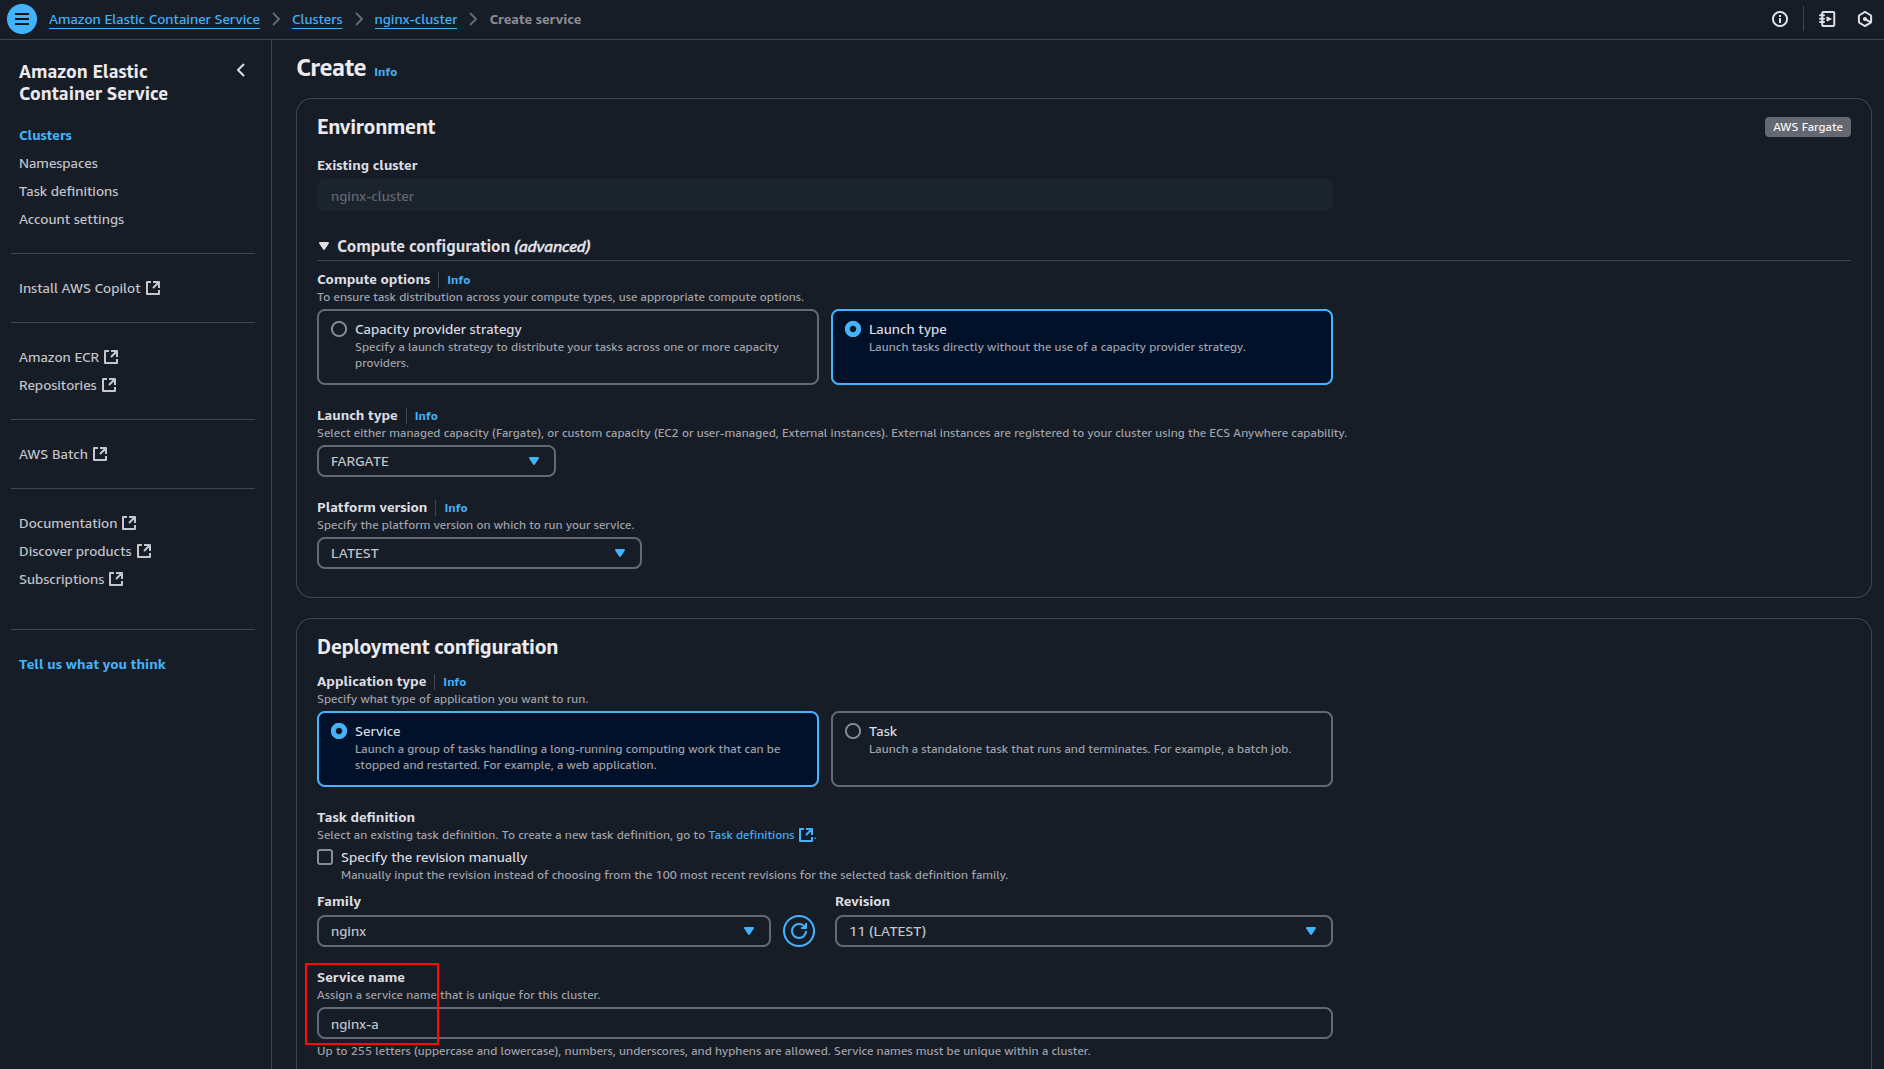
nginx-cluster) and click “Create” under the “Services” tab. - Select “Fargate” as the “Launch type” to run containers without managing EC2 instances.
- Choose the application type as “Service” and from the “Task Definition” dropdown, select the task definition you created earlier (e.g.
nginx), along with its latest revision. - Set the ECS Service name, which is set as nginx-a here.
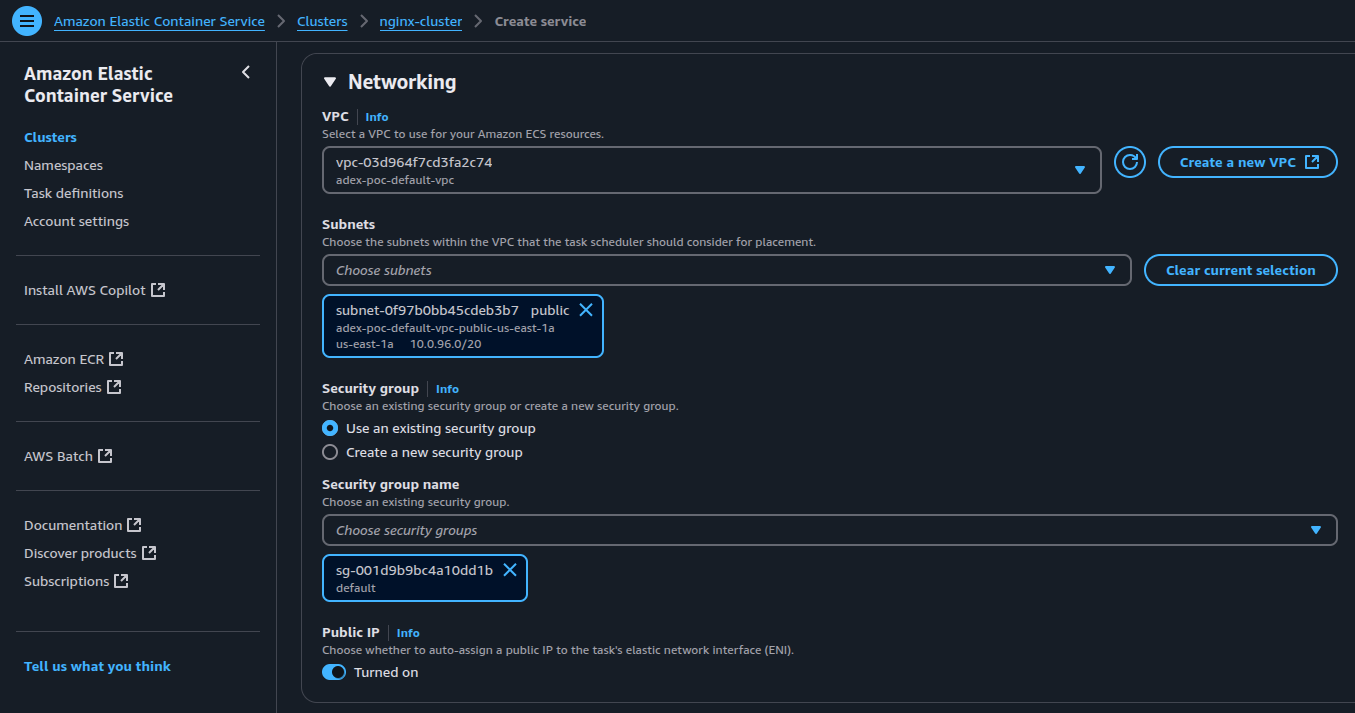
- Configure Networking: Select your existing VPC and appropriate subnets to ensure proper container-to-container communication.
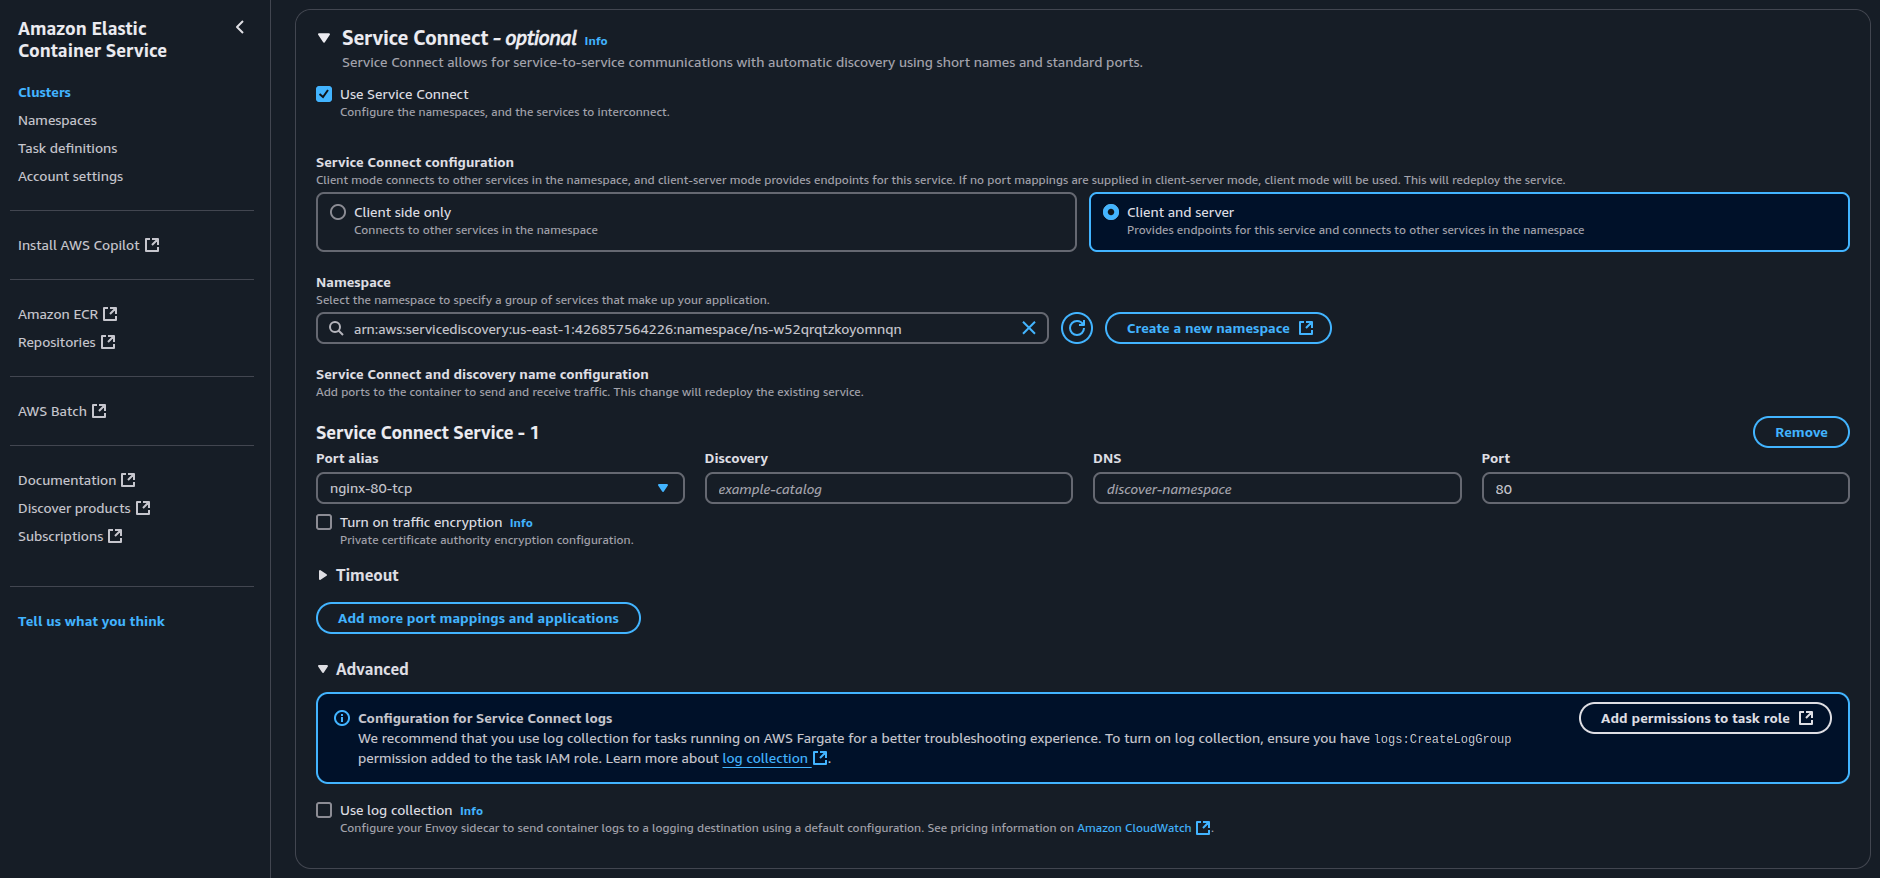
- Scroll down to the “Service Connect” section and enable it. In the Discovery Name field, specify a unique name.
Note: ECS uses the Port Alias from the container definition if you don’t provide a Discovery Name.
- Once everything is configured, click Create Service to launch it.

5.2 Create the Second ECS Service (nginx-b)
- Create the second ECS service by repeating the steps above in 5.1.
- Select the same task definition, networking settings, and Fargate launch type, while specifying the “Service name” as
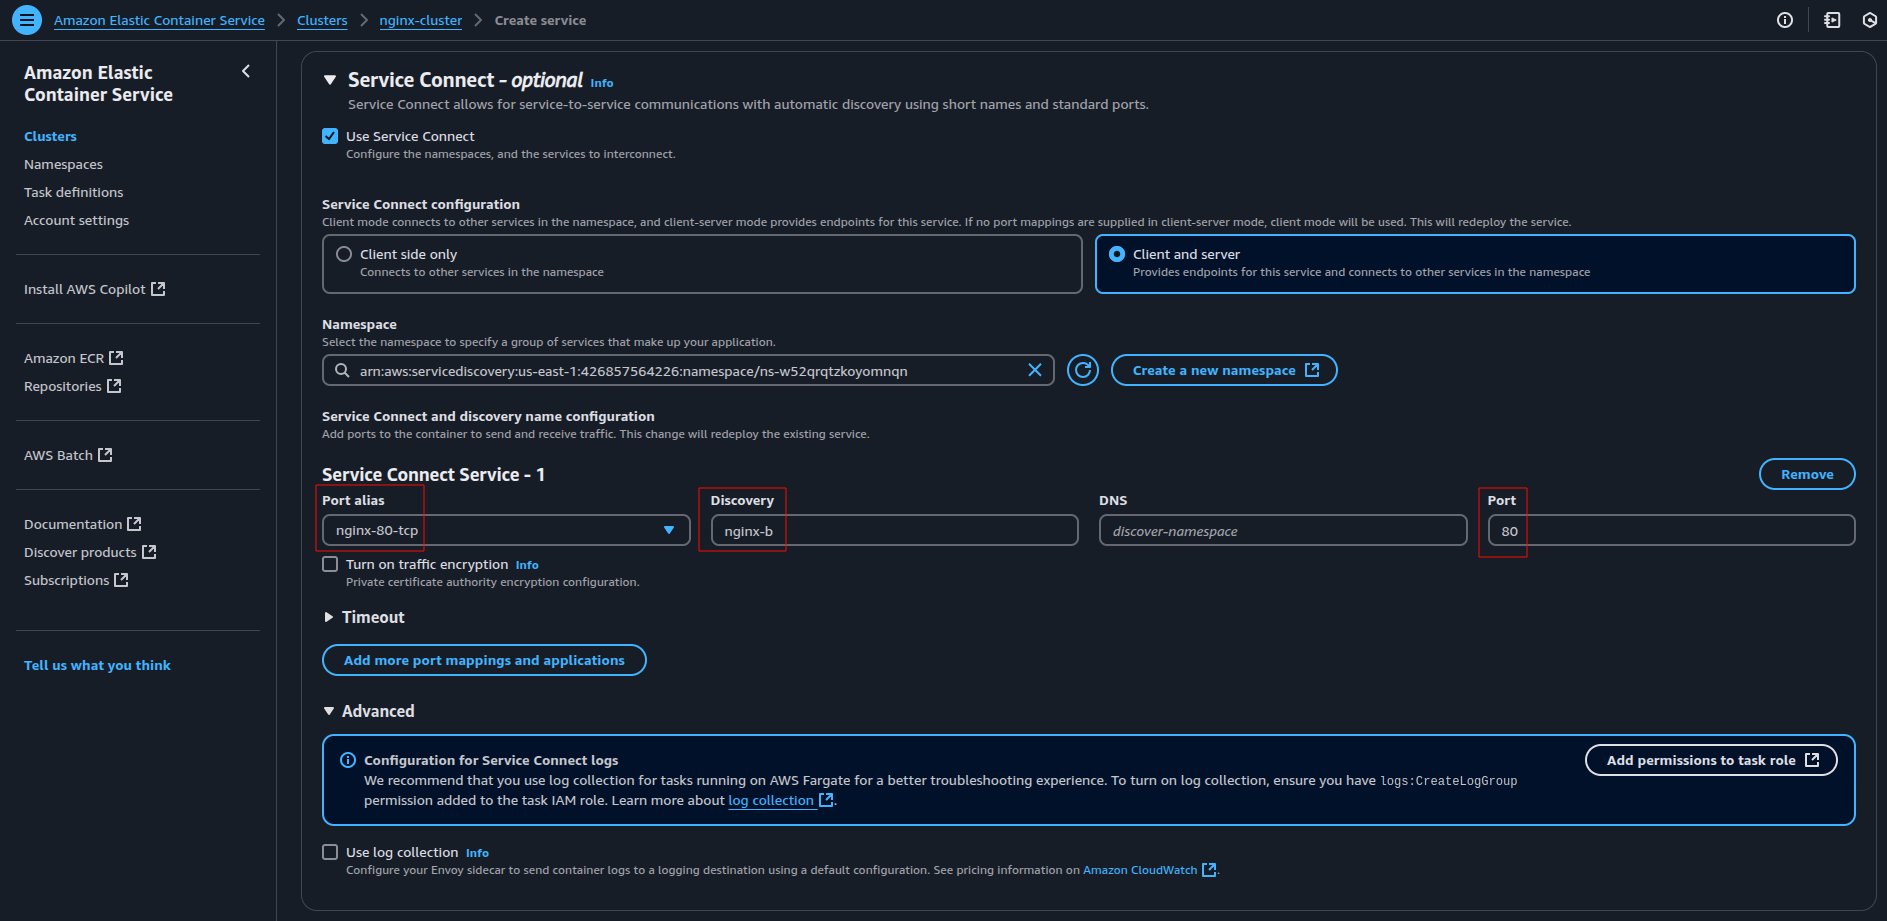
nginx-b. - Enable “Service Connect” and manually enter
nginx-bin the Discovery Name field.
Note: Duplicate Discovery Names are not allowed within the same namespace. Therefore, it is recommended that each service explicitly define a unique Discovery Name (e.g., nginx-b) for consistency.
Step 6: Enable ECS Exec for Secure Container Access
Enable ECS Exec on both services (nginx-a and nginx-b) to securely access and debug the containers.
6.1 Check ECS Exec Status in the Console
Before proceeding, ensure that ECS Exec is enabled for your services.
Navigate to the AWS ECS Console, go to your cluster, and click the “Task” tab to view the tasks running.
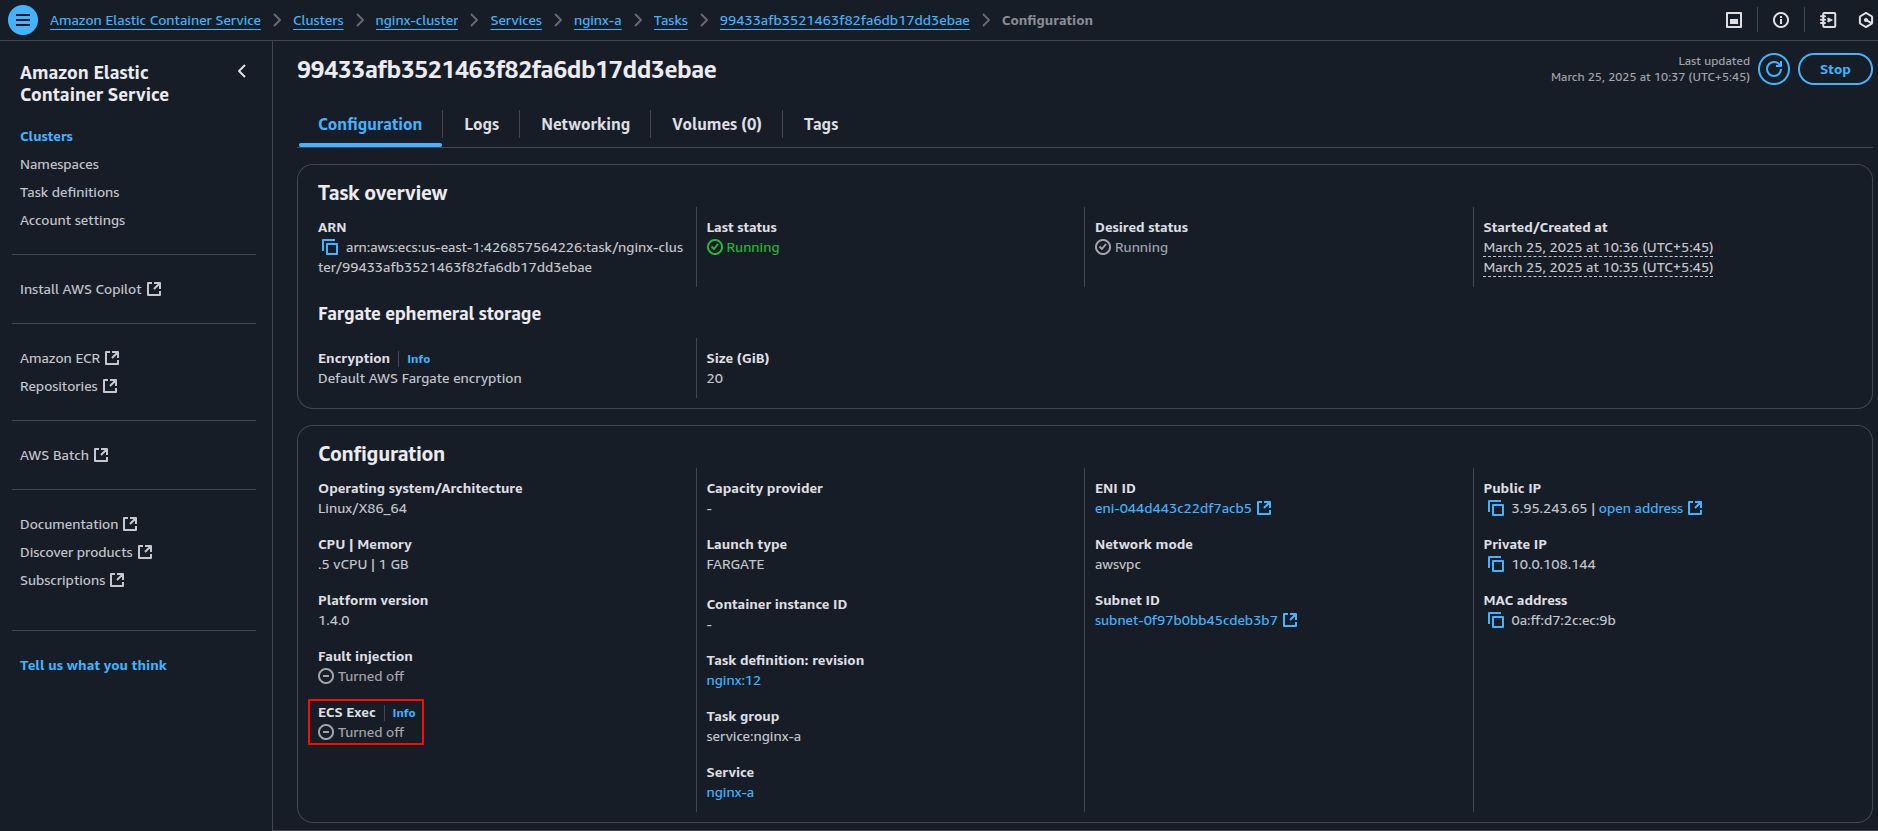
The image above shows that the ECS Exec is “turned off.”
Important Note: Currently, there is no option to enable ECS Exec from the console. So, you’ll need to run the command (shown below) in a terminal where AWS credentials are configured or use CloudShell.
6.2. Update the ECS Services to Enable ECS Exec
- To enable ECS Exec for both services, use the following command format:
#Replace the following placeholders in the command with your actual values
aws ecs update-service \
  --cluster <cluster-name> \
  --service <service-name> \
  --task-definition <task-definition> \
  --force-new-deployment \
  --enable-execute-command
For our two services (nginx-a and nginx-b), the command will be:
# Run the command for nginx-a service
aws ecs update-service \
--cluster nginx-cluster \
--service nginx-a \
--task-definition nginx-task \
--force-new-deployment \
--enable-execute-command
# Run the command for nginx-b service
aws ecs update-service \
--cluster nginx-cluster \
--service nginx-b \
--task-definition nginx-task \
--force-new-deployment \
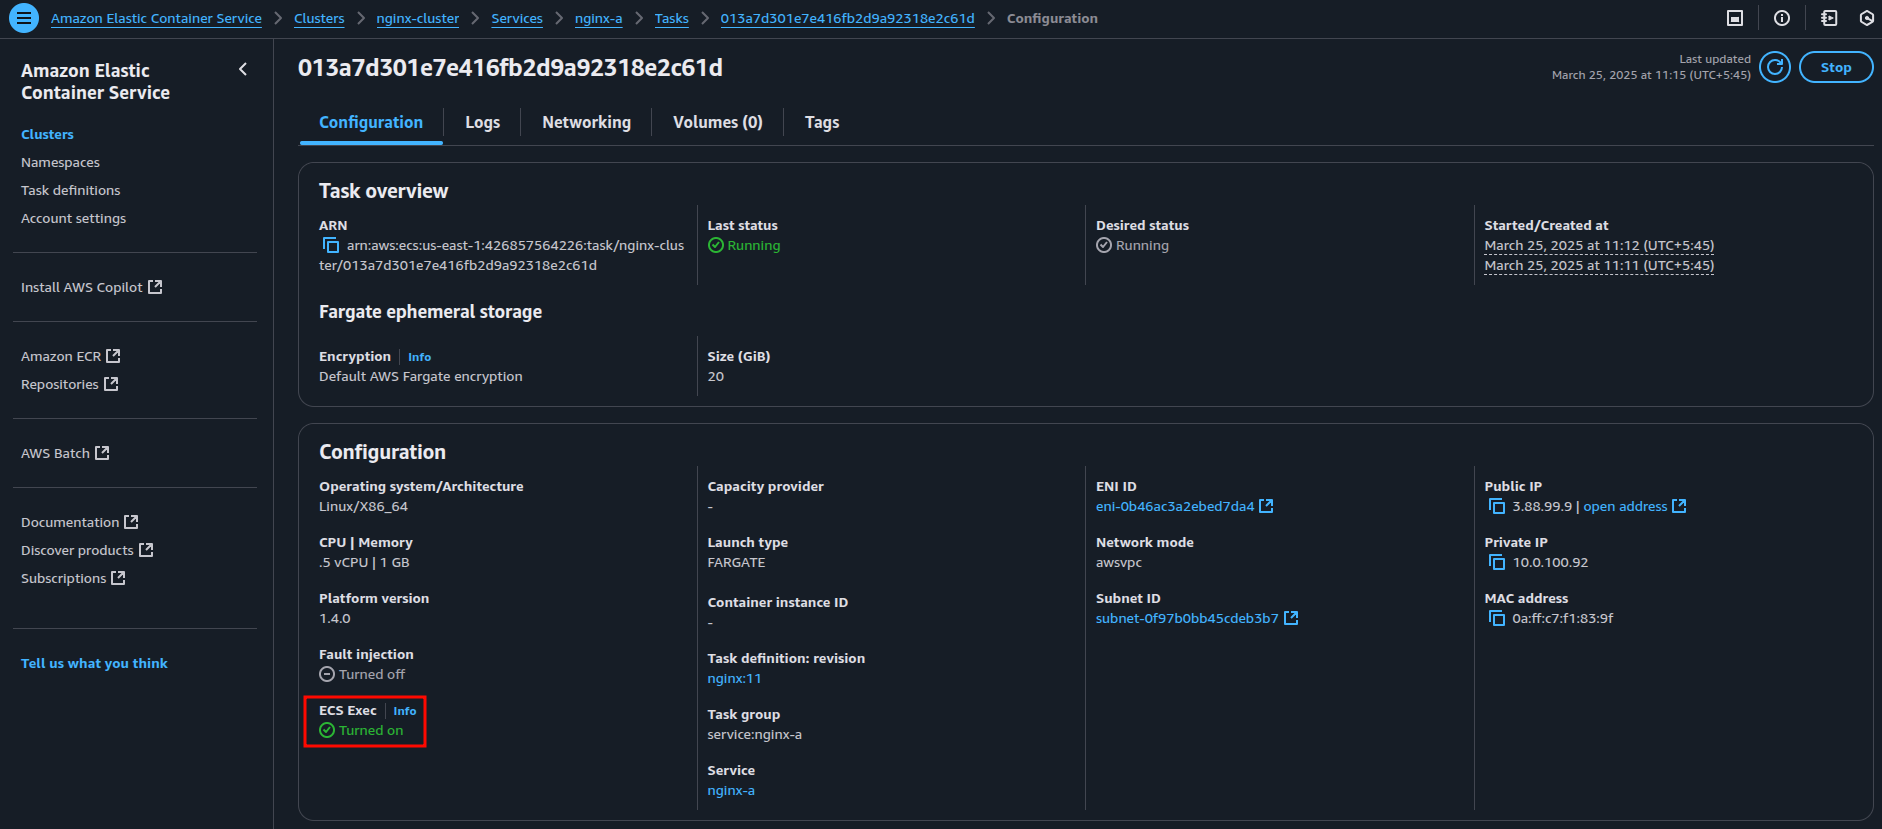
--enable-execute-command6.3. Verify ECS Exec is Enabled
After updating the services, navigate to the ECS Console to confirm that ECS Exec has been enabled. The image below shows that ECS Exec is now turned on.
Step 7: Access and Test Communication Between Containers
Now that ECS Service Connect is configured, it’s time to test communication between your services (nginx-a and nginx-b). Use ECS Exec to access a container and test the connection between the two services.
7.1 Exec into a Running Container
To begin, access the container within your ECS service.
aws ecs execute-command \
  --cluster <cluster_name> \
  --task <task_id_or_arn> \
  --container <container_name> \
  --interactive \
  --command "/bin/bash"
Replace the <placeholders> with your specific values. Gather the necessary details (cluster name, task ID, container name) from your service in the ECS Console, as shown for nginx-a below.
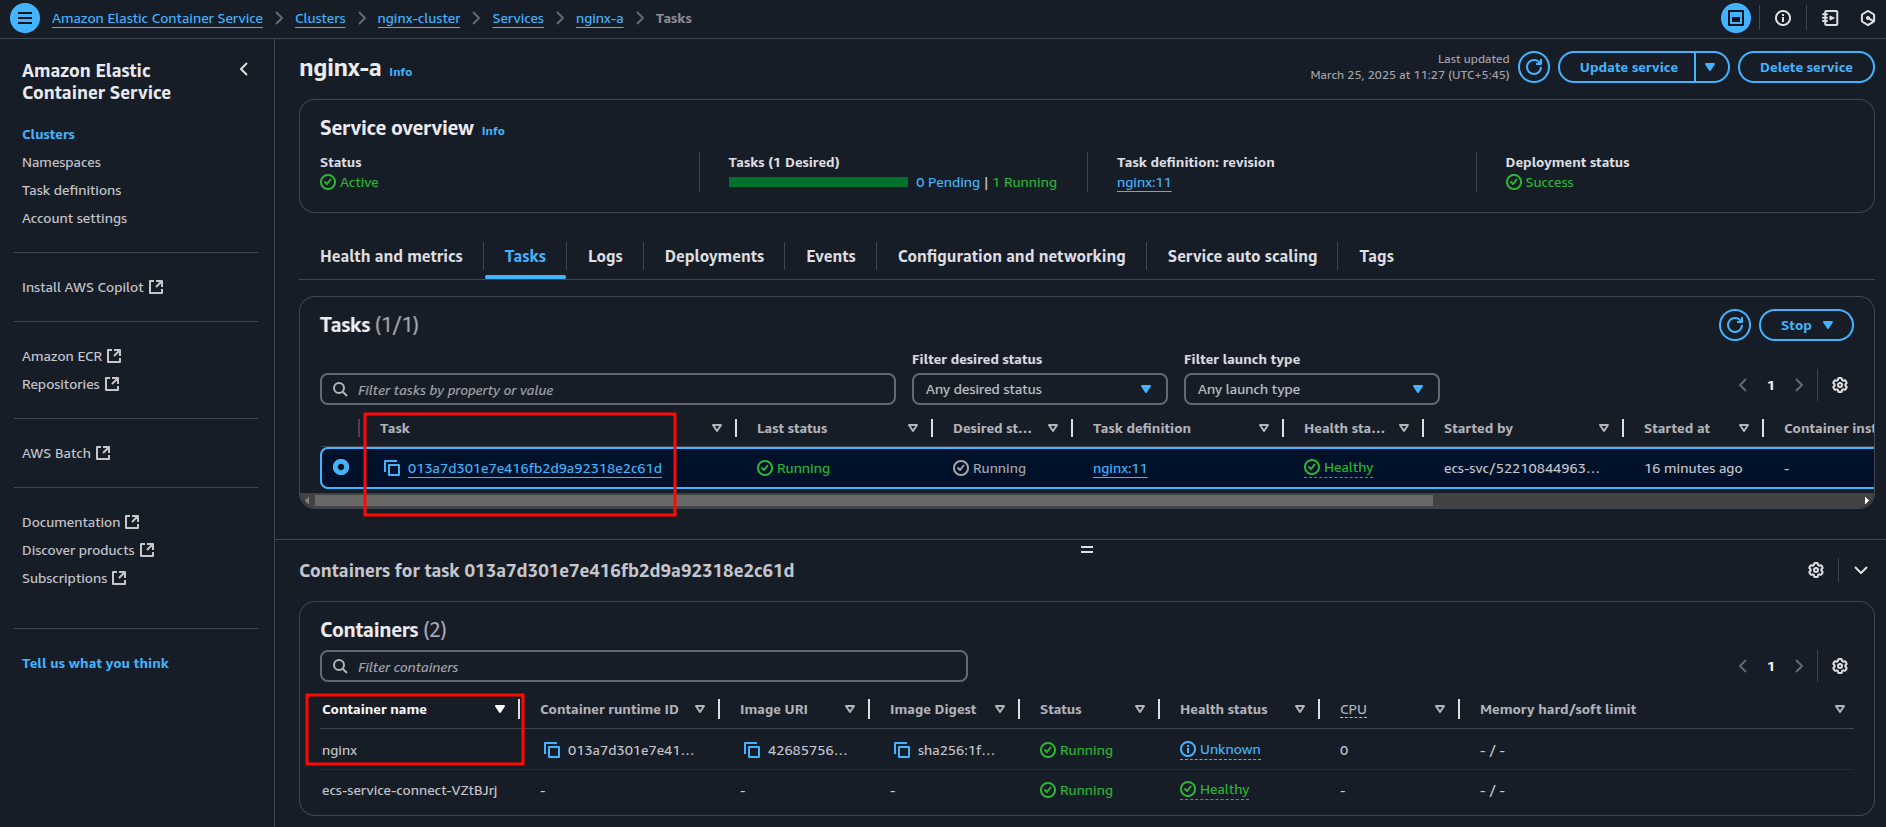
So, our command for the nginx-a will be:
aws ecs execute-command \
  --cluster nginx-cluster \
  --task 013a7d301e7e416fb2d9a92318e2c61d \
  --container nginx \
  --interactive \
  --command "/bin/bash"
7.2 Access the Container’s Terminal
Once the command is executed successfully, you’ll see output like this, indicating that you’ve accessed the container’s terminal:

7.3 Test Communication Between Services
Now that you’re inside the container, running the nginx-a service, let’s test if it can communicate with the nginx-b .
For that, the DNS name of nginx-b is necessary, which can be found in the ECS Service Connect configuration.

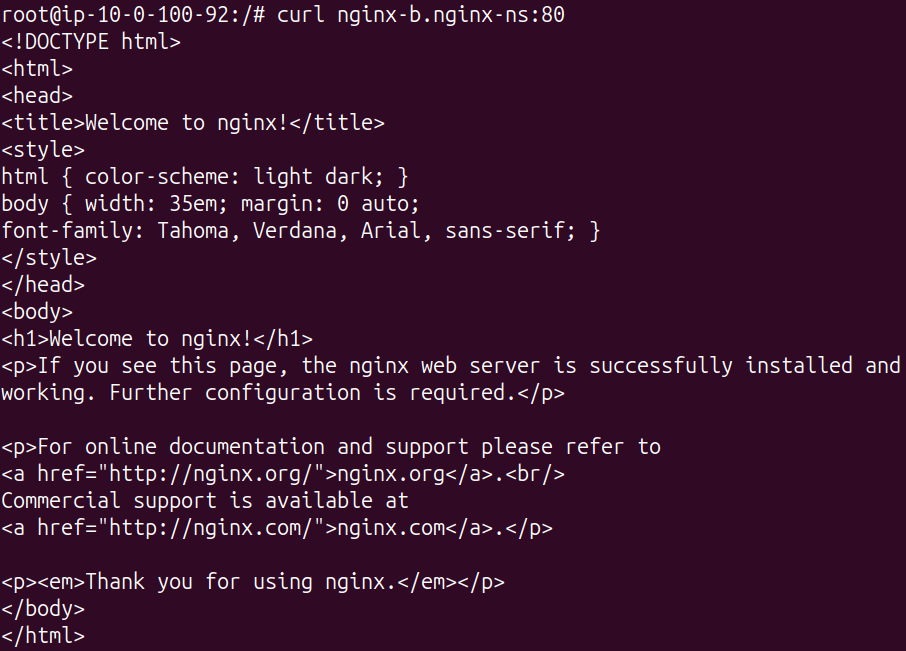
Run the following curl command inside the nginx-a container to test the connection from nginx-a to nginx-b:
curl nginx-b.nginx-ns:80If everything is configured correctly, you’ll receive the HTML response from nginx-b, confirming the communication is working.
To verify two-way communication, you can repeat the same process inside the nginx-b container, but this time use the DNS name for nginx-a.
Use Cases for ECS Service Connect
- Simplified Service-to-Service Communication: Enables easy communication between services in the same namespace with consistent DNS names.
- Secure Traffic Flow: Ensures only authorized services communicate within the namespace.
- Cost-effective Connections: Reduces reliance on internal load balancers (ALB/NLB) for service-to-service traffic.
Conclusion
ECS Service Connect streamlines service-to-service communication in microservices architectures on AWS. It removes the complexity of managing networking, service discovery, and secure connections, so you can focus on building your applications.
With built-in DNS resolution, observability, and security features, ECS Service Connect helps you create scalable and resilient containerized apps more efficiently.


