Event-driven architecture is a cornerstone of modern cloud applications, enabling systems to respond instantly to events with minimal dependencies and strong fault tolerance.
To implement this architecture effectively in the cloud, AWS provides native services such as Amazon SNS, Amazon SQS, and Amazon EventBridge, which work together to build flexible, resilient workflows without the need for custom orchestration layers.
This guide demonstrates how to build an event-driven architecture in AWS using these services that support evolving application requirements.
Use Case Overview: Simulating an Event-Driven Order Workflow
In this guide, we’ll build a simplified, event-driven, and serverless backend order processing system for an e-commerce application using AWS services, including Lambda, SNS, SQS, and EventBridge.
Here is the workflow:
- Order Placement: A customer places an order, which triggers a Lambda function (
PlaceOrderLambda) that publishes an OrderPlaced event to an SNS topic. - Fan-Out via SNS: The SNS topic broadcasts the event to two targets:
– A Lambda function that logs a simulated order confirmation email.
– An SQS queue that holds the order for backend processing. - Payment Processing: The SQS queue triggers another Lambda function (
ProcessOrderLambda) that reads the order message, simulates payment processing, and publishes a PaymentConfirmed event to EventBridge. - Shipping Triggered by EventBridge: EventBridge listens for the PaymentConfirmed event and triggers a Lambda function to simulate shipping the order.
Prerequisites
To implement this architecture, the following are required:
- An AWS account with access to Lambda, SNS, SQS, EventBridge, and CloudWatch.
- IAM permissions to create and manage relevant AWS resources.
- Basic familiarity with the AWS Management Console.
Steps to Create Event-Driven Architectures using SNS, SQS, and EventBridge
Step 1: Create SNS Topic
- Navigate to the Amazon SNS Console from the AWS Console.
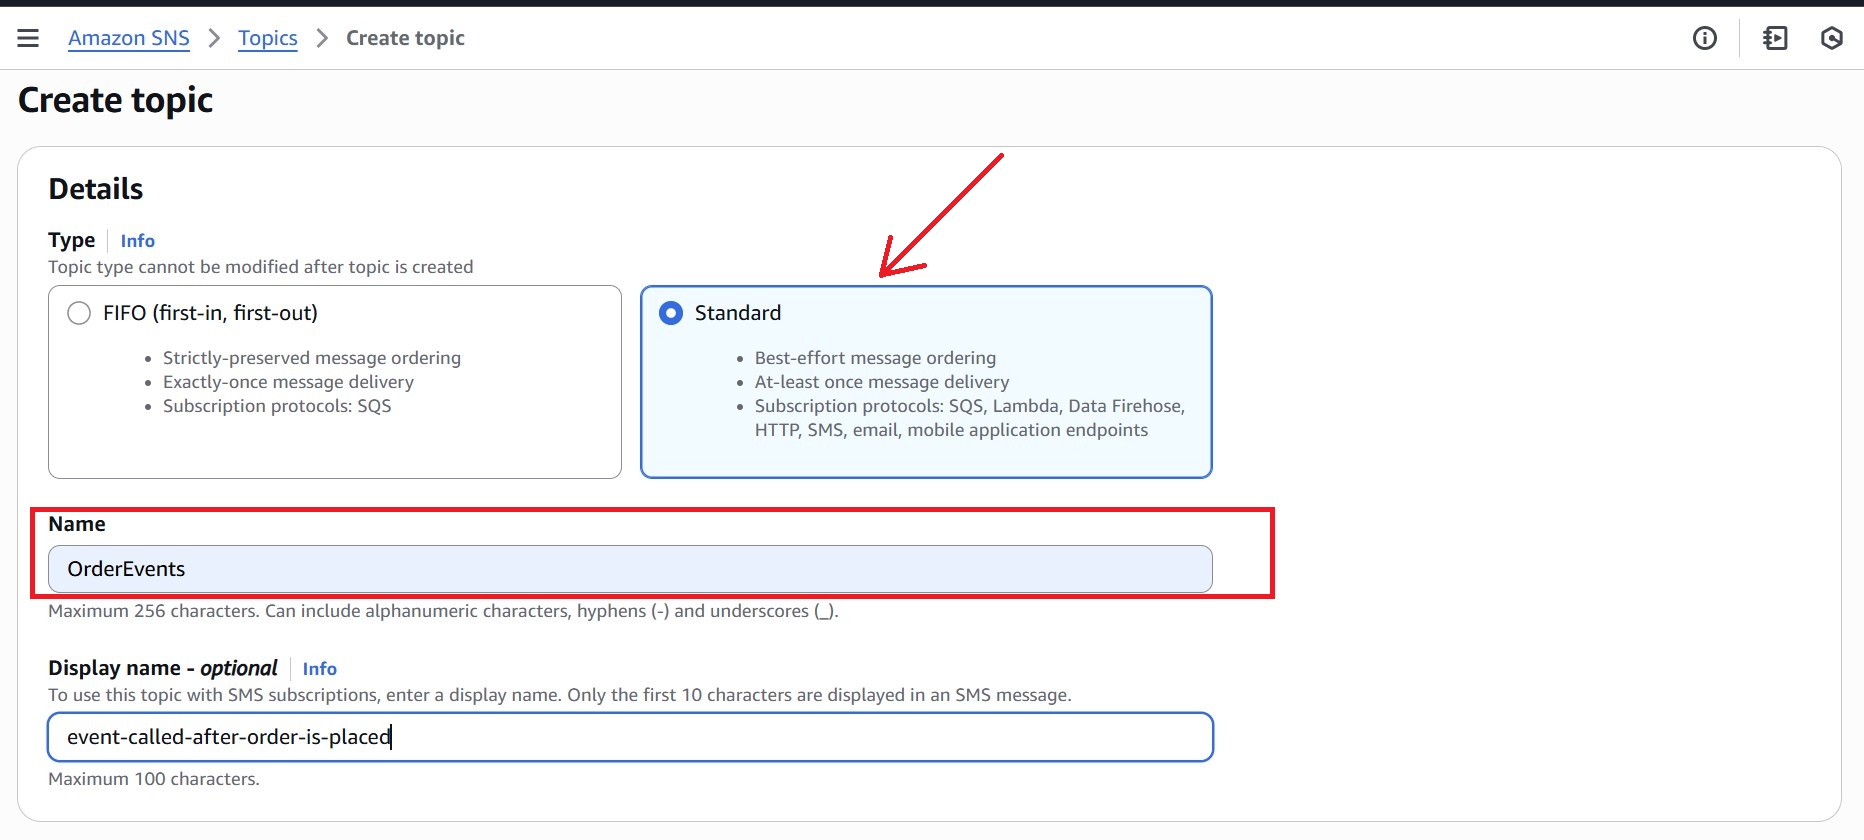
- In the left navigation pane, click “Topics”, then choose “Create topic.”
- Under Type, select Standard, and name the SNS topic (for example: OrderEvents).
- Leave other settings as the default.
- Click “Create topic.”
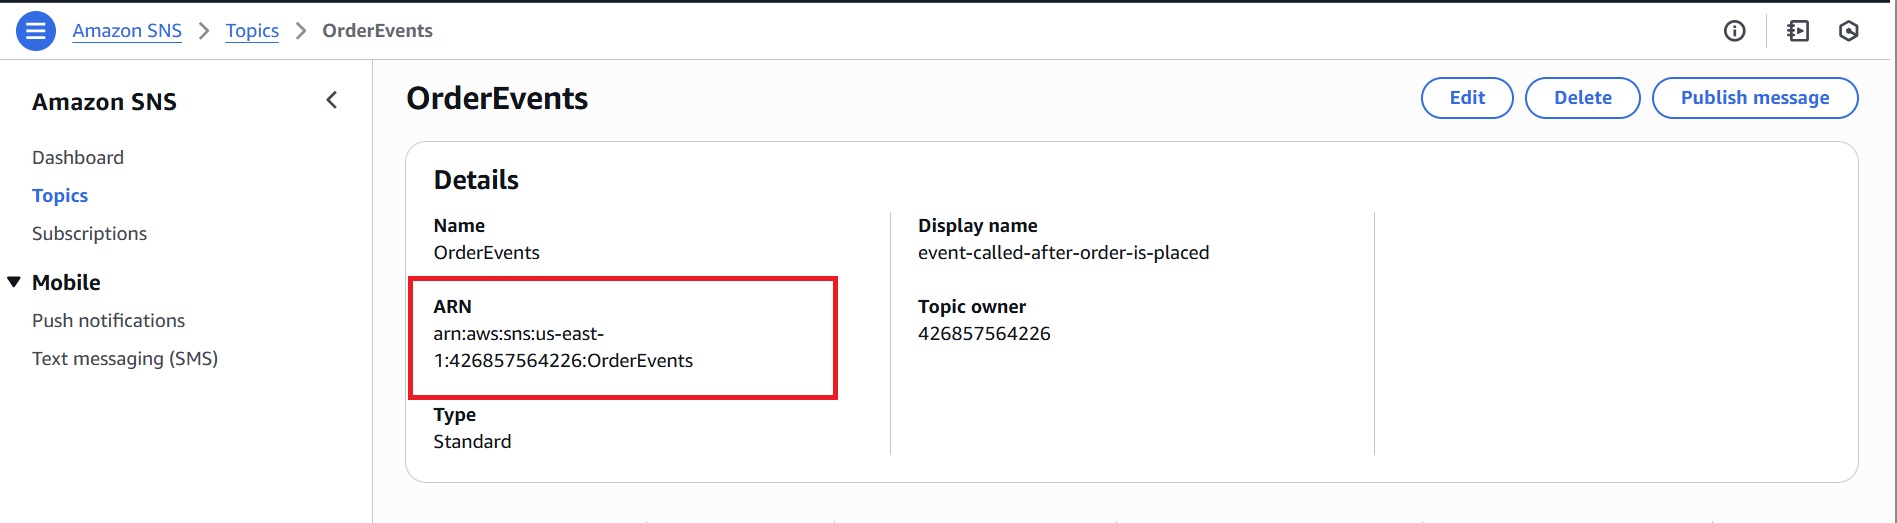
After creation, the topic ARN appears at the top of the topic’s details page. Copy the ARN as it will be used later when configuring permissions for the SQS queue.
Step 2: Create a Lambda Function to Publish Order Events to SNS
This Lambda function simulates a customer placing an order by sending a message to the SNS topic created in Step 1. This message initiates the order processing workflow by delivering a notification to the SNS topic, which then distributes it to subscribed services.
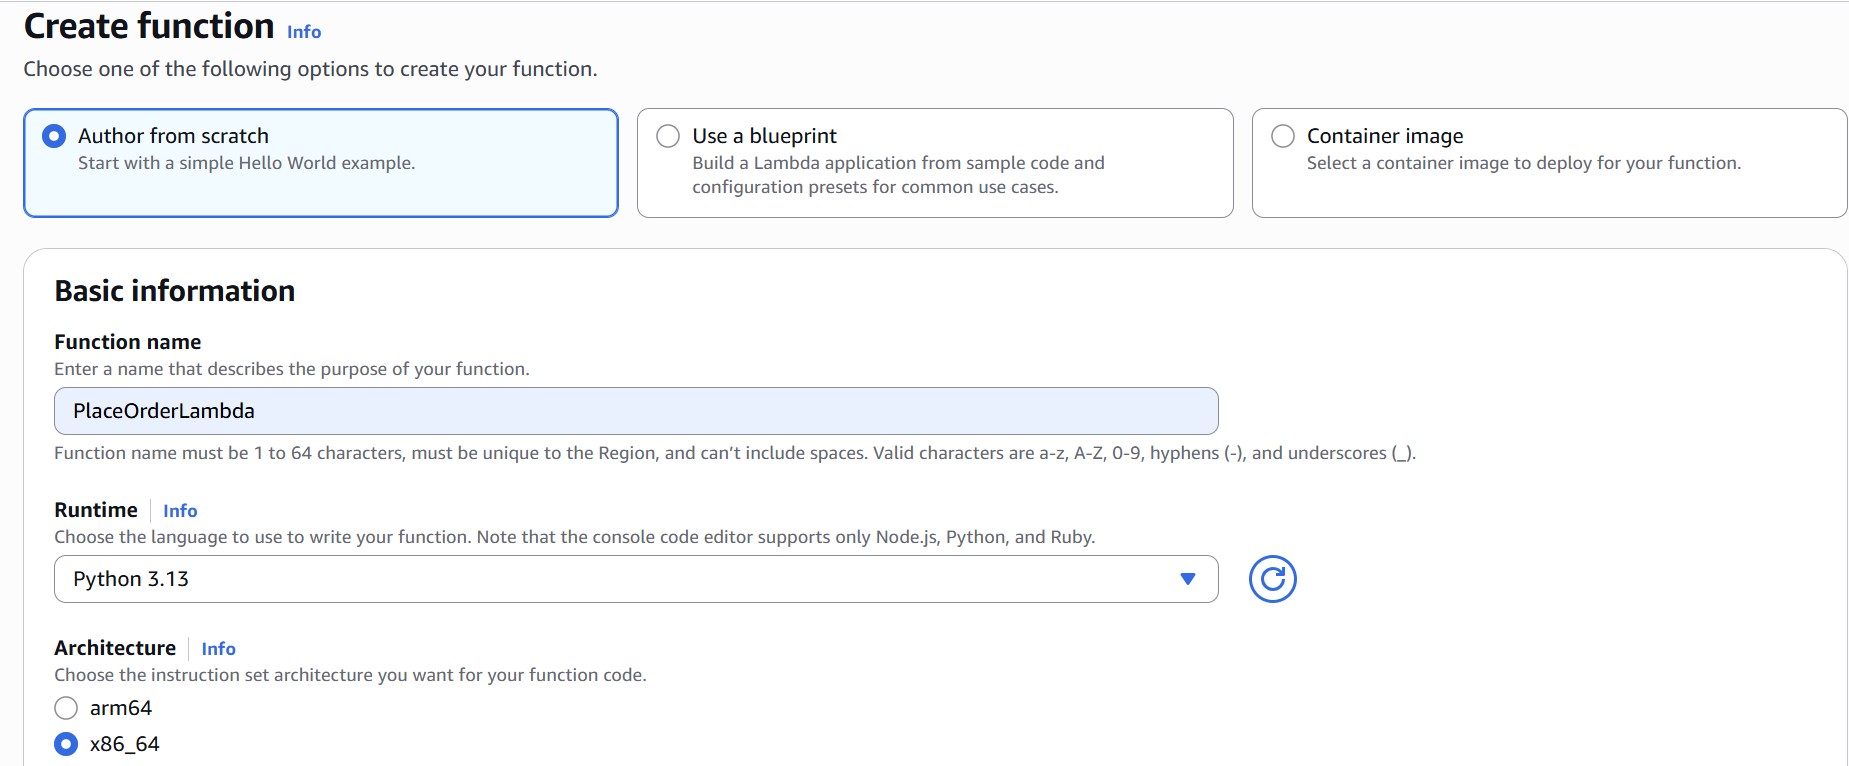
- Go to the AWS Lambda Console and click “Create function.”
- On the Create function page, select the ‘Author from scratch’ option.
- Under Basic information, fill in:
– Function name:PlaceOrderLambda
– Runtime: Python 3.x
- Under Permissions, make sure the execution role attached to the function includes:
– Basic Lambda execution permissions for logging to CloudWatch
– Permission to publish to the SNS topic (sns:Publish)
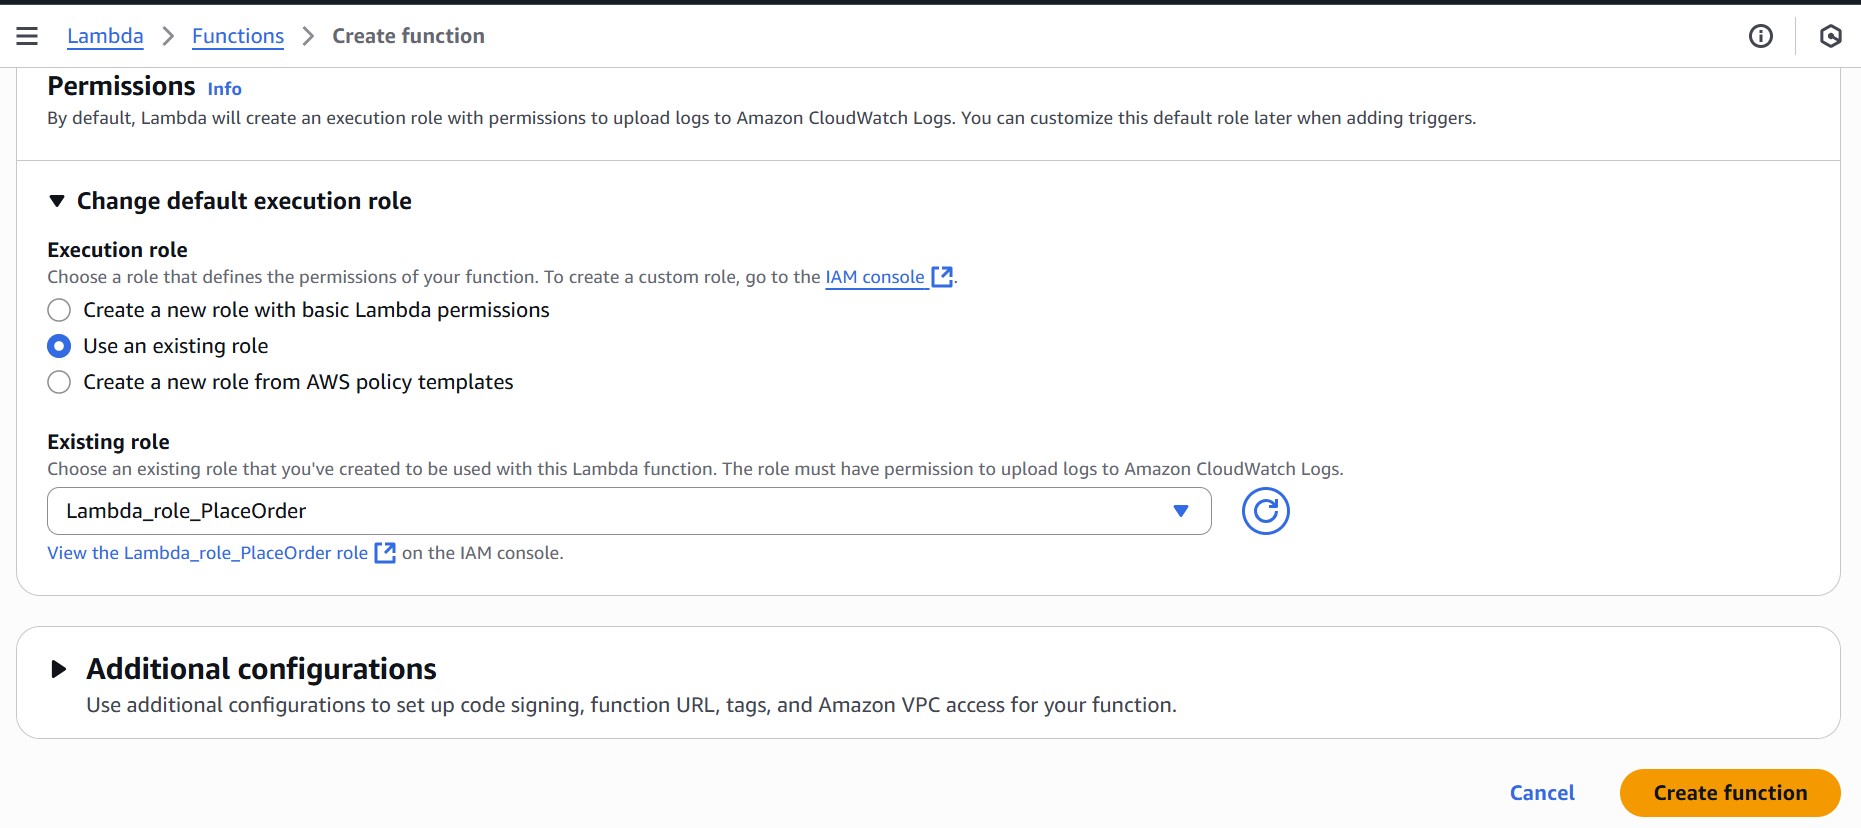
- Click “Create function” at the bottom.
Edit The Function Code
- Once the function is created, scroll to the code section (lambda_function.py) and replace it with the following, and click Deploy.
import json
import boto3
import uuid

sns = boto3.client('sns')
SNS_TOPIC_ARN = 'arn:aws:sns:us-east-1:426857564226:OrderEvents'

def lambda_handler(event, context):
    order_event = event
    if 'orderId' not in order_event:
        order_event['orderId'] = str(uuid.uuid4())

    sns.publish(
        TopicArn=SNS_TOPIC_ARN,
        Message=json.dumps(order_event)
    )

    print(f"Order placed: {order_event['orderId']}")

    return {
        "statusCode": 200,
        "body": f"Order {order_event['orderId']} placed."
    }
Tip: Replace the ARN placeholder with the actual ARN of the SNS topic.
Important Note: For simplicity, the PlaceOrderLambda function in this guide receives order data directly through its event input. In a real-world setup, it would typically be triggered by an API Gateway or frontend application with dynamic input.
Step 3: Create SQS Queue and Subscribe To SNS
To ensure reliable message handling and resilience against failures, first create a Dead-Letter Queue (DLQ) to handle failed messages. Then, create the primary OrderProcessingQueue and configure it to use the DLQ.
3.1 Create the Dead-Letter Queue (DLQ)
- Go to the Amazon SQS Console and click “Create queue.”
- Under Type, select Standard and name it, e.g., OrderProcessingDLQ.
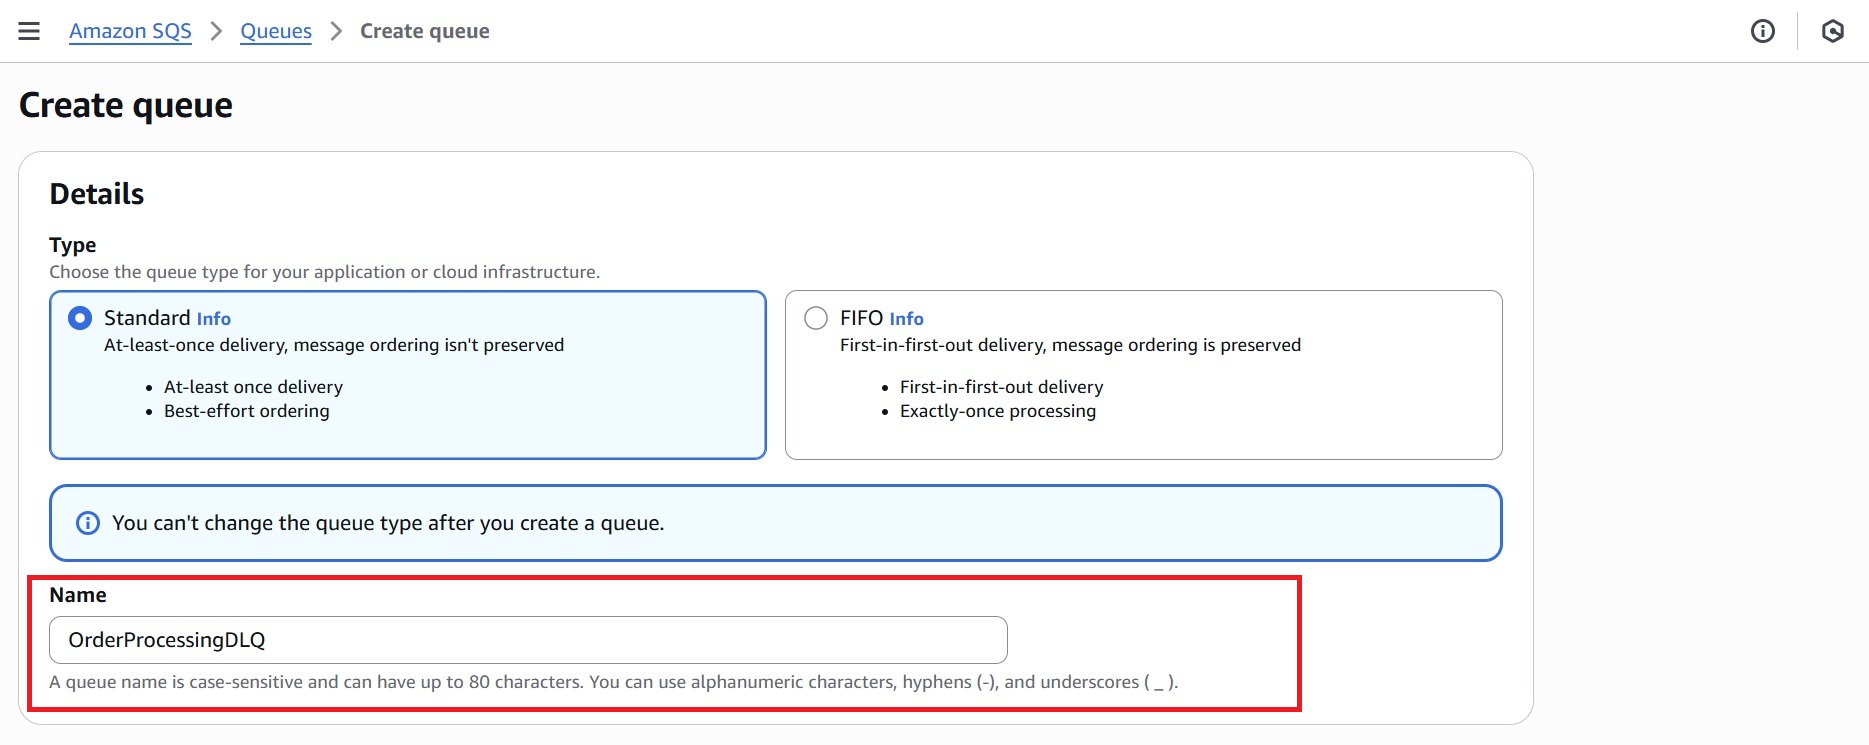
- Leave all other settings at their defaults and click Create queue.
After creation, copy the ARN of DLQ (which looks like arn:aws:sqs:<region>:<account-id>:OrderProcessingDLQ) as it will be required in the next step.
3.2 Create the Main SQS Queue And Enable DLQ
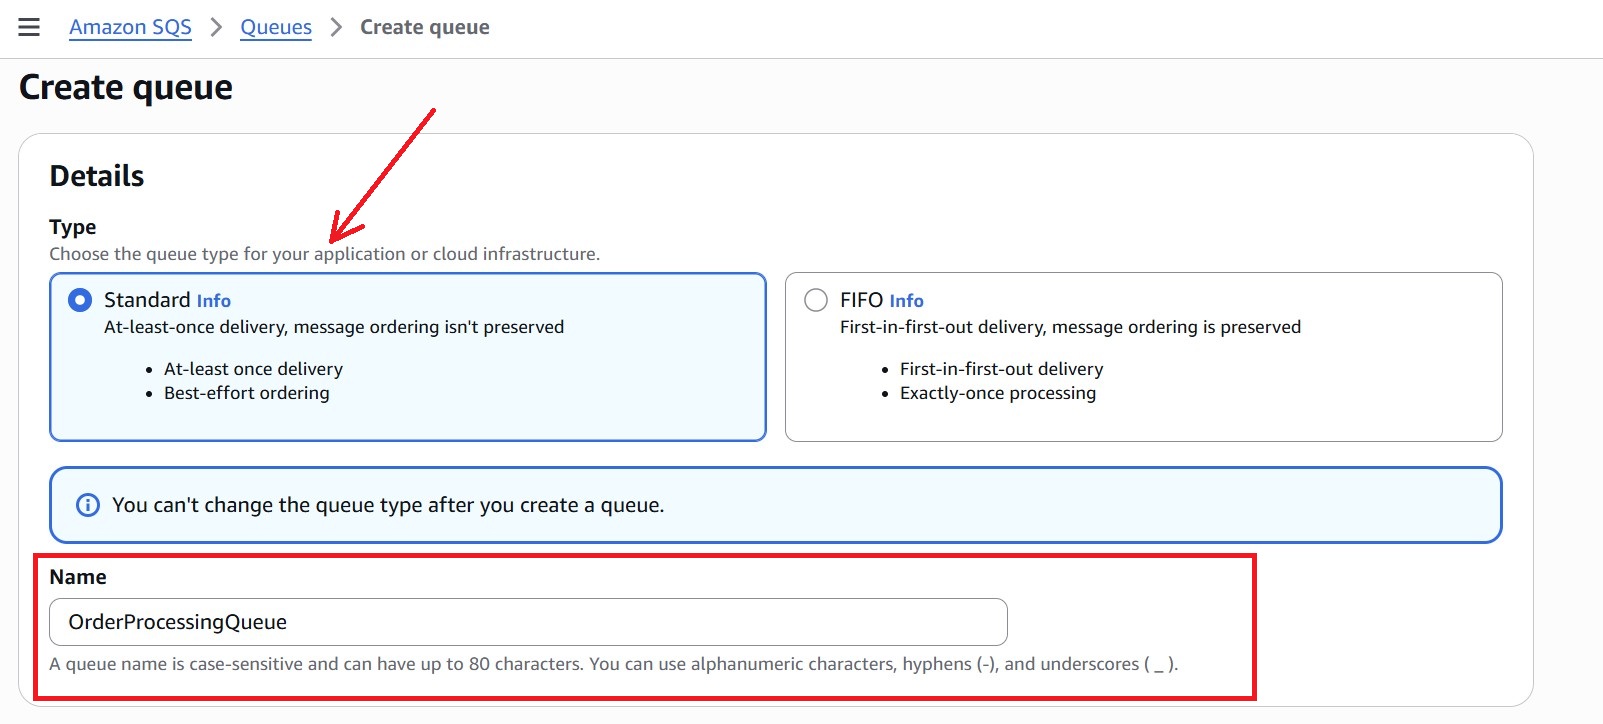
- Navigate to the Amazon SQS Console and click “Create queue.”
- Under Queue type, select Standard.
- Provide a name to the queue, for example: OrderProcessingQueue.
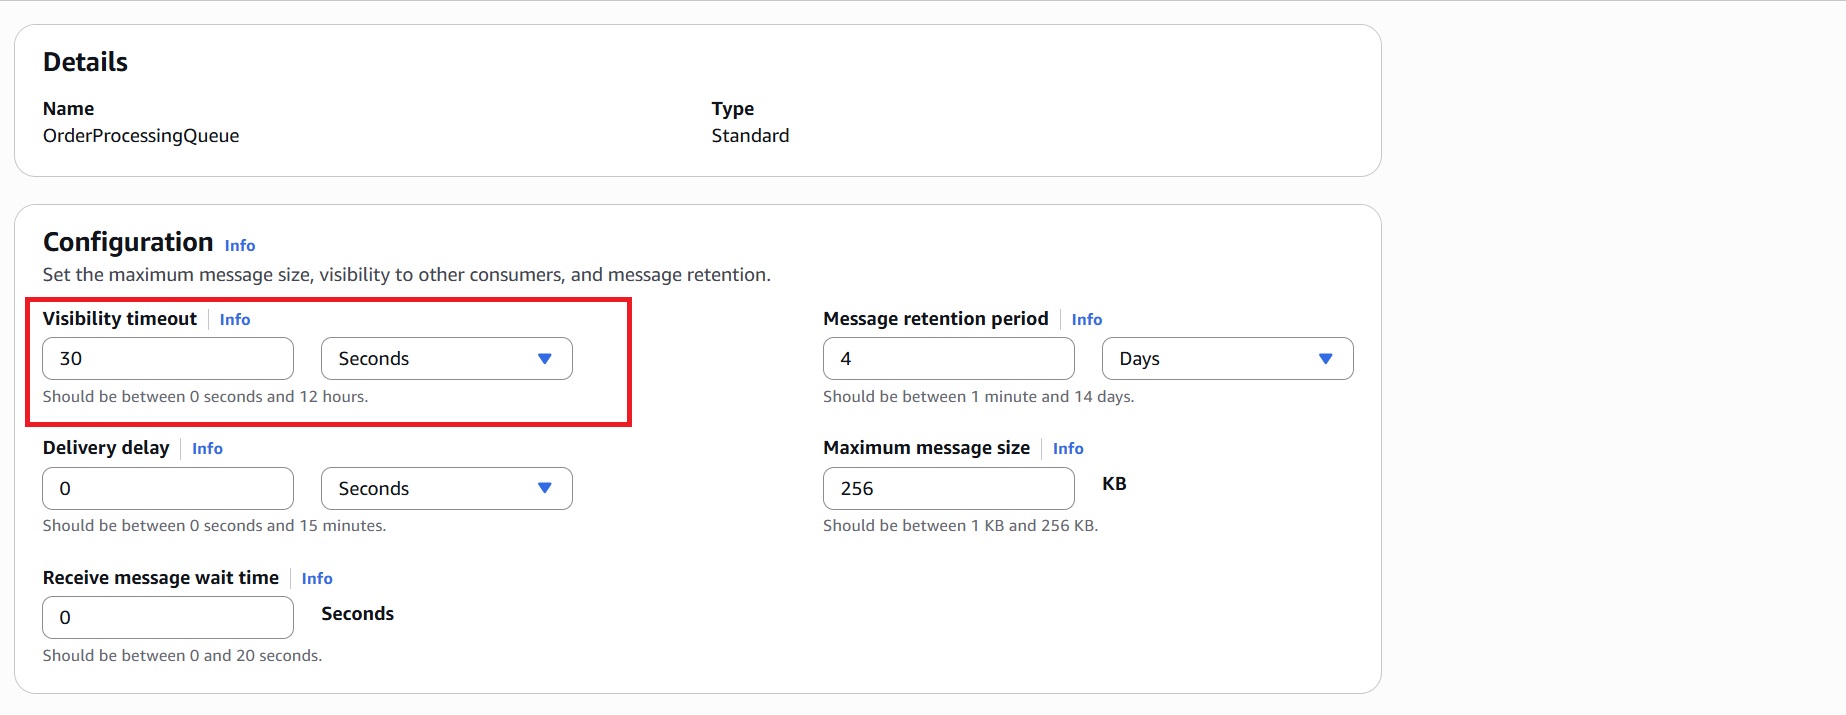
- In the Configuration section, set the Visibility timeout to 30 seconds. This ensures that a message isn’t reprocessed while the Lambda is still processing it.
- In the Dead-letter queue – Optional section:
– Set the Dead-letter queue to Enabled.
– Paste the ARN of the Dead-Letter Queue created earlier.
– Set Maximum receives to 3.
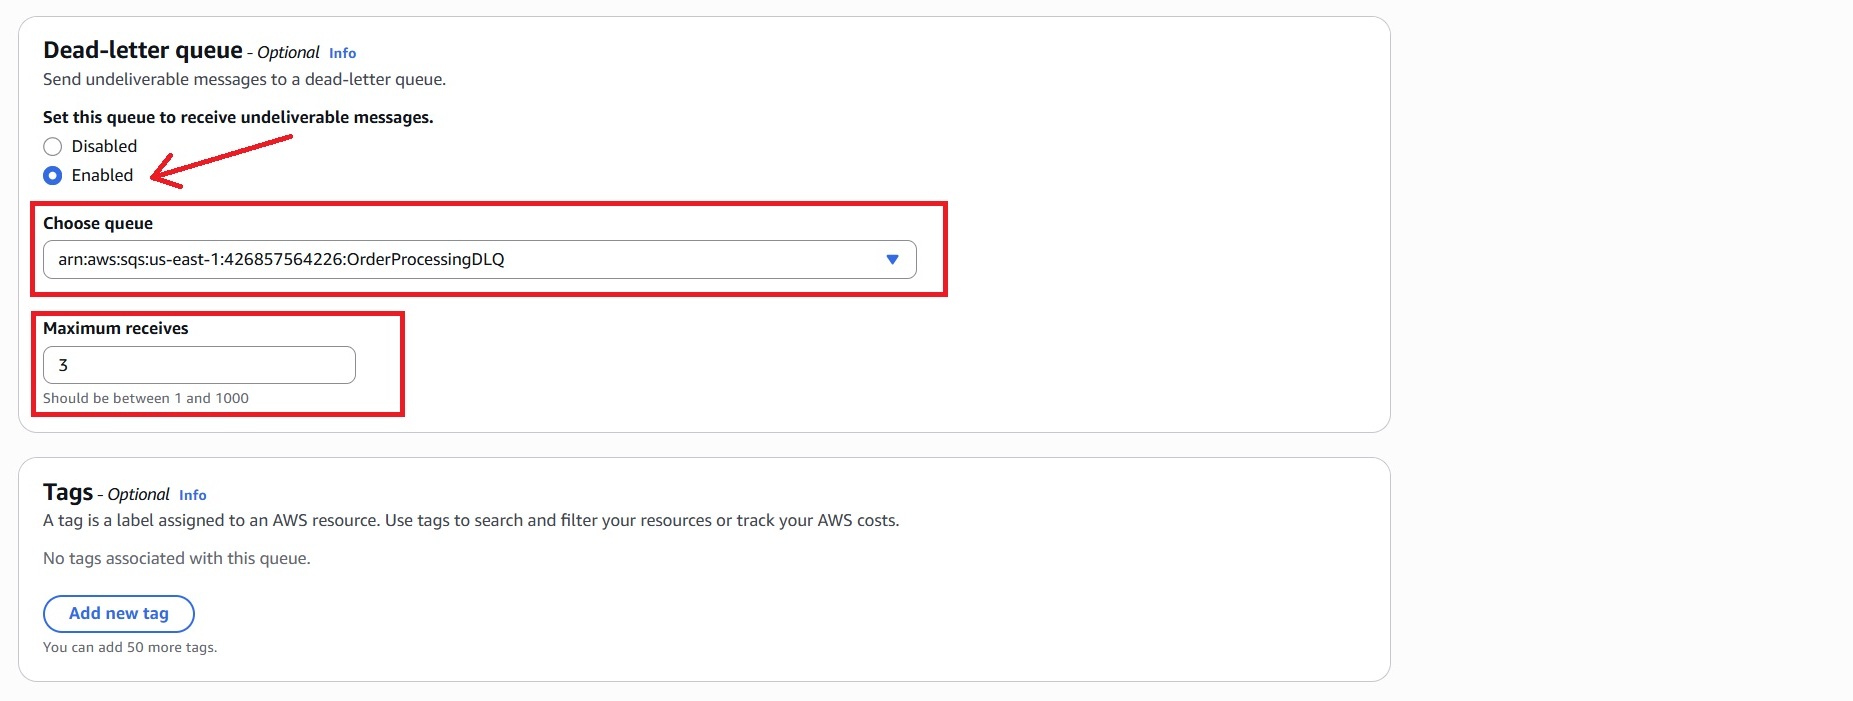
- Leave other settings as default and click “Create queue.”
Note: The DLQ captures messages that fail processing after 3 attempts. This helps isolate errors and makes debugging easier.
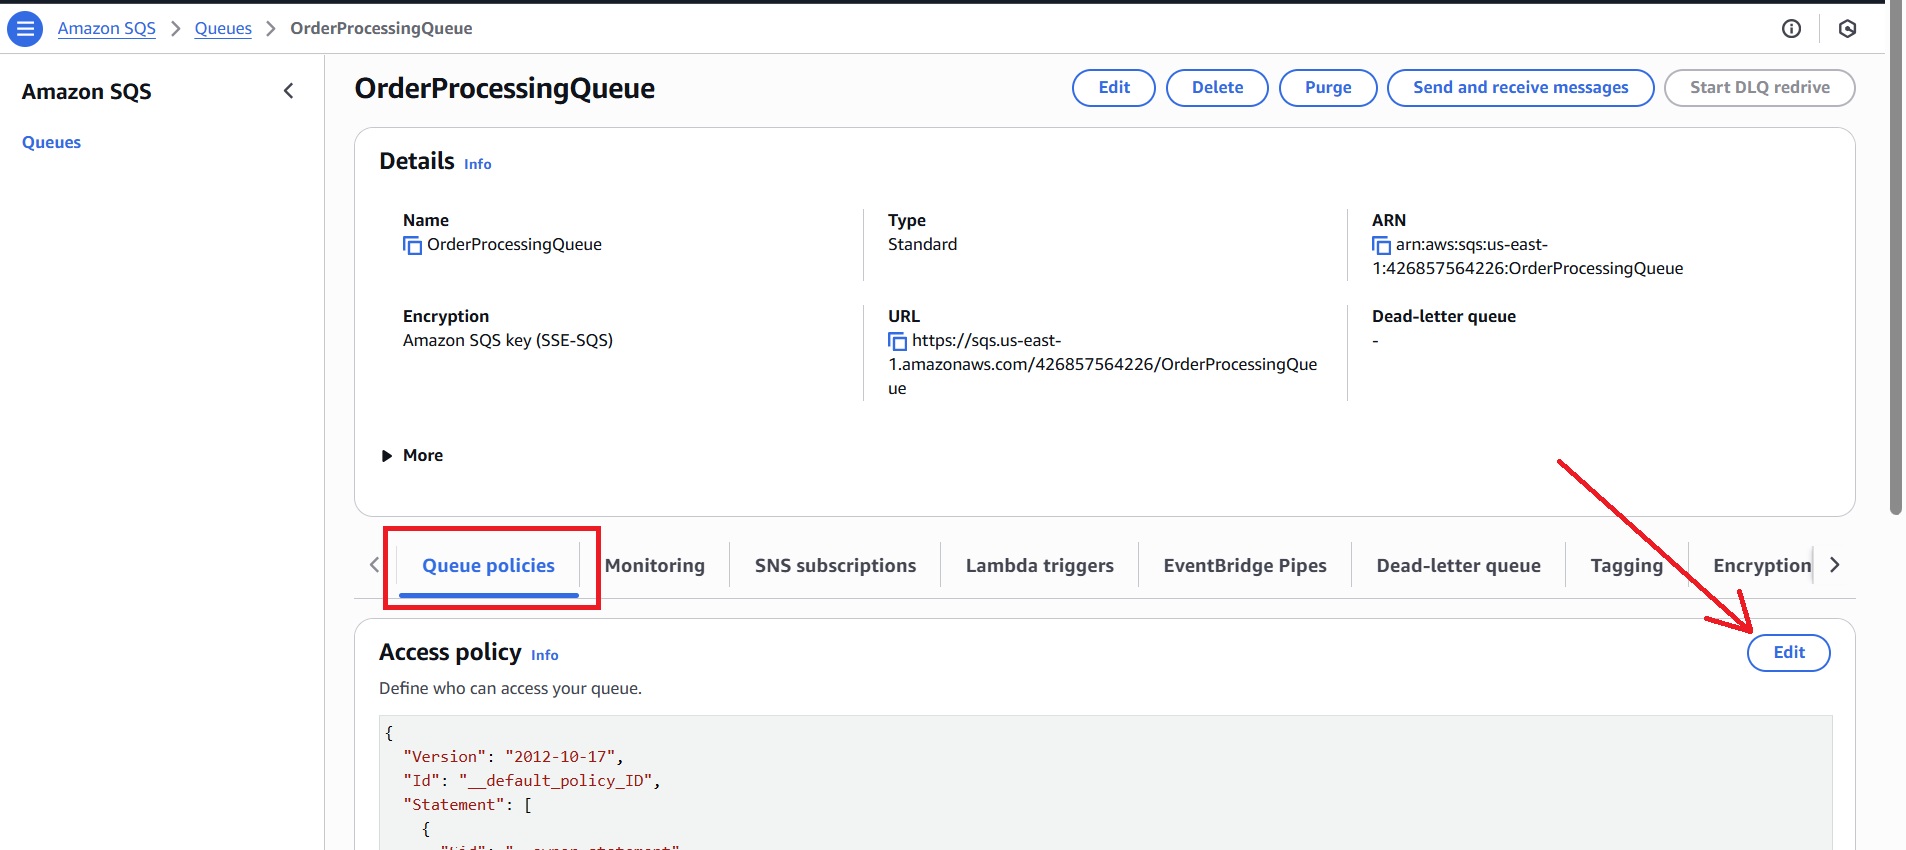
3.3 Set Permissions to Allow SNS to Send Messages to the Queue
By default, Amazon SQS queues do not permit messages from SNS topics unless explicitly authorized. To enable it, configure the queue’s access policy as follows:
- Access the main SQS queue (example: OrderProcessingQueue) you created in the console.
- Edit the “Queue policies” and replace with the following:
{
  "Version": "2012-10-17",
  "Id": "PolicyForSNS",
  "Statement": [{
    "Effect": "Allow",
    "Principal": { "Service": "sns.amazonaws.com" },
    "Action": "sqs:SendMessage",
    "Resource": "arn:aws:sqs:<region>:<account-id>:OrderProcessingQueue",
    "Condition": {
      "ArnEquals": {
        "aws:SourceArn": "arn:aws:sns:<region>:<account-id>:OrderEvents"
      }
    }
  }]
}
Note: Replace the ARN placeholders with the actual ARNs of the SQS queue and SNS topic, respectively.
3.4 Subscribe SQS To SNS
- Navigate to the SNS Console > Topics and select the topic you created (for example, OrderEvents).
- In the “Subscriptions” tab, click “Create subscription.”
- Configure the following:
– Protocol: Amazon SQS
– Endpoint: ARN of the main SQS queue (OrderProcessingQueue)
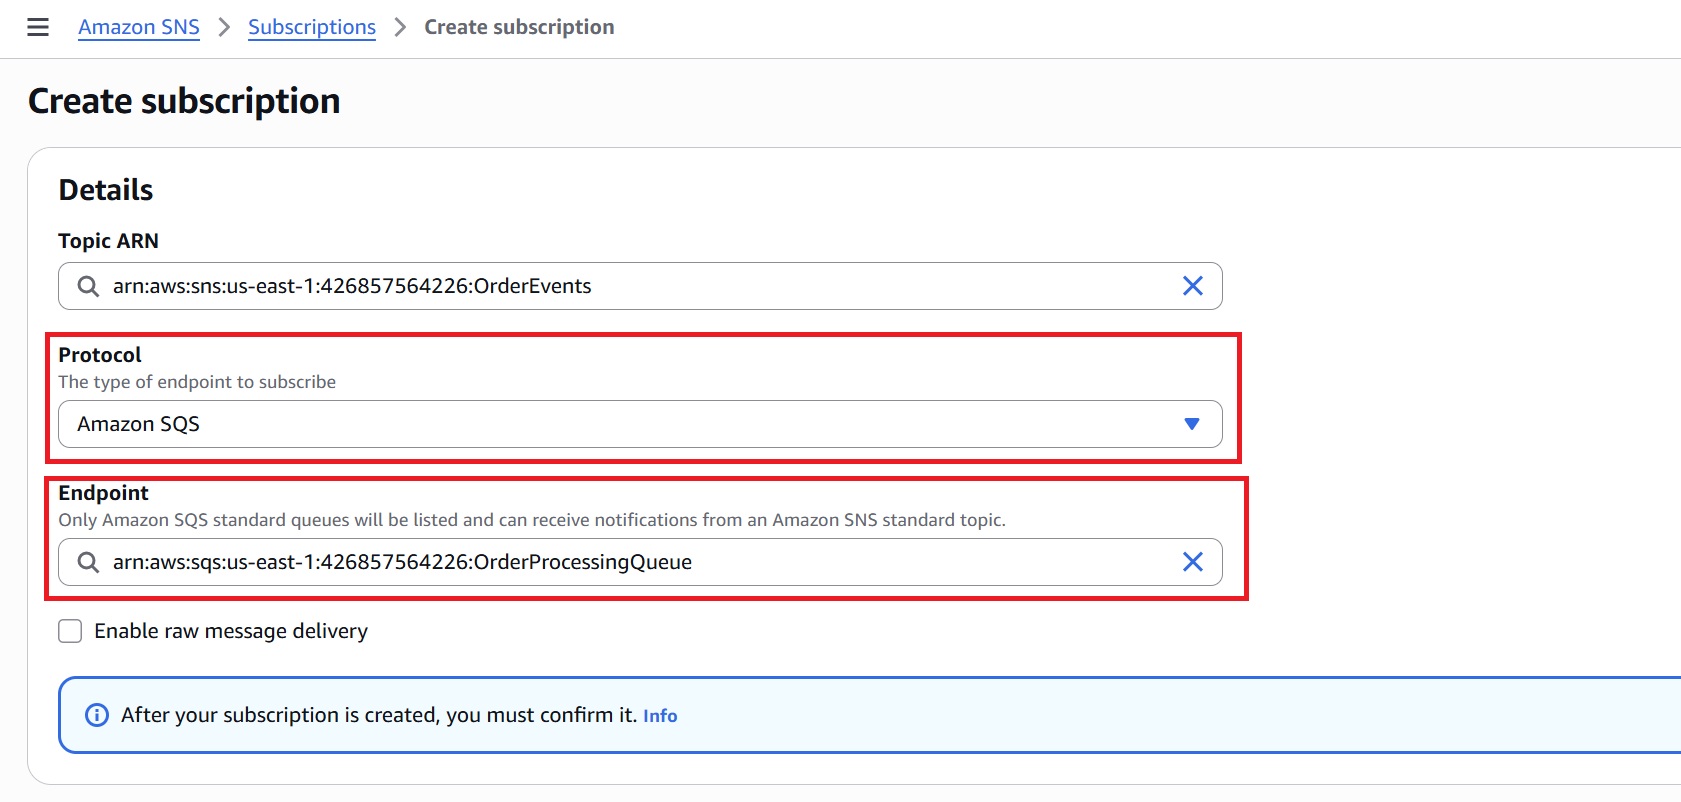
- Click “Create subscription.”
Step 4: Create a Lambda Function to Send Order Confirmation
This Lambda function subscribes to the SNS topic and simulates sending an order confirmation email to the customer, which acts immediately upon receiving a new order event.
- In the AWS Lambda console, click “Create function.”
- Choose “Author from scratch” and fill in basic information:
– Function Name:SendConfirmationEmail
– Runtime: Python 3.x - Under Permissions, select “Create a new role with basic Lambda permissions” and create the function.
After creating the Lambda function, replace its default code with the following and click Deploy.
import json

def lambda_handler(event, context):
    for record in event['Records']:
        message = json.loads(record['Sns']['Message'])

        order_id = message.get('orderId')
        customer_email = message.get('customerEmail')

        if order_id and customer_email:
            print(f"Confirmation email sent to {customer_email} for order {order_id}")
        else:
            print(f"Invalid order message. Skipping. Payload: {message}")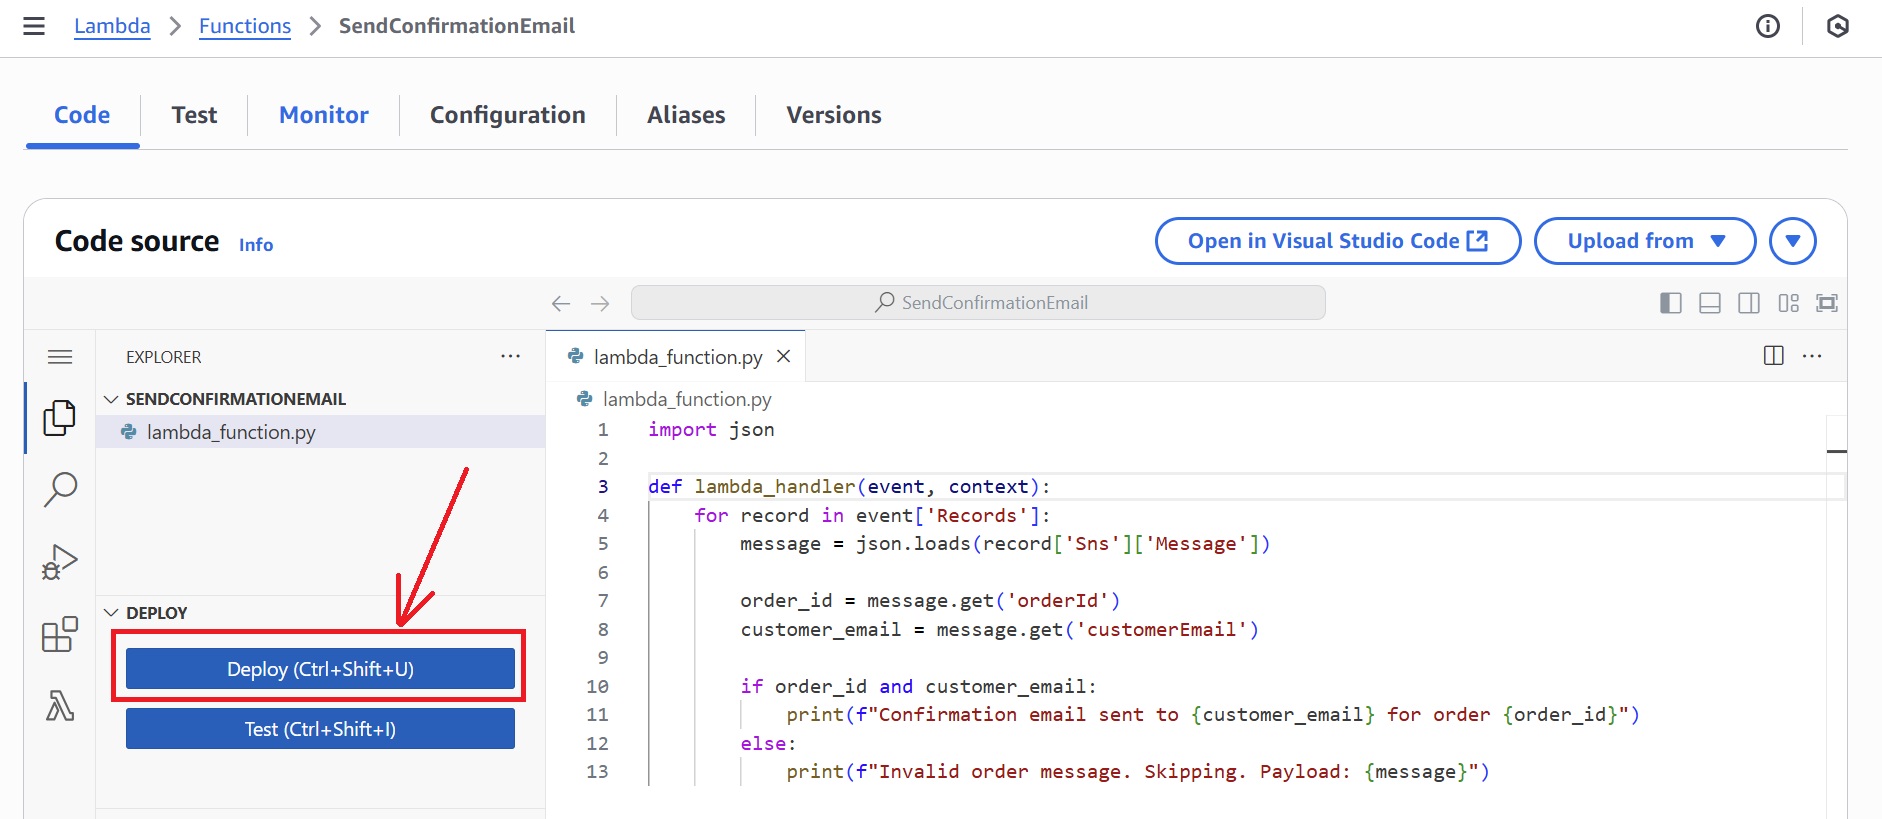
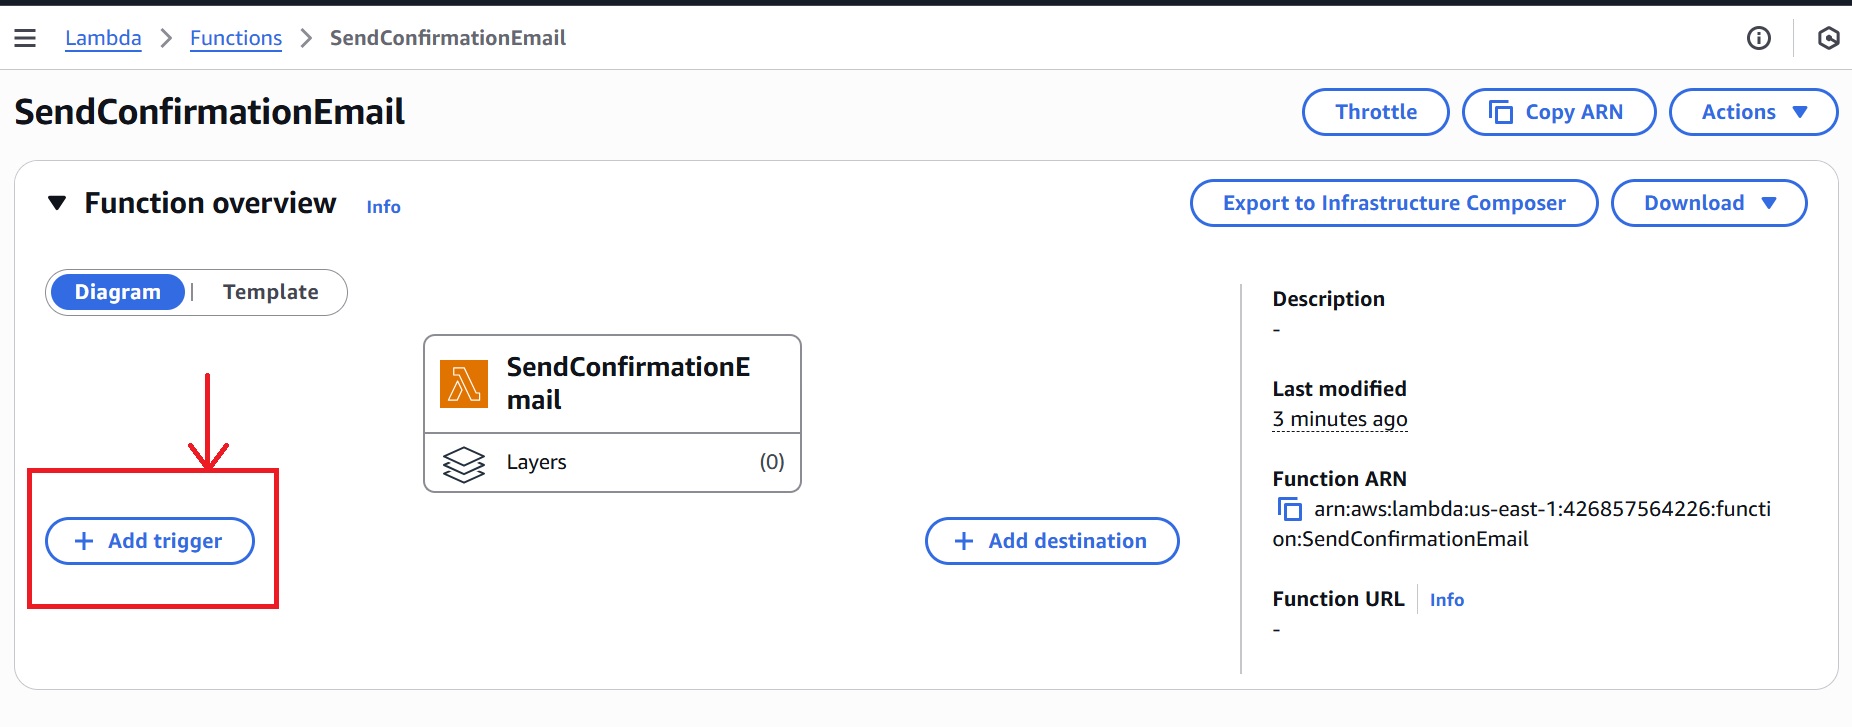
Add SNS topic as a Trigger: Invoke Lambda To Send Email Confirmation
- In the overview section of the
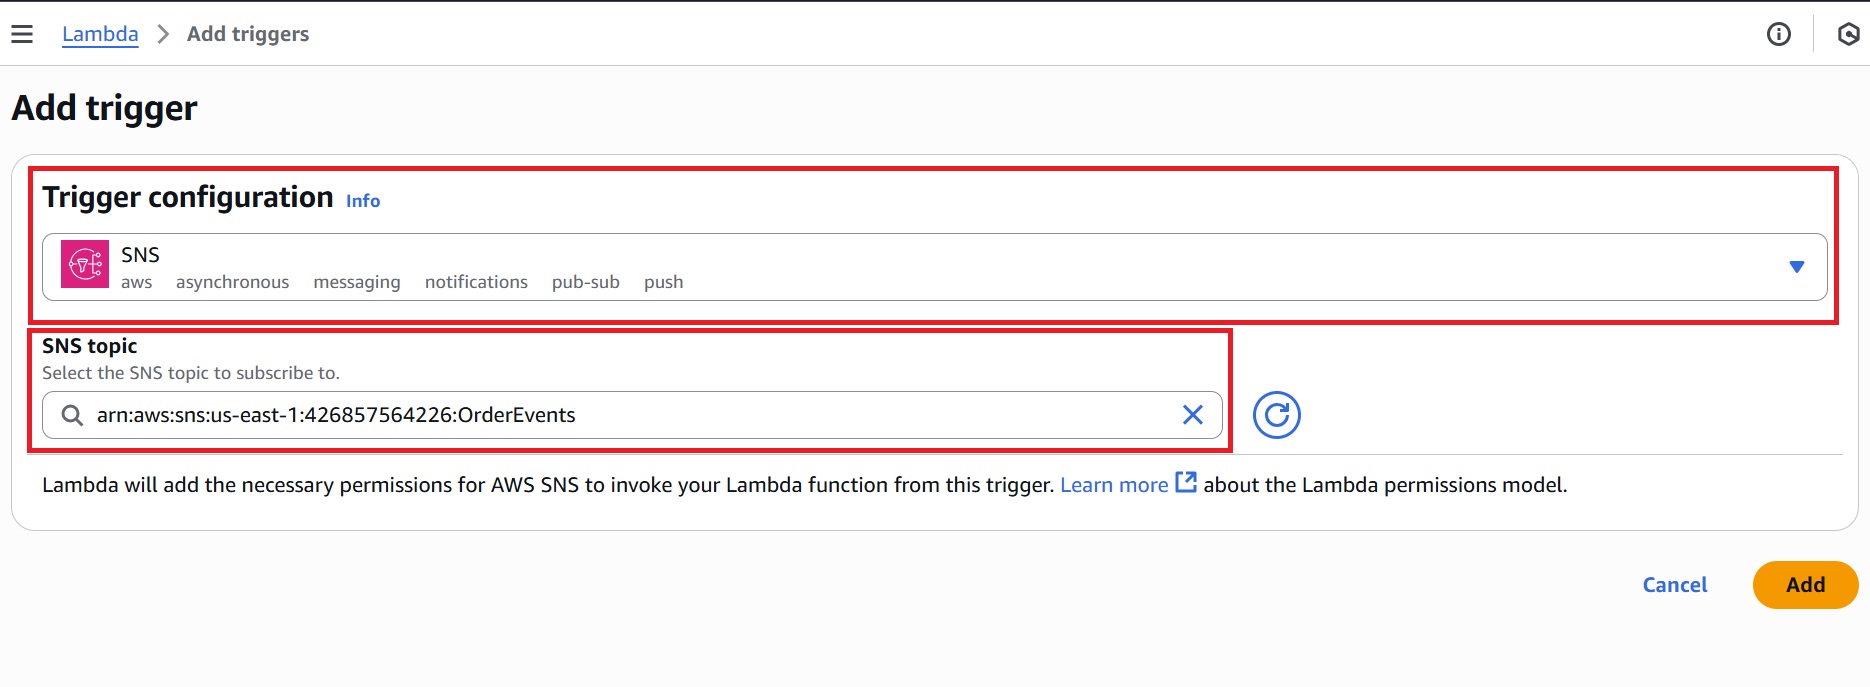
SendConfirmationEmailLambda, click “Add trigger.”
- In the Trigger configuration, select “SNS” and choose your topic (for example, OrderEvents).
- Click Add.
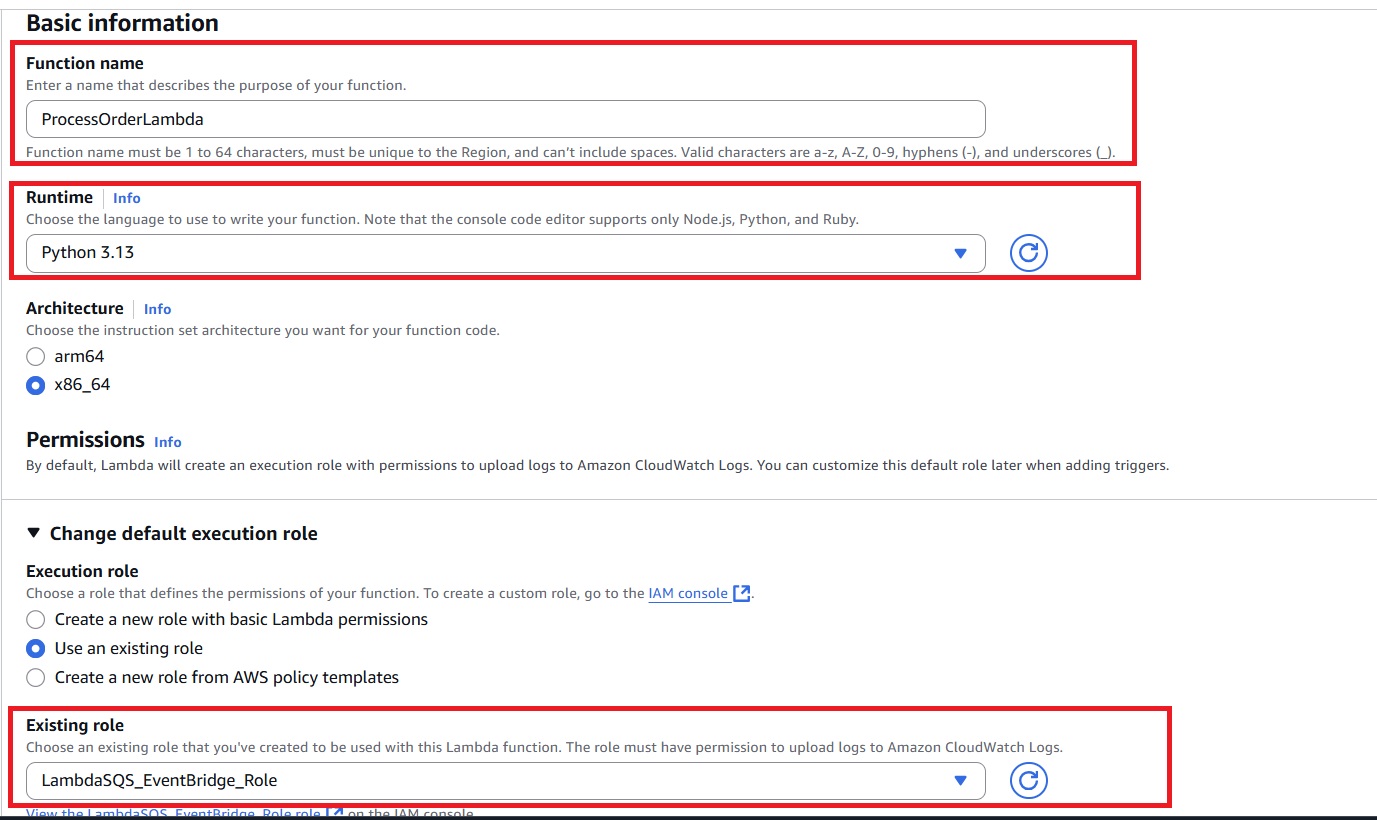
Step 5: Create a Lambda Function to Process Orders from SQS
This Lambda function processes orders asynchronously after receiving messages from the SQS queue created in Step 3. It simulates payment processing and publishes an PaymentConfirmed event to Amazon EventBridge to continue the workflow.
- In the AWS Lambda console, click to create a new function and name it (example:
ProcessOrderLambda.) - Use Python 3.x runtime.
- Under Permissions, make sure the execution role attached includes:
– Basic Lambda execution permissions for logging to CloudWatch.
– Permission to read from the SQS queue (sqs:ReceiveMessage,sqs:DeleteMessage).
– Permission to publish events to EventBridge (events:PutEvents).
Edit The Function Code
In the code section of ProcessOrderLambda function, replace the default code with:
import json
import boto3

eventbridge = boto3.client('events')

def lambda_handler(event, context):
    for record in event['Records']:
        sns_message_envelope = json.loads(record['body'])
        order = json.loads(sns_message_envelope['Message'])

        order_id = order.get('orderId')
        order_total = order.get('orderTotal')

        if not order_id or order_total is None or order_total <= 0:
            print(f"Invalid order. OrderId: {order_id}, Total: {order_total}")
            raise ValueError("Invalid order input.")

        print(f"Processing payment for Order ID: {order_id}, Amount: {order_total}")

        eventbridge.put_events(
            Entries=[{
                'Source': 'ecommerce.orders',
                'DetailType': 'PaymentConfirmed',
                'Detail': json.dumps({
                    "orderId": order_id,
                    "paymentStatus": "Success"
                }),
                'EventBusName': 'default'
            }]
        )
Add the SQS Trigger For Lambda
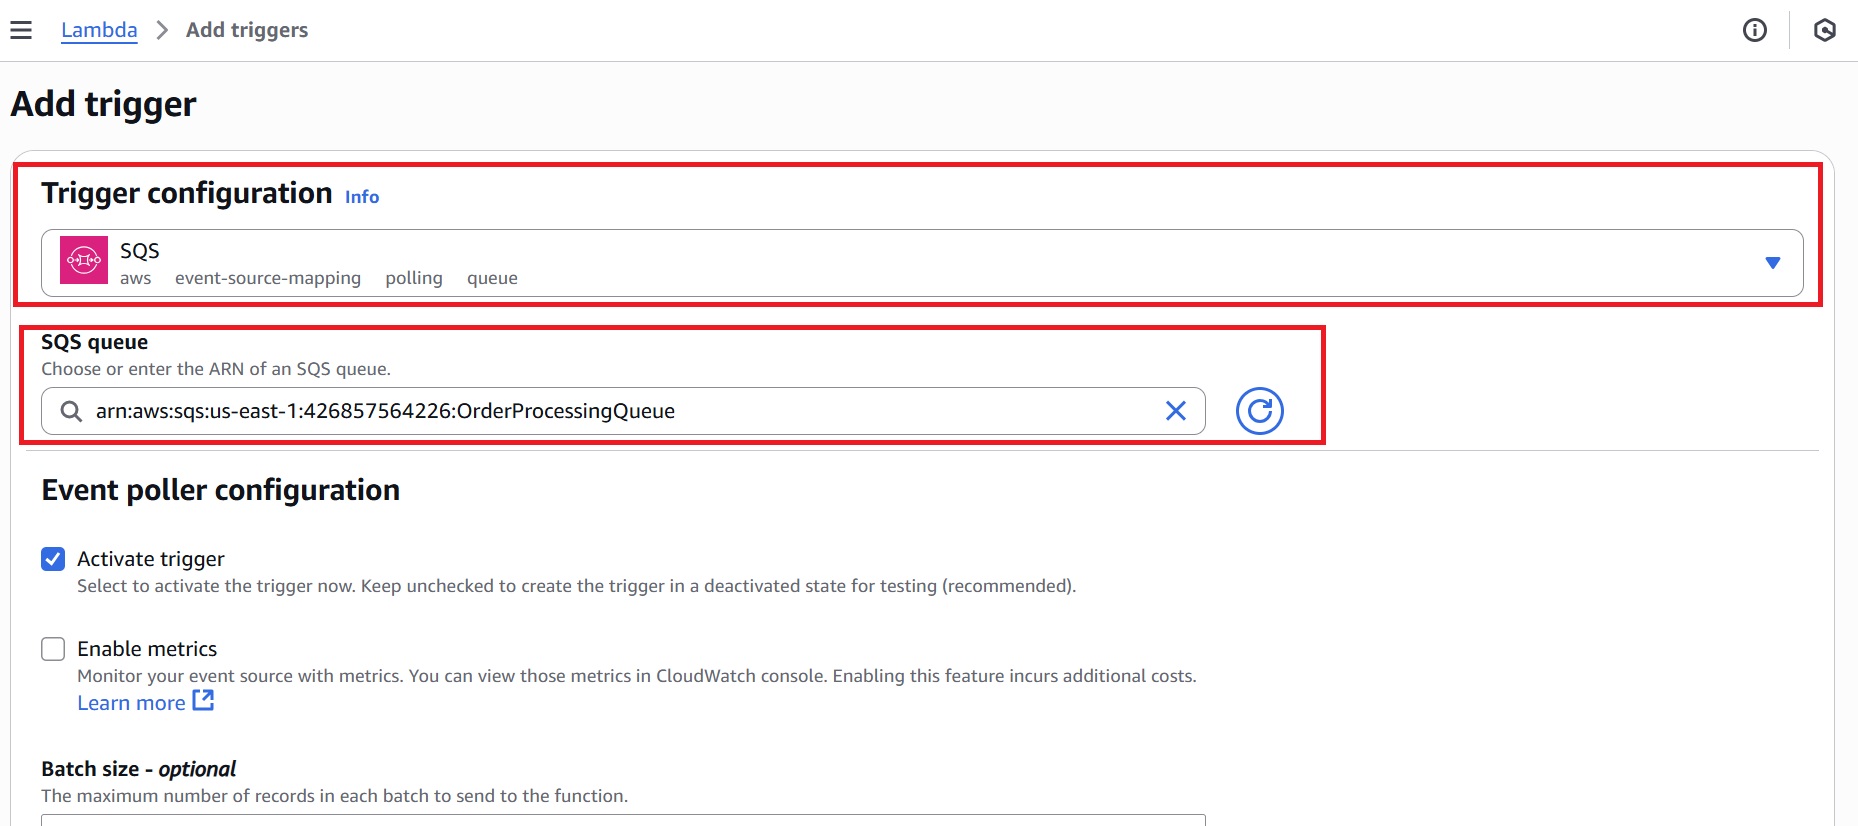
Adding the SQS trigger connects the queue to the Lambda, enabling it to process new messages as they arrive automatically.
- In the
ProcessOrderLambdafunction overview, click “Add trigger.”
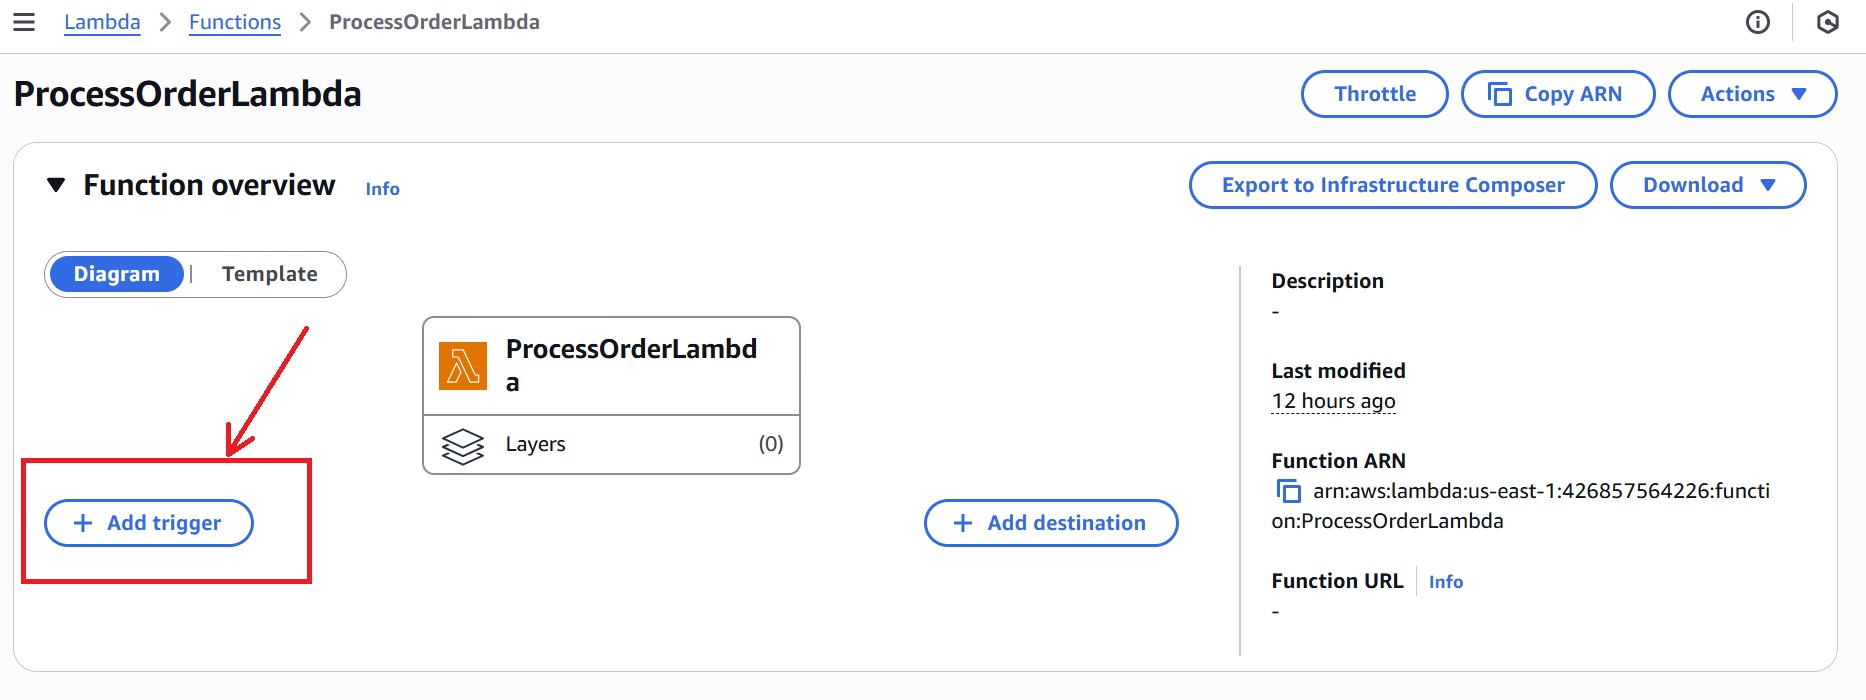
- In the Trigger configuration, select “SQS” from the dropdown and choose your SQS queue from the list.
- Click Add.
Step 6: Create a Lambda Function to Handle Shipping Events
This Lambda handles shipping after a successful payment. It will be triggered by EventBridge in Step 7 when an PaymentConfirmed event is published.
- From the AWS Lambda console, create a Lambda function (eg,
ShipOrderLambdafor our blog). - Choose Python 3.x as the runtime.
- Under Permissions, for execution role, select “Create a new role with basic Lambda permissions.”
- Click “Create function.”
After the Lambda function is created, navigate to the Code tab and replace the default code with the following, and click Deploy.
def lambda_handler(event, context):
    detail = event.get('detail', {})
    order_id = detail.get('orderId')
    payment_status = detail.get('paymentStatus')

    if order_id and payment_status == 'Success':
        print(f"Shipping order {order_id}")

    return {"statusCode": 200}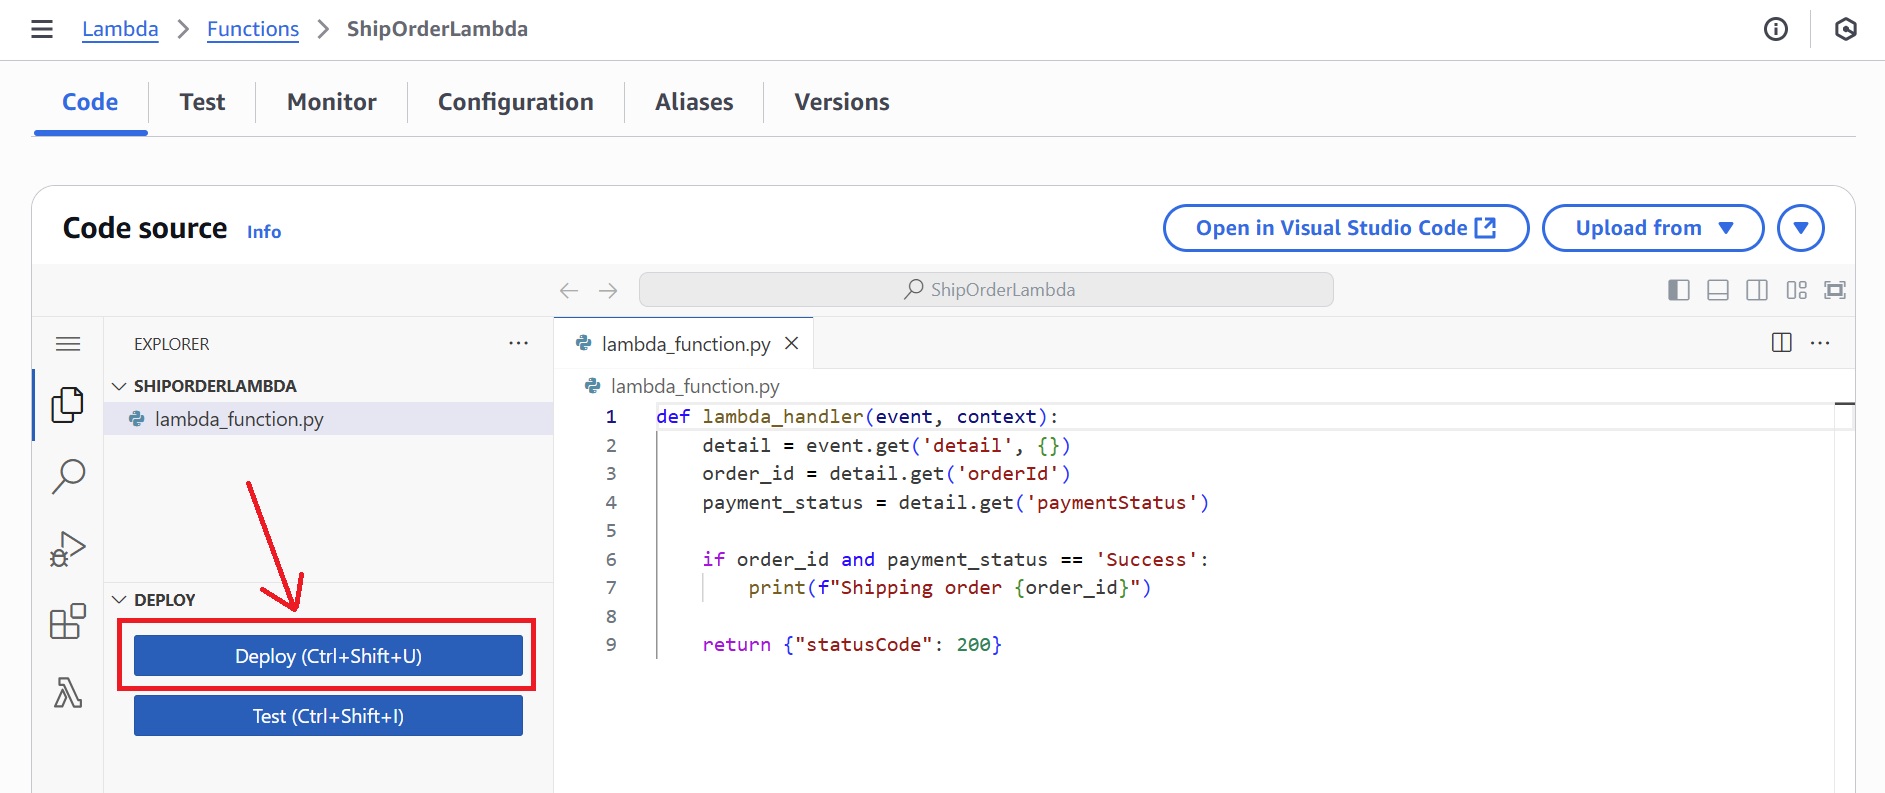
Step 7: Create EventBridge Rule to Trigger Shipping Lambda
This rule listens for PaymentConfirmed events and invokes the ShipOrderLambda to handle shipping.
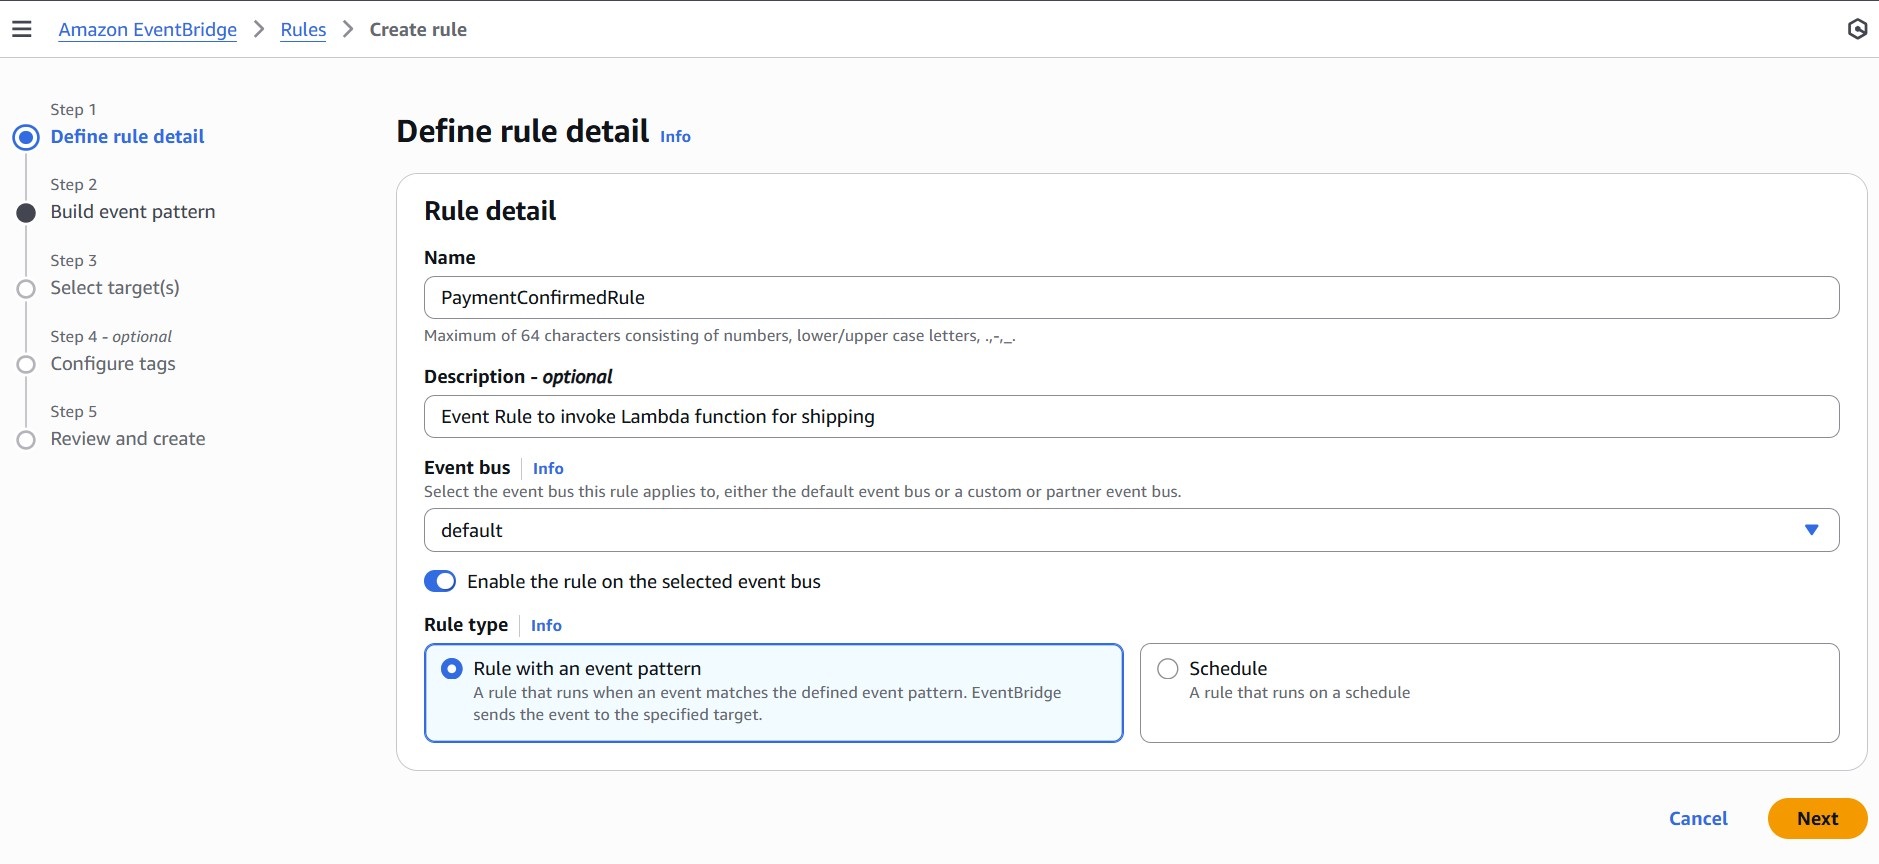
- In the Amazon EventBridge Console, navigate to EventBridge Rule, then click “Create rule.”
- Define rule details:
– Name: PaymentConfirmedRule
– Event bus: Select default
– Rule type: Select Rule with an event pattern
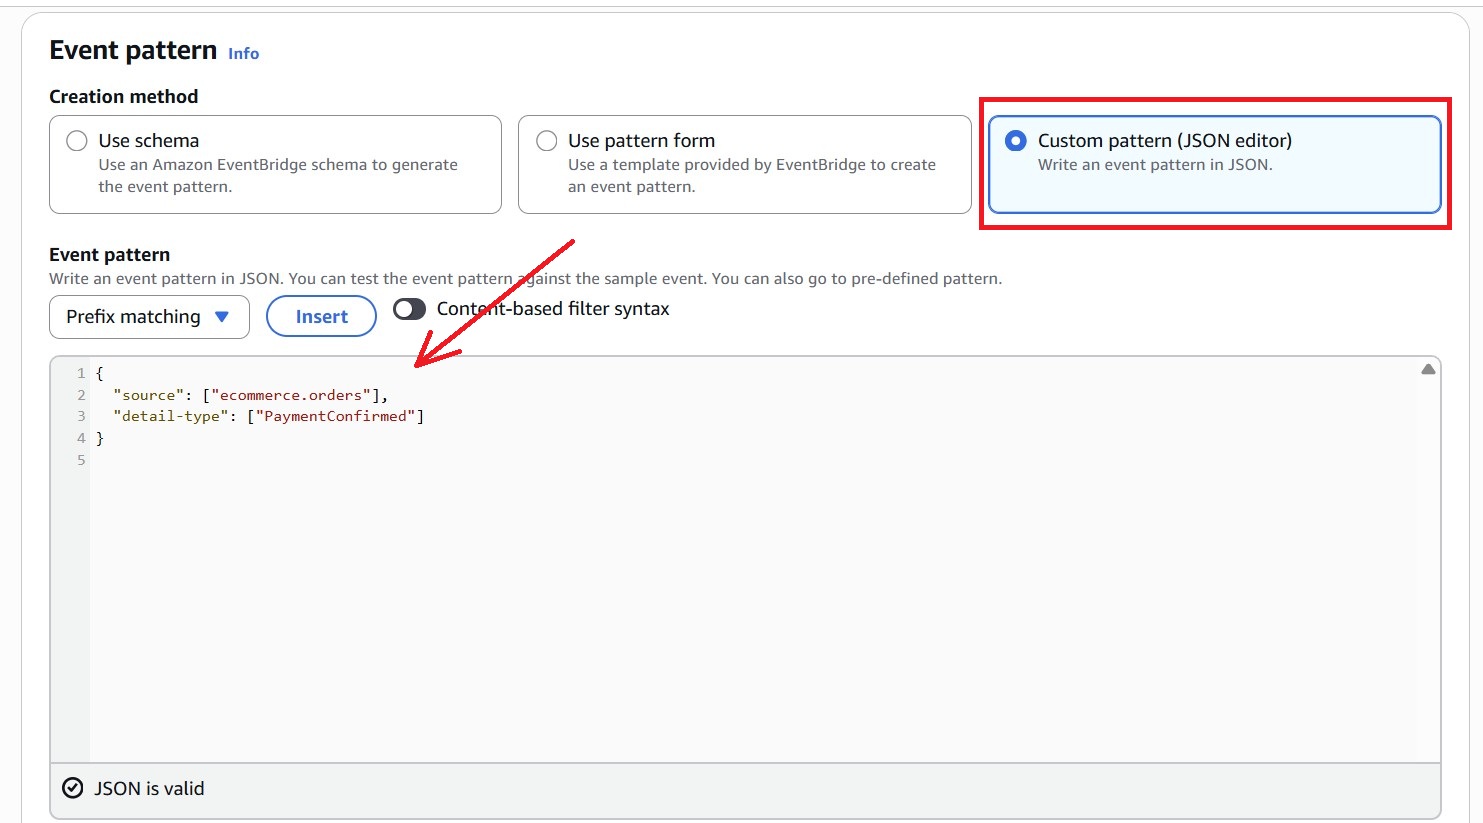
- To build an event pattern, choose:
– Creation method: Custom pattern (JSON editor)
– Paste the following pattern:
{
  "source": ["ecommerce.orders"],
  "detail-type": ["PaymentConfirmed"]
}
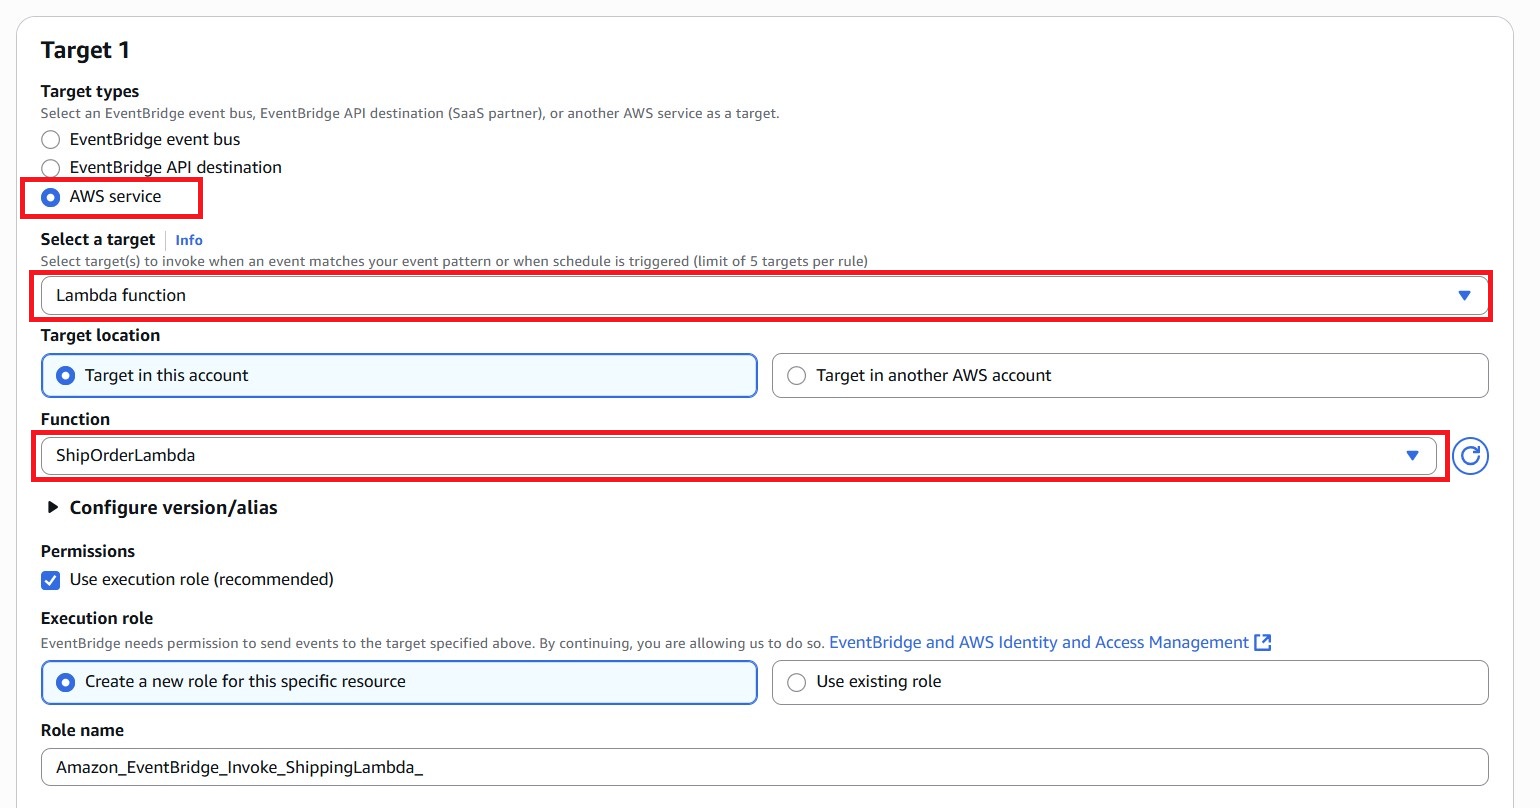
- Set the target:
– Target type: AWS service
– Service: Lambda function
– Function:ShipOrderLambda
- For Permissions, choose “Create a new role for this specific resource”.
- Click Next, review settings, and then Create rule.
Testing The Even-Driven Workflow
Trigger the order process by invoking PlaceOrderLambda. This starts the event chain through SNS, SQS, and EventBridge, resulting in confirmation, payment processing, and shipping.
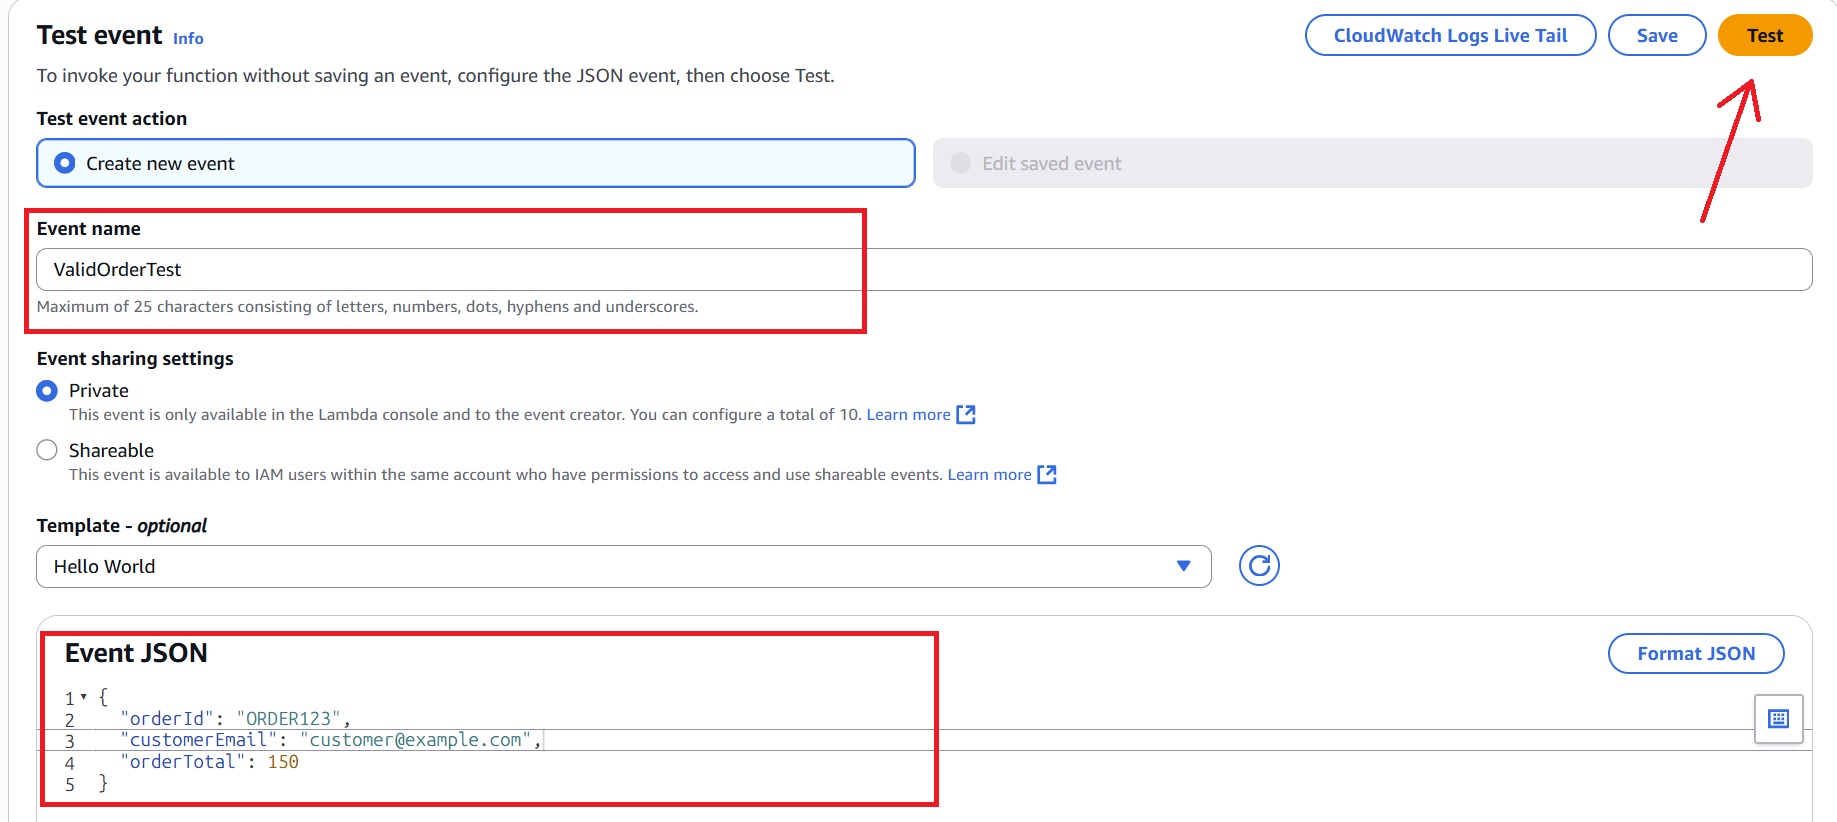
- In the AWS Lambda console, select the
PlaceOrderLambdafunction and click Test. - Name the event (for example, ValidOrderTest) and use a valid order payload to invoke the function:
{
  "orderId": "ORDER123",
  "customerEmail": "customer@example.com",
  "orderTotal": 150
}
Verify Successful Execution in CloudWatch Logs
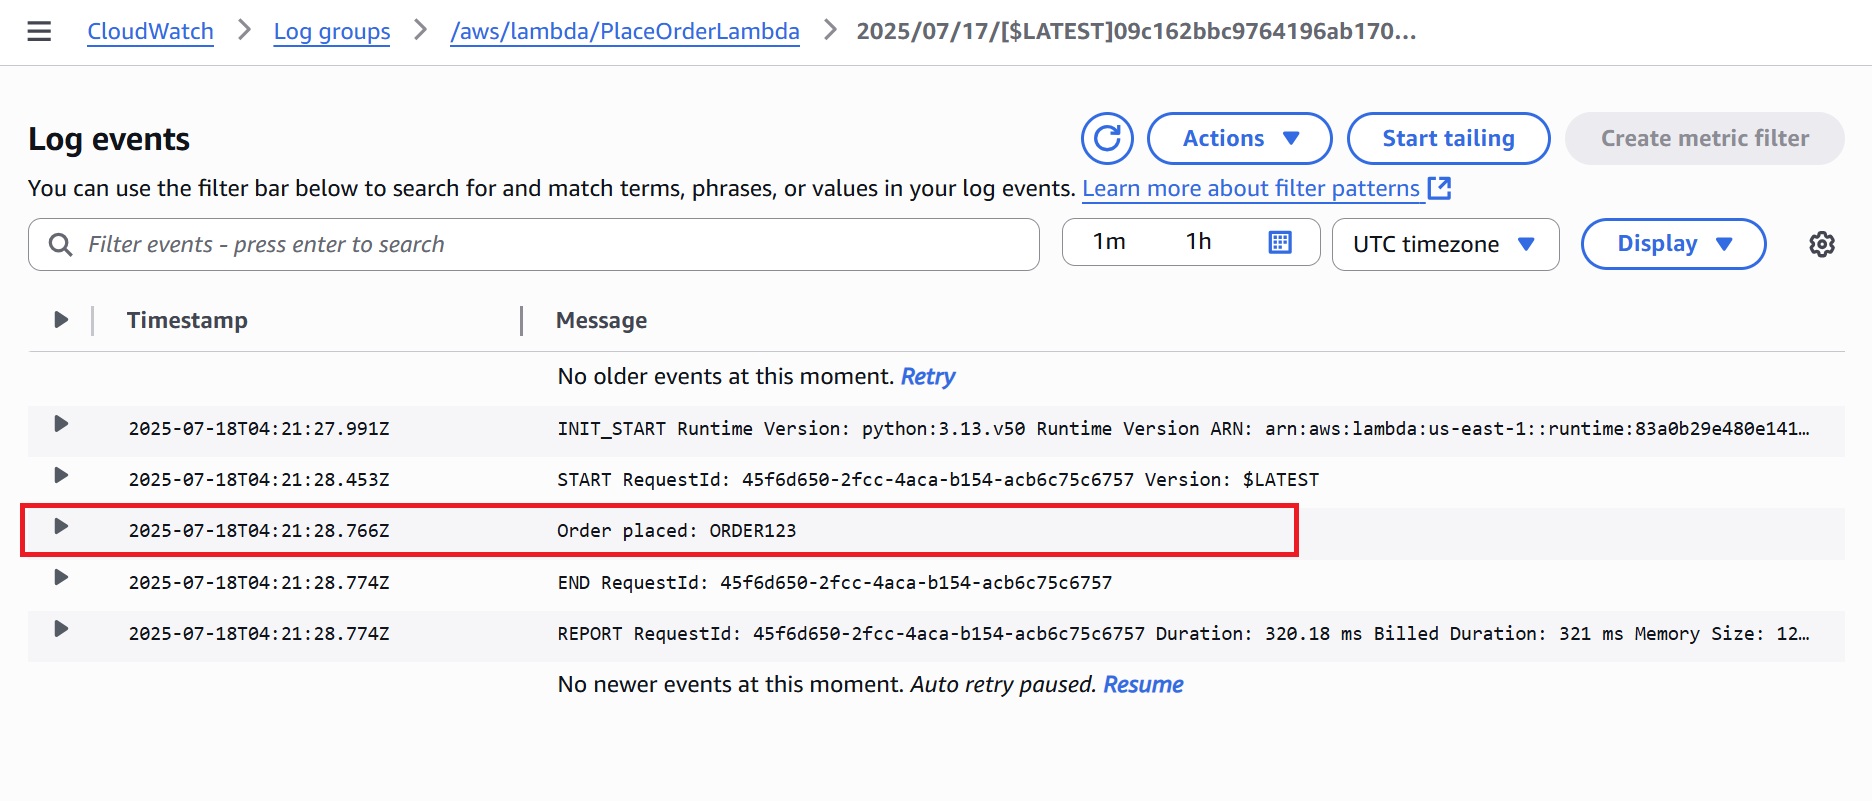
Check the logs for each Lambda function in the AWS CloudWatch Console.
PlaceOrderLambda: A log entry confirming that the order was placed with a unique order ID.
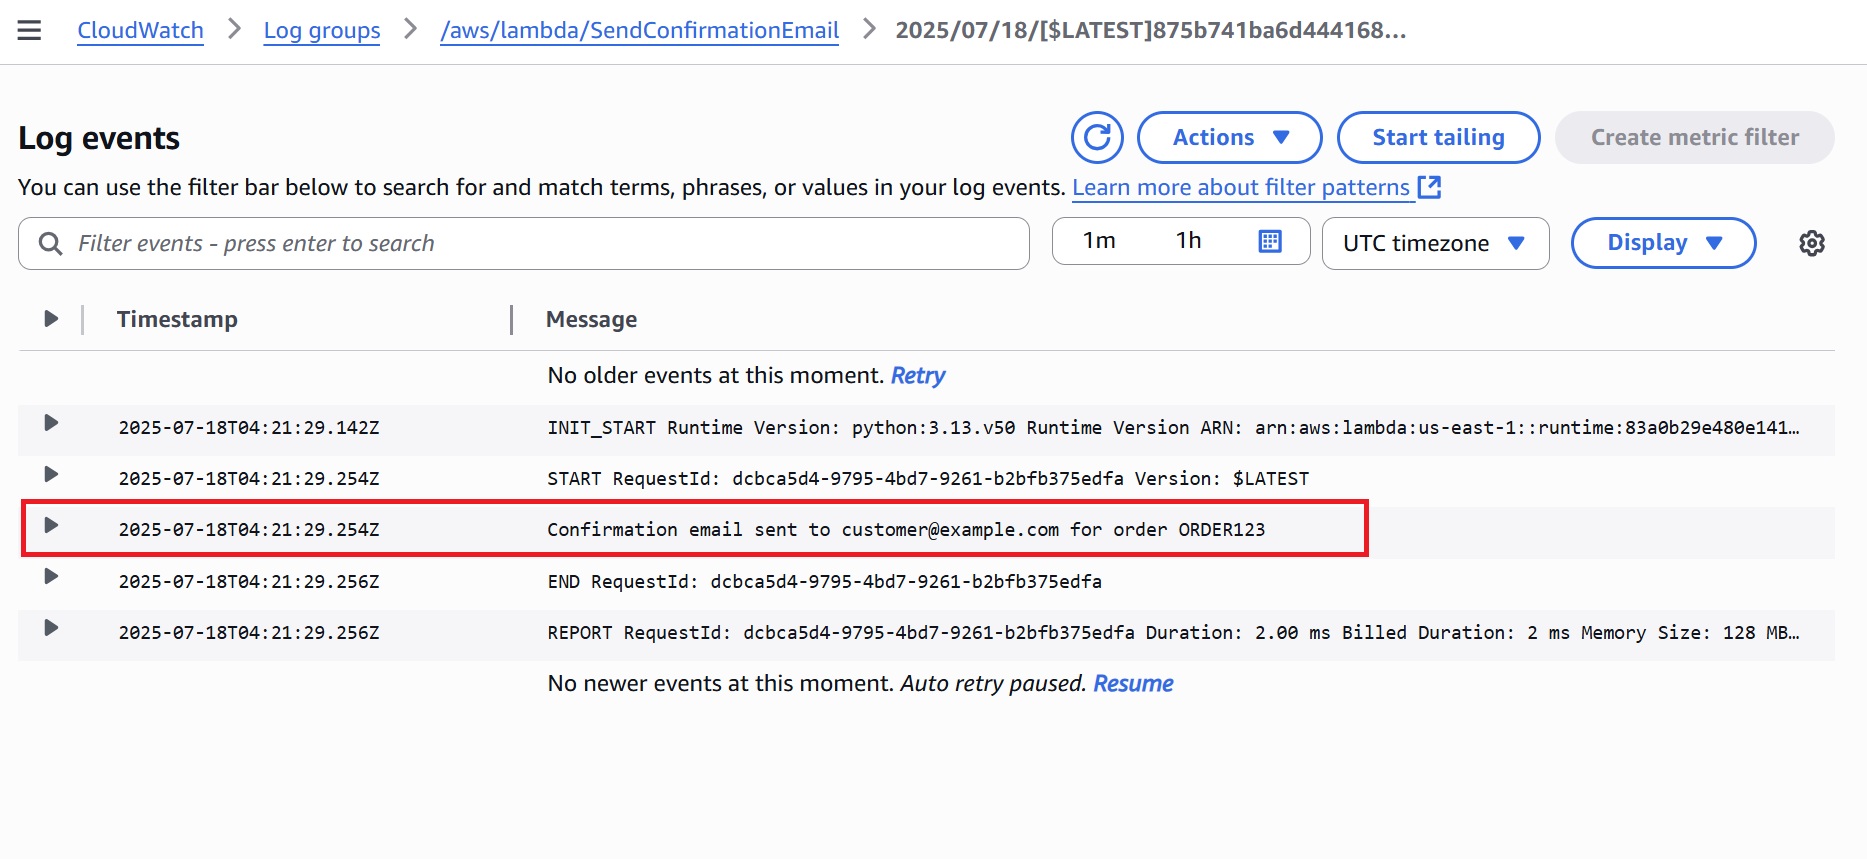
SendConfirmationEmail: A log showing the confirmation email simulated for the order ID.
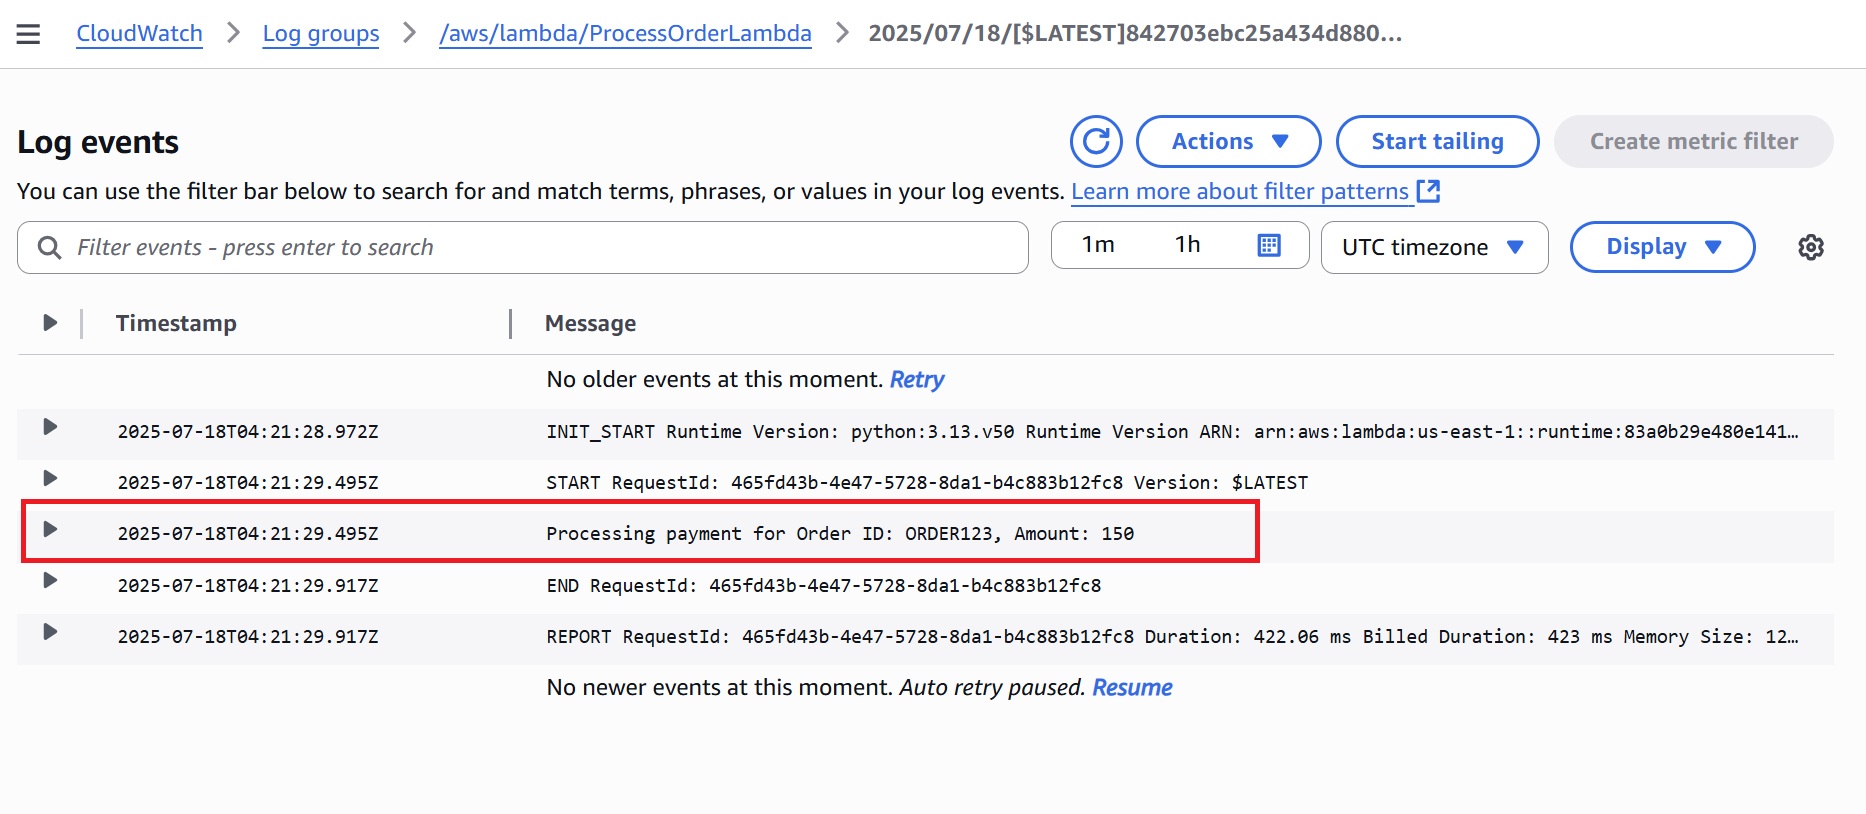
ProcessOrderLambda: A log entry for payment processing with the order ID and amount.
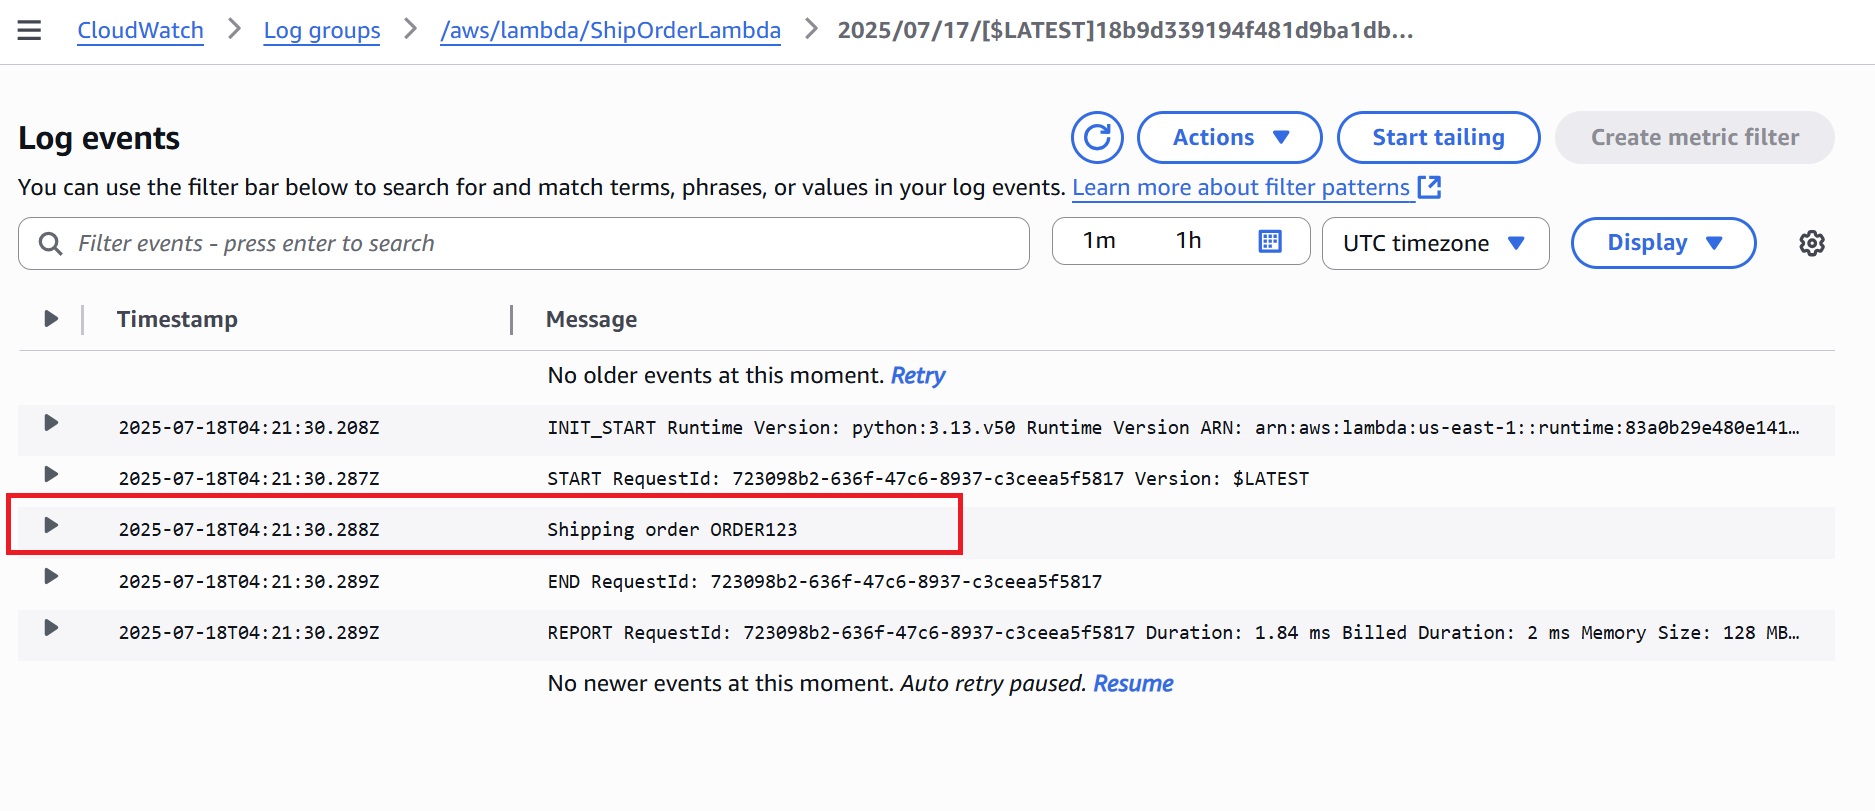
ShipOrderLambda: A log indicating the order is being shipped, showing the same order ID.
Test the DLQ by Simulating a Failure
In e-commerce, orders can fail due to unexpected values such as zero or negative totals from pricing glitches or frontend errors. The system retries processing a few times before sending such messages to a Dead-Letter Queue (DLQ) for review.
Let’s simulate this scenario.
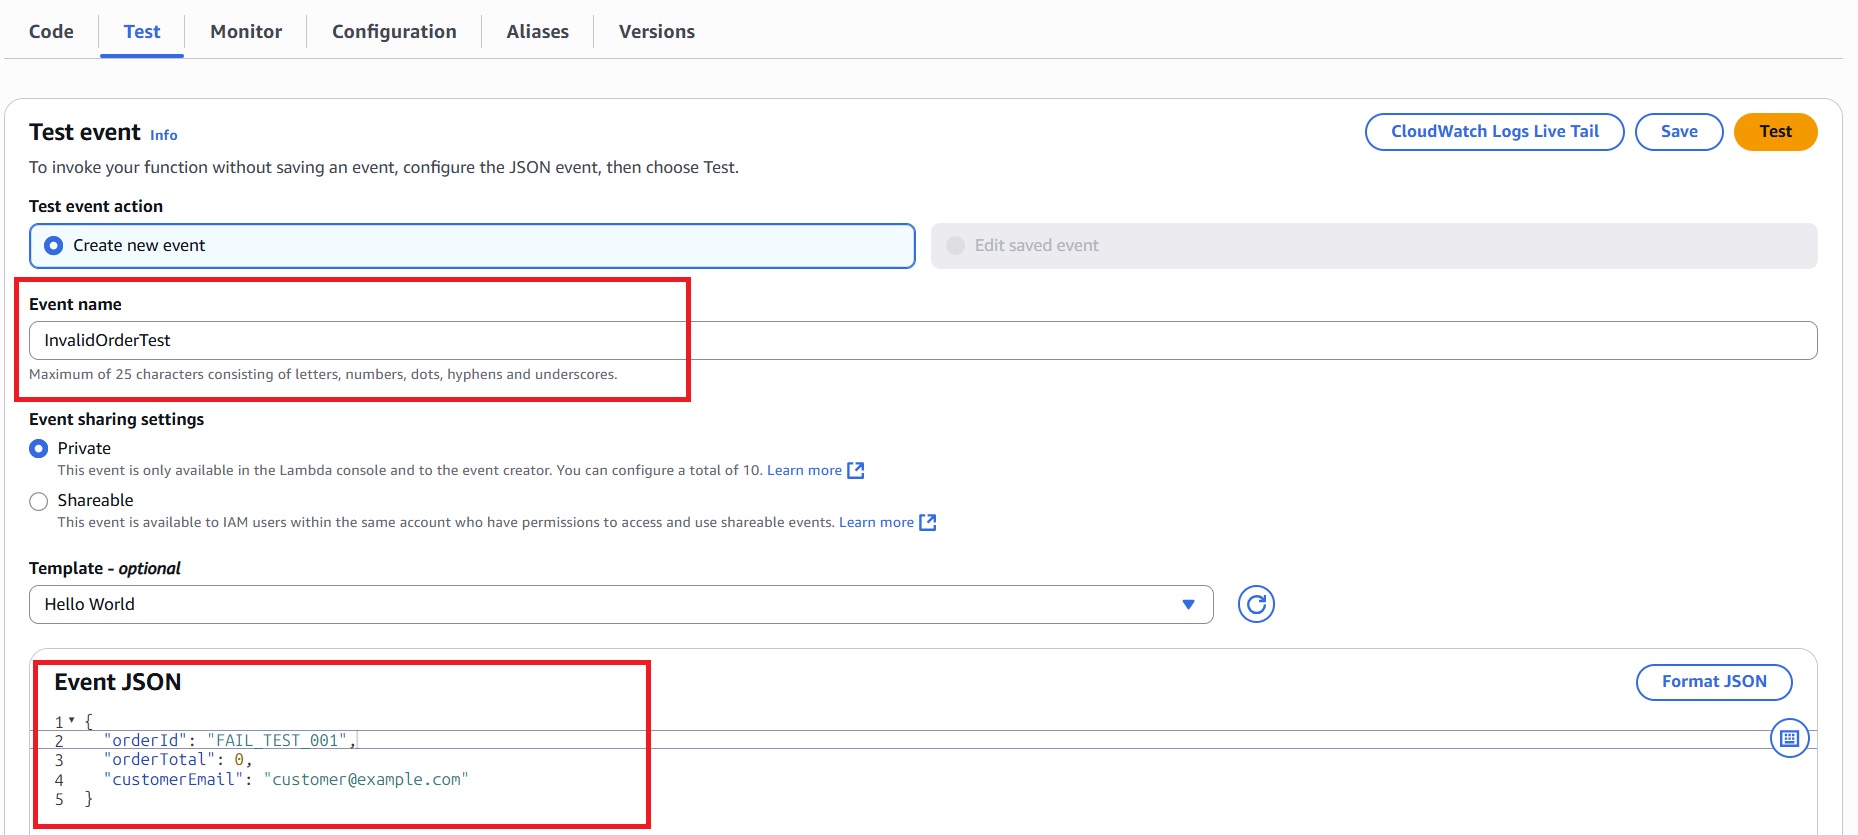
Trigger the Workflow with an Invalid Order Payload
- In the AWS Lambda console, select the
PlaceOrderLambdafunction and click Test. - Invoke the function with the following payload to start the workflow with invalid data:
{
  "orderId": "FAIL_TEST_001",
  "orderTotal": 0,
  "customerEmail": "customer@example.com"
}
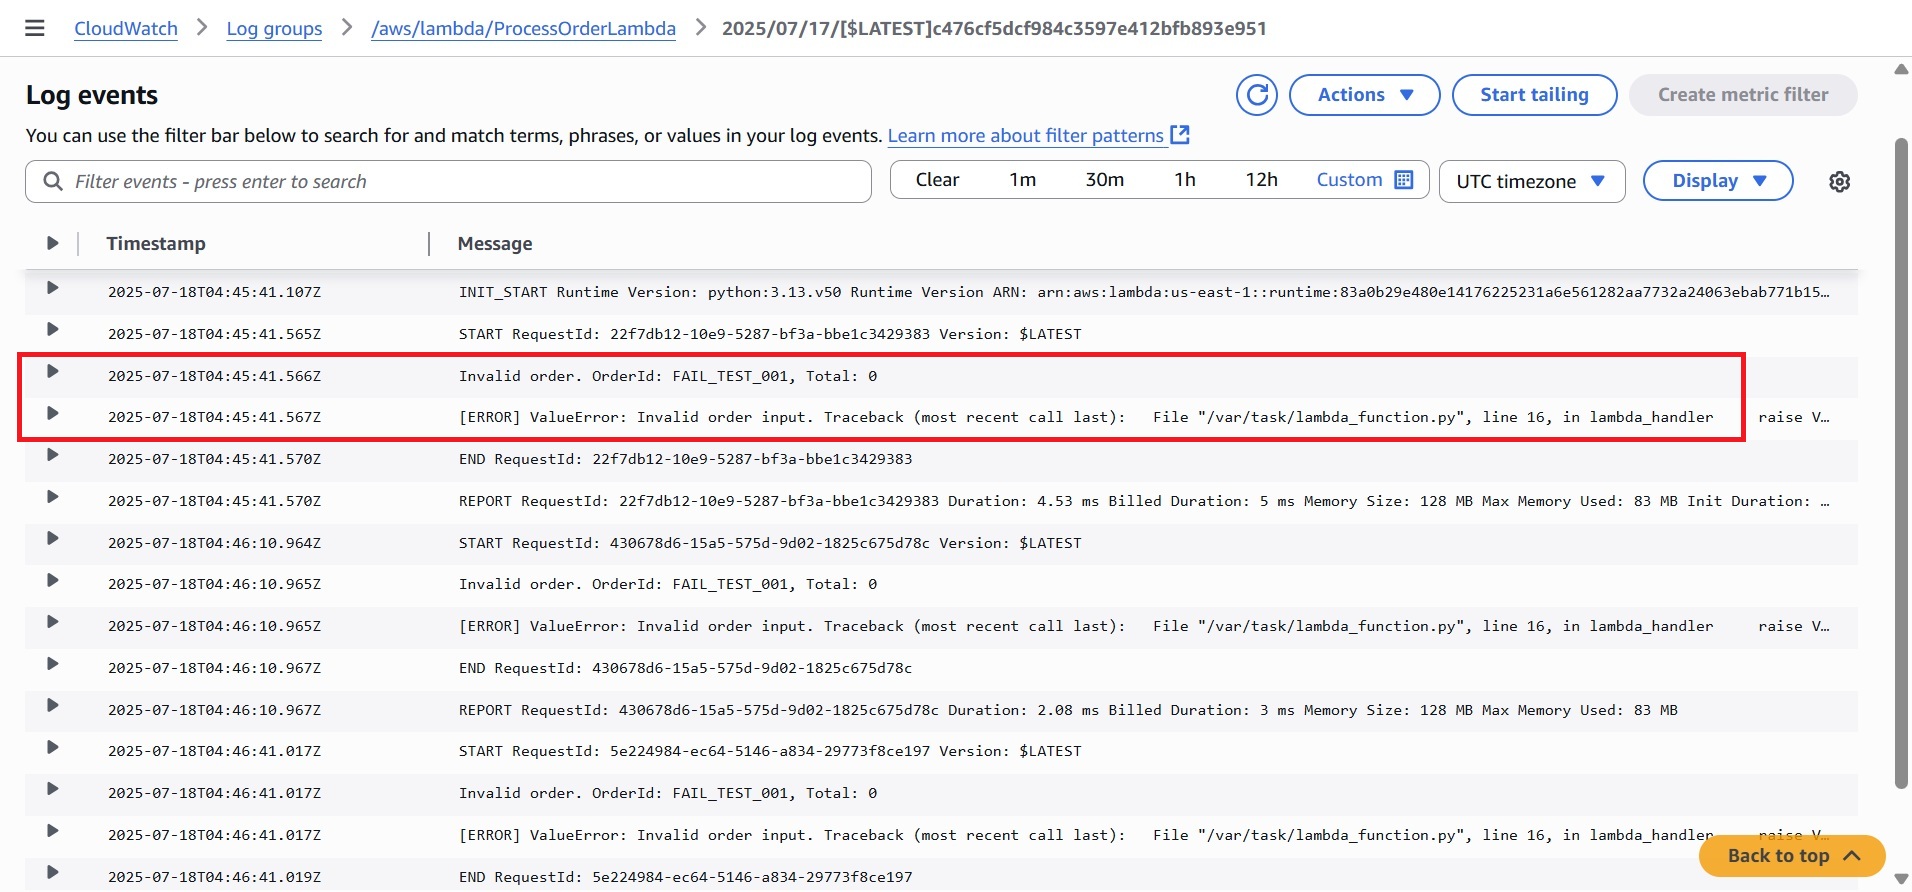
Observation 1: ProcessOrderLambda Log Output (Failure Case)
After triggering the workflow with invalid test data, check CloudWatch Logs for ProcessOrderLambda. It shows multiple retry attempts and errors.
Observation 2: Verify the Failed Message in DLQ
Based on the configuration (which we set to three for SQS Maximum Receives), the system processes the order. After failed attempts, the message is automatically moved to the Dead-Letter Queue (OrderProcessingDLQ).
- Navigate to the Amazon SQS console.
- Locate and select the DLQ you configured when creating the processing queue (for example: OrderProcessingDLQ)
- Click Send and receive messages.

- In the new panel that opens, click “Poll for messages” to fetch any messages currently in the queue.
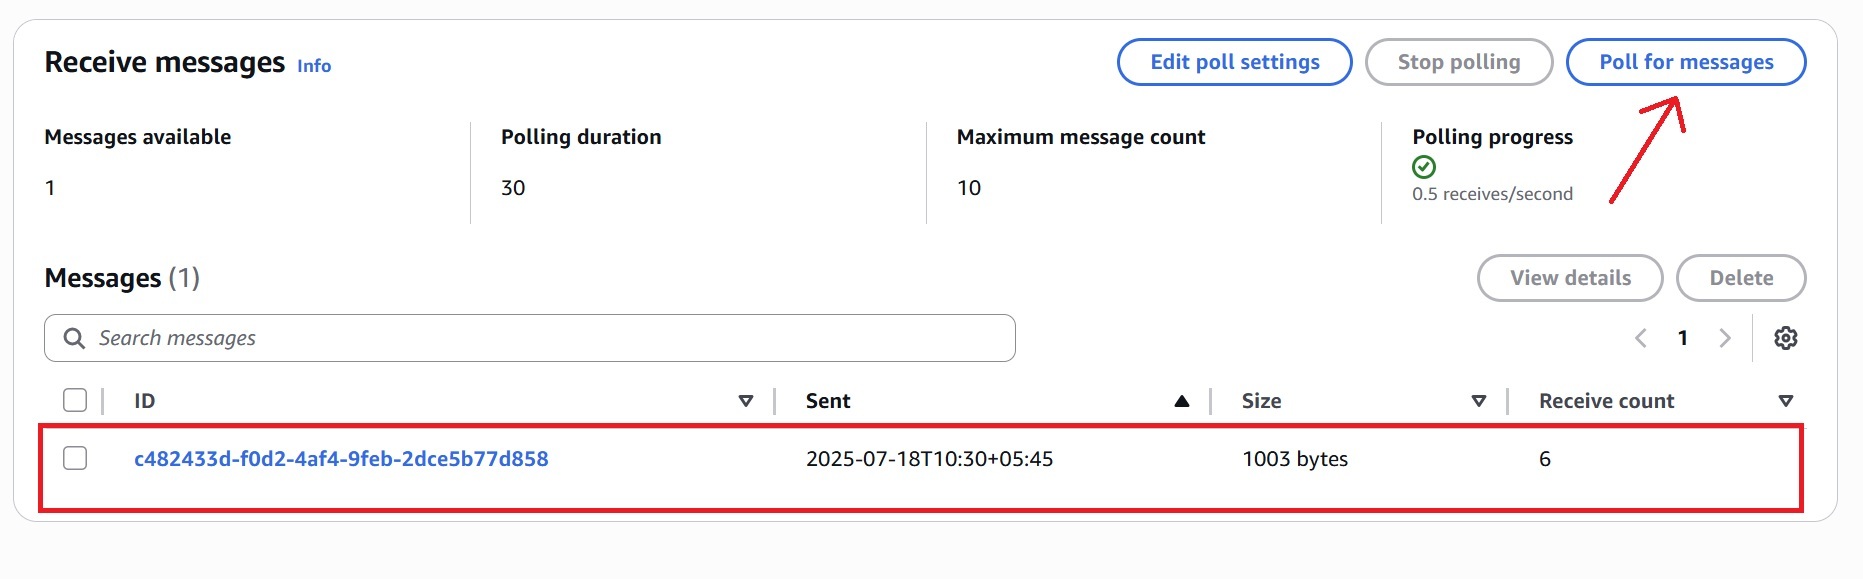
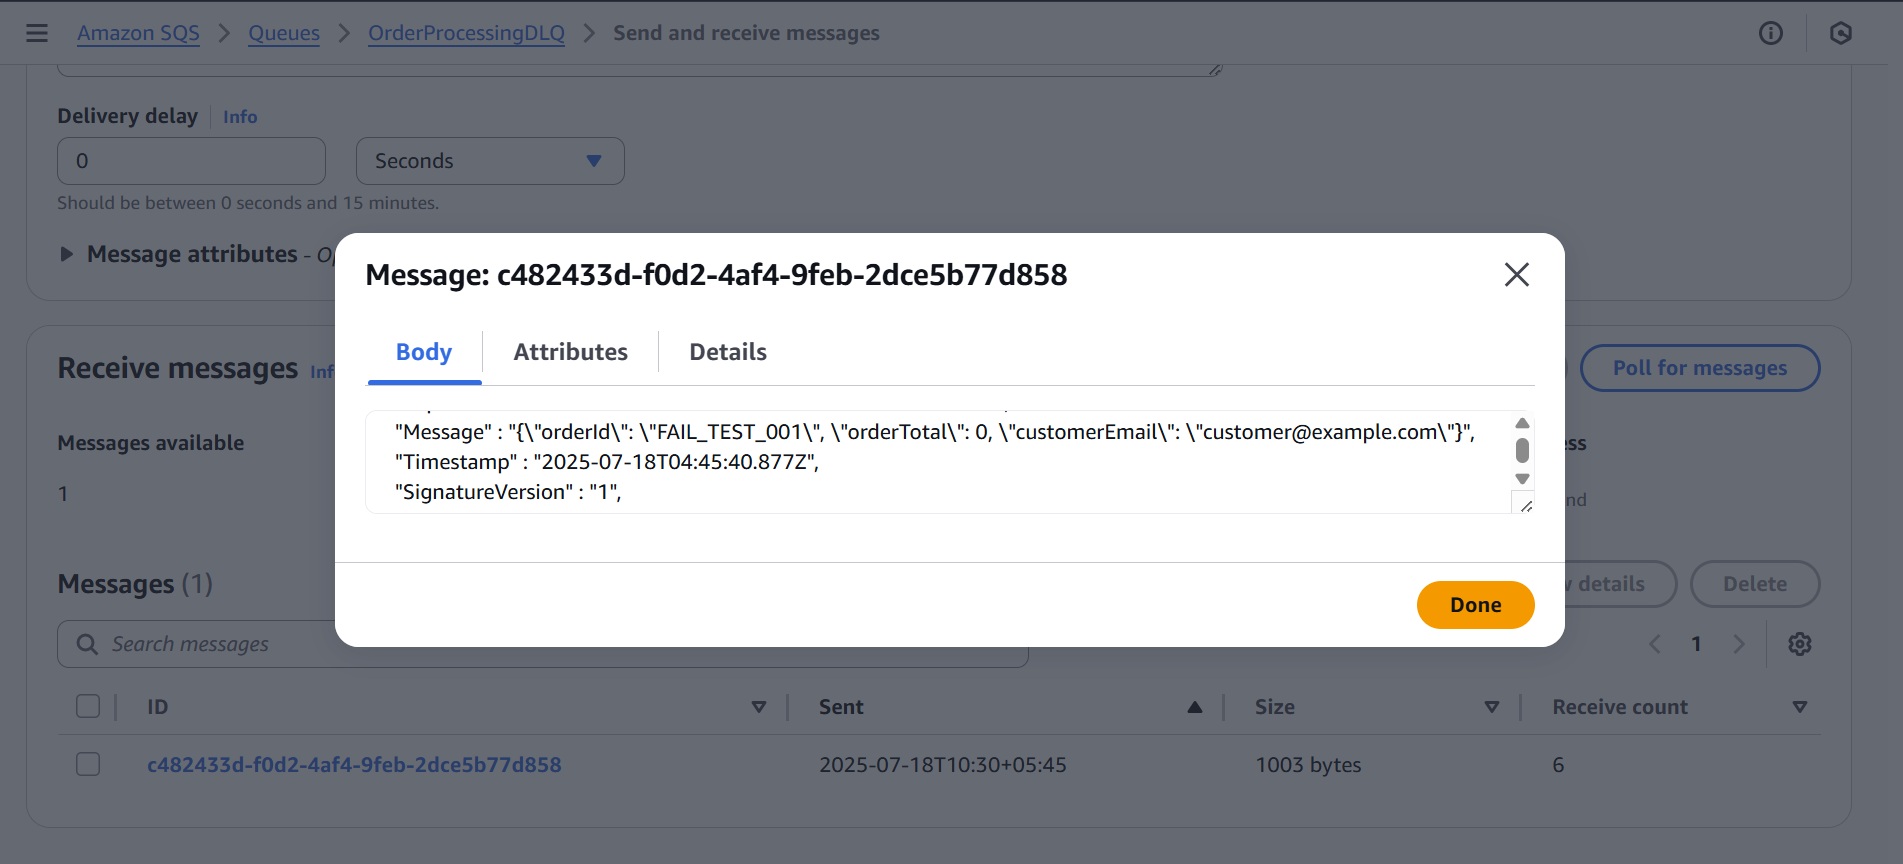
- Click the message in the list to view the full failed order data that caused it to be moved to the DLQ.
Conclusion
This practical simulation demonstrates how AWS’s event-driven services, such as SNS, SQS, EventBridge, and Lambda, can work together to create a decoupled, resilient workflow for order processing. By validating input early, separating responsibilities across functions, and routing failures to a DLQ, the system mirrors real-world patterns used in scalable, production-grade applications.


