
Effective configuration management ensures system consistency, reduces downtime, and streamlines operations, especially as organizations scale. Centralizing it enhances security, compliance, and reliability.
This blog will explore how AWS Systems Manager (SSM) and Ansible work together to automate and centralize configuration management.
We’ll show you how to run Ansible playbooks using SSM, enabling centralized control over your infrastructure without requiring SSH access.
Overview of AWS Systems Manager and Ansible
AWS Systems Manager (SSM): A management service that provides operational insights, remote management, and automation capabilities for AWS resources and on-premises servers.
Ansible: An open-source IT automation tool for configuration management, application deployment, and task automation.
You can visit the official AWS Systems Manager documentation for more information.
Prerequisites
1) AWS Environment Setup:
- Install the SSM Agent on all target instances (pre-installed on Amazon Linux and Windows AMIs).
2) AWS Permissions:
- Ensure instances have an IAM role with SSM permissions and access to S3 for retrieving playbooks.
Tip: To properly manage IAM roles and secure your AWS infrastructure.
Step-by-Step Guide: Running Ansible Playbooks Using AWS Systems Manager
Scenario: Configuring an Nginx Web Server on EC2 Instances
You want to configure an EC2 instance to run an Nginx web server and serve a custom homepage.
Traditional Approach
In the traditional approach, you manually configure servers, which involves different software installation methods. You would need to:
- Identify the operating system (Amazon Linux or Ubuntu).
- Install Nginx using the appropriate command.
- Start the web server.
- Customize the homepage.
This process can be error-prone, especially when managing multiple instances with varying operating systems.
Why Use Automation with Ansible?
By using AWS Systems Manager (SSM), you can automate and centralize server configuration, ensuring consistent setups across different OS types, reducing manual effort, and minimizing errors.
To dive deeper into playbook management and best practices, visit the Ansible community documentation.
Step 1: Automating the Process with Ansible
To implement automation, let’s start by understanding the essential components of an Ansible project:
Folder Structure for Playbooks
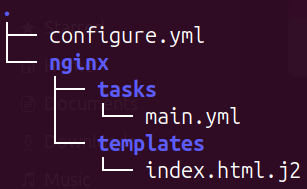
Explanation of folder structure:
- tasks/main.yml: Contains the Ansible tasks to install and configure Nginx, handle templating, and manage the Nginx service.
templates/index.html.j2: A Jinja2 template used to customize the default HTML file served by Nginx.- configure.yml: The playbook entry point that calls the necessary roles or tasks.
File Contents
1) configure.yml
---
- hosts: all
  become: true
  become_method: sudo
  roles:
    - nginx
Explanation of configure.yml:
a) hosts: all
- Targets all hosts specified in the inventory file.
b) become: true
- Escalates privileges to run tasks as the
rootuser or another privileged user. - Uses
sudofor privilege escalation (become_method: sudo).
c) roles: – nginx
- Applies the
nginxrole to set up Nginx on all hosts. - The
nginxrole includes all tasks, templates, and handlers from thenginxfolder.
2) main.yml
- name: Gather EC2 facts
  ec2_metadata_facts:

- name: Install Nginx on Debian or Ubuntu instances
  apt:
    name: nginx
    state: present
  when: ansible_os_family == "Debian"

- name: Install Nginx on RedHat or CentOS instances
  yum:
    name: nginx
    state: present
  when: ansible_os_family == "RedHat"

- name: Template the index file for Debian/Ubuntu
  template:
    src: index.html.j2
    dest: /var/www/html/index.html
    owner: www-data
    group: www-data
    mode: '0644'
  when: ansible_os_family == "Debian"

- name: Template the index file for RedHat/CentOS
  template:
    src: index.html.j2
    dest: /usr/share/nginx/html/index.html
    owner: nginx
    group: nginx
    mode: '0644'
  when: ansible_os_family == "RedHat"

- name: Enable Nginx on startup and start service for Debian or Ubuntu
  service:
    name: nginx
    enabled: yes
    state: started
  when: ansible_os_family == "Debian"

- name: Enable Nginx on startup and start service for RedHat or CentOS
  service:
    name: nginx
    enabled: yes
    state: started
  when: ansible_os_family == "RedHat"
Explanation of main.yml:
ec2_metadata_factsis used to retrieve instance-specific information (e.g., OS type, region, instance ID).- The
whenclause determines which package manager (yumorapt) to use based on the OS. - The
servicemodule ensures the web server is started regardless of the OS. - The
templatemodule ensures the file is rendered with variables dynamically if included in the Jinja2 template.
3) index.html.j2
<html>
<body>
<h1>Hello from State Manager!</h1>
<h2>Yahoooouuuuu</h2>
</body>
</html>
Explanation of index.html.j2:
Your index.html.j2 template ensures that the default page served by Nginx is customized. This code would dynamically include the server’s hostname and AWS region using facts gathered by the ec2_metadata_facts module.
Step 2: Integration with AWS Systems Manager (SSM)
2.1 Prepare the Target EC2 Instance
a) Launch at least one EC2 instance with the operating system specified in your Ansible playbook, i.e., Debian, Ubuntu, RedHat. For this blog, I have launched the Ubuntu-22.04 instance.
- Assign a public IP address.
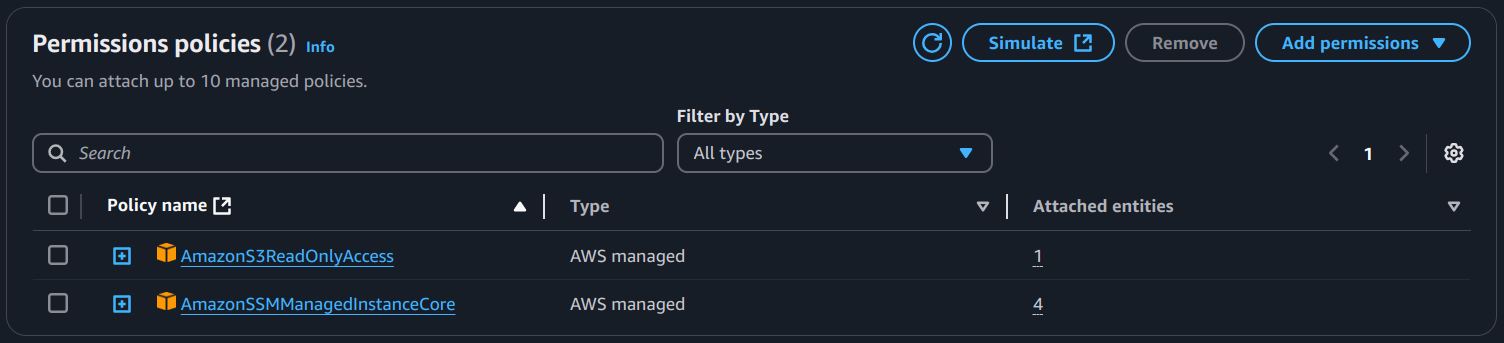
- Attach the IAM policy that contains permission to get objects from S3 and
AmazonSSMManagedInstanceCore.
b) Provide a tag for that instance. For example: Key = Project, Value = AnsibleSSM.

A Pro Advice:
While preparing your target EC2 instance for automation, you should also be mindful of managing and accessing these instances securely. One practical approach is to use Session Manager.
2.2 Create a Resource Group
a) Navigate to the Resource Groups section from the AWS Console search bar.
b) Create a new resource group by selecting the tag-based group type and in grouping criteria: Resource types= AWS::EC2::Instance and in Tags, Tag key = Project and Tag value = AnsibleSSM.
- In group details, provide a group name. Example: Ansible_SSM_Group.
c) This resource group will be used later to target instances.

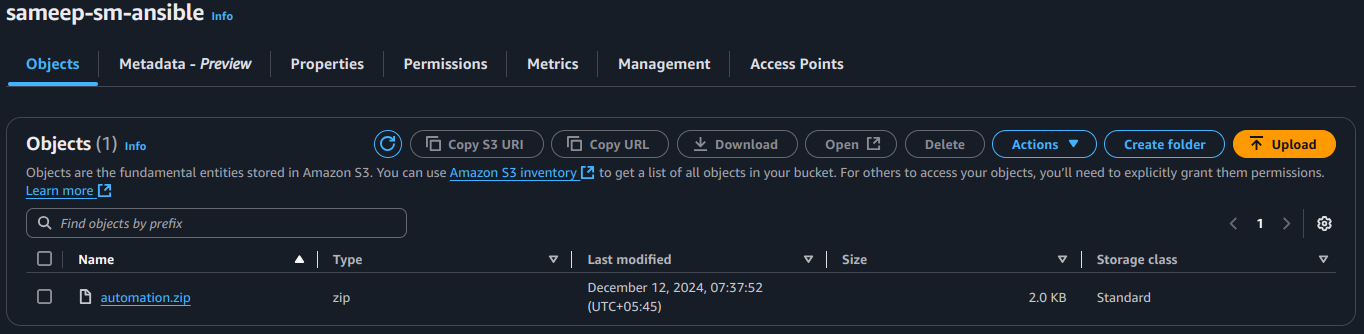
2.3 Package the Playbook and Upload to S3
a) Compress the local folder containing the playbook files into a ZIP file (e.g., automation.zip).
b) Create an S3 bucket. Bucket name example: example-bucket. Info: Bucket names must be globally unique.
c) Upload the ZIP file to an Amazon S3 bucket with proper permissions.
- Ensure the
S3 bucket policyorIAM instance profilegrants read access to the S3 bucket.
2.4 Create an Association in Systems Manager
2.4.1) Navigate to the AWS Systems Manager Console.
2.4.2) From the left pane, select State Manager.
2.4.3) Click on Create Association.
Then, you need to configure the association details:
a) Association Name: Provide a meaningful name for the association (e.g., Configure-WebServer-Through-Ansible).
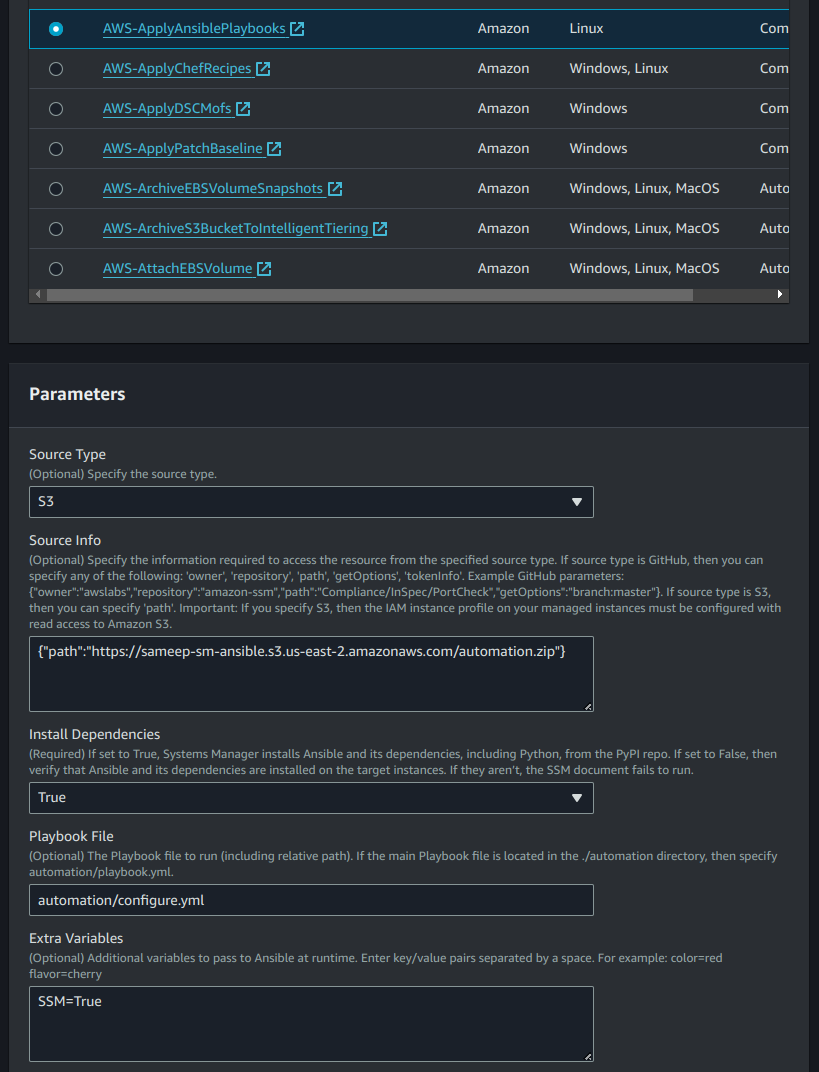
b) SSM Document: Select AWS-ApplyAnsiblePlaybooks from the list of available documents and configure its parameters.
- Source type: Select
S3. - Source Info: Provide the S3 bucket path to the ZIP file in JSON format:
{“path”:”https://example-bucket.s3.amazonaws.com/automation.zip”}- Playbook File: Specify the relative path to the playbook inside the ZIP file (e.g.,
automation/configure.yml). - In the target selection section, choose the resource group and select the previously created resource group from the dropdown menu (e.g.,
role: Ansible_SSM_Group).
c) Define the execution schedule for the association (e.g., every hour or daily).
d) Click on Create Association to complete the process.

2.5 Run the Association
- Using the association name, select the previously created association from the list in the state manager.
- Click on Apply Association now.
- Check the association’s execution history to see its status.
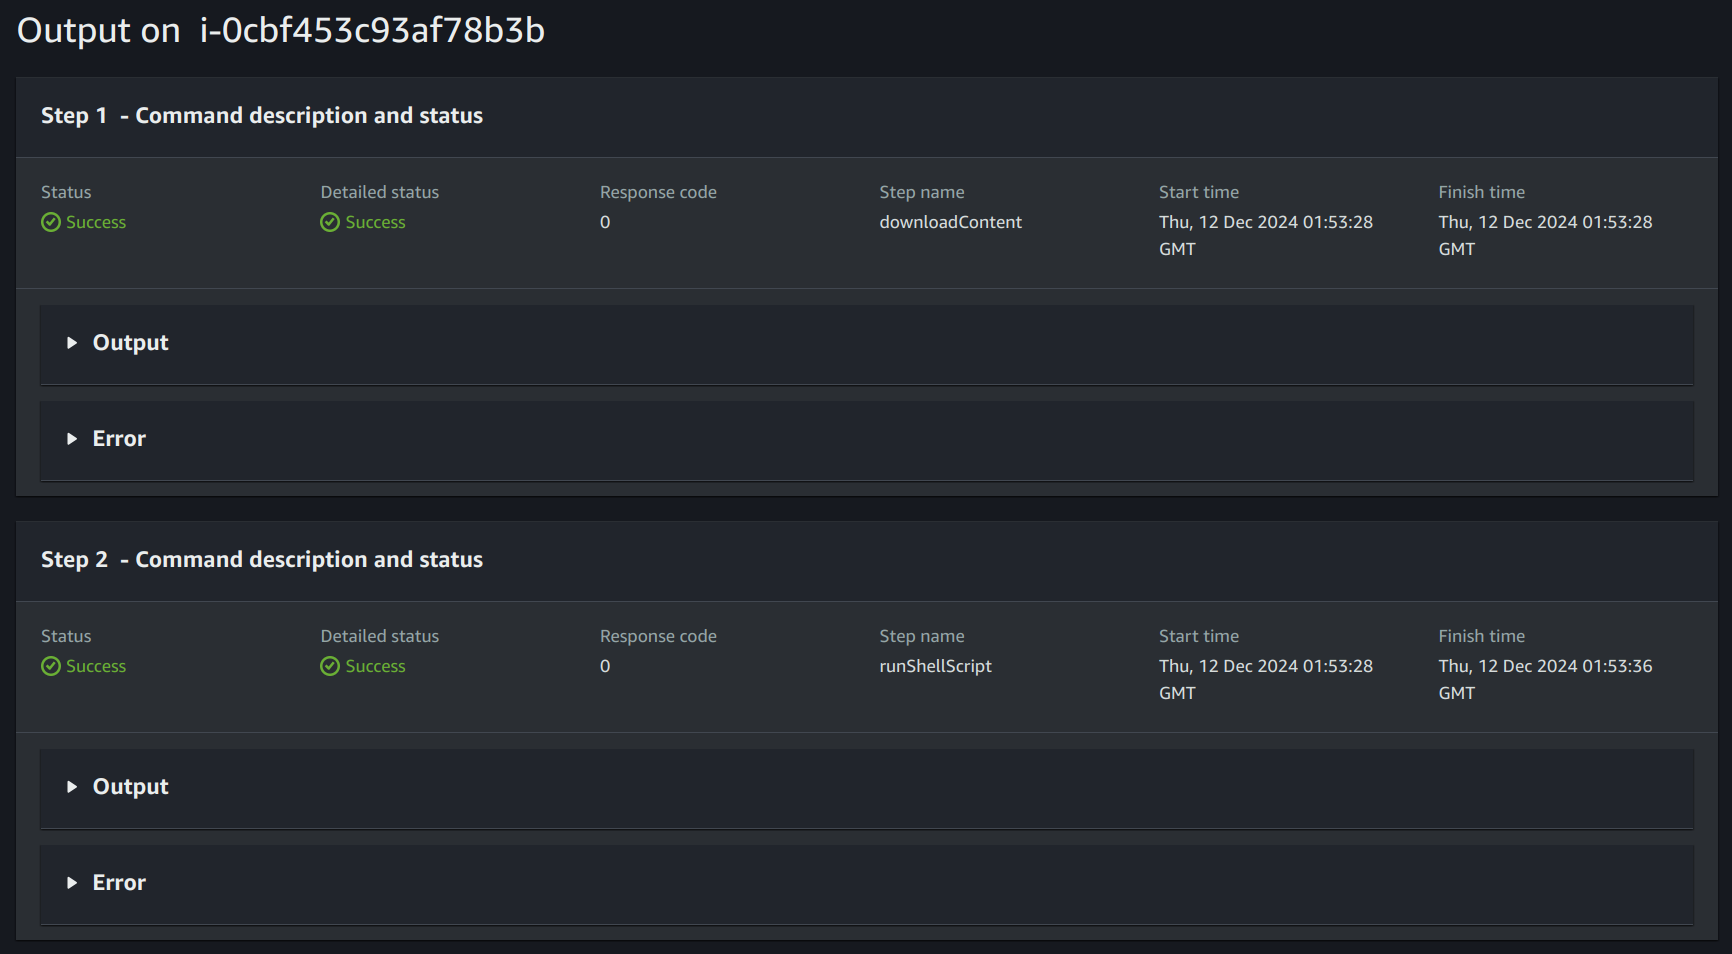
- View output logs for details about execution success or failure by selecting the appropriate execution ID.
2.6 Test the configuration
Visit the instance public IP of your ec2 instance and see if the required HTML page is being served.

Use Cases
- Automating Application Deployments: Deploy applications across hybrid environments without manual intervention.
- Configuration Drift Management: Ensure consistency across servers by regularly applying configuration updates.
- Patch Management: Automate software and OS patching for enhanced security.
Conclusion
You can streamline and automate configuration management across your infrastructure. This approach eliminates the inconsistencies and manual errors that arise from using different installation methods on various operating systems.
With SSM’s centralized control, you can ensure consistent, repeatable configurations, regardless of the OS, while maintaining security, compliance, and efficiency.
Automating these tasks reduces operational overhead and enhances scalability, allowing you to manage a growing infrastructure easily.


