
Managing AWS costs has become a top priority as cloud spending continues to outpace other IT expenses, including infrastructure and staffing. For organizations running scalable workloads, AWS Savings Plans, available as Compute or EC2 Instance plans, offer a cost-effective way to reduce compute expenses without sacrificing flexibility.
Available in 1-year and 3-year commitment terms, Savings Plans provide significant savings over standard On-Demand rates.
Whether applied in a cost-conscious startup or an enterprise-scale environment running thousands of EC2 instances, they offer a powerful lever for compute cost optimization.
In this step-by-step guide, learn how to purchase AWS Savings Plans to maximize ROI, control cloud spend, and align costs with your cloud usage.
What Are AWS Savings Plans?
AWS Savings Plans are flexible pricing models that provide discounted rates on compute usage in exchange for a commitment to a consistent hourly spend (measured in $/hour) over either a 1-year or 3-year term. These plans help organizations optimize cloud costs by aligning expenses with expected compute usage across various AWS services.
There are two types of Savings Plans:
1. Compute Savings Plans
- Provides flexibility across instance types, regions, operating systems, and tenancy.
- Apply to compute services, including EC2, Fargate, and Lambda.
- Unlike EC2 Reserved Instances, Compute Savings Plans do not require commitment to specific instance attributes, allowing usage to shift across services and regions while retaining discounts.
- Suitable for environments with variable or evolving workloads.
2. EC2 Instance Savings Plans
- Offers higher discounts than Compute Savings Plans but is limited to specific instance families and regions.
- Best suited for workloads with predictable, stable usage patterns.
Term Length Differences In Savings Plans
- The 3-year commitment provides greater overall cost savings but requires a longer financial commitment and reduced flexibility to change or exit.
- The 1-year commitment offers lower savings but allows organizations to adjust their commitments more frequently in response to changing workload demands.
Prerequisites
Before purchasing a Savings Plan, ensure the following:
- Billing access is granted in the AWS account.
- Review compute usage patterns using AWS Cost Explorer.
- Get approval for financial commitments, especially if selecting upfront payment options.
Step-by-Step Guide to Purchase AWS Savings Plans (1-Year or 3-Year)
Step 1: Access the AWS Billing Console
- Sign in to your AWS Console.
- Navigate to the Billing Dashboard from the AWS service search.
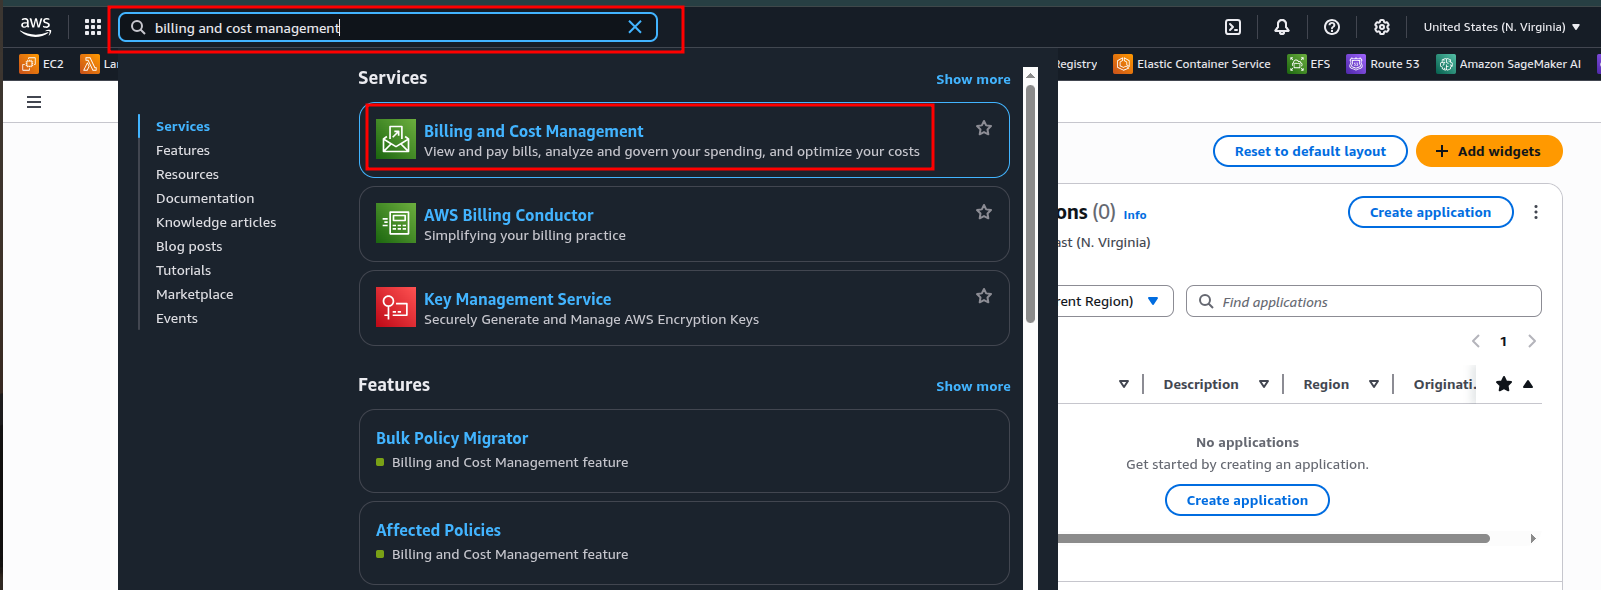
- In the left navigation pane, select Savings Plans.
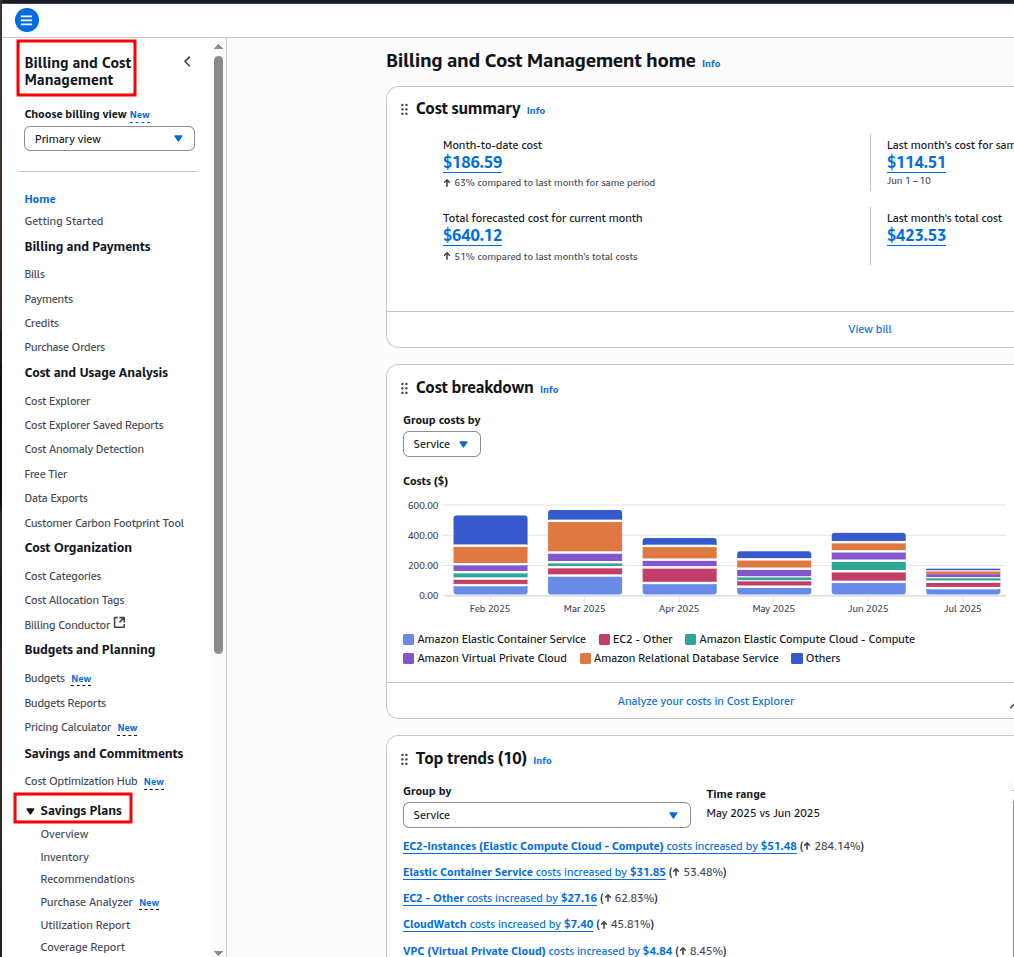
Step 2: Review AWS Savings Plan Recommendations
Before making a purchase, it is best to start with AWS’s Recommendations.
- Go to Savings Plans > Recommendations.
- AWS analyzes your recent compute usage (typically 7, 30, and 60 days) and provides automated suggestions:
– Commitment amount ($/hr)
– Plan type (Compute or EC2 Instance)
– Term (1-year or 3-year)
– Payment option
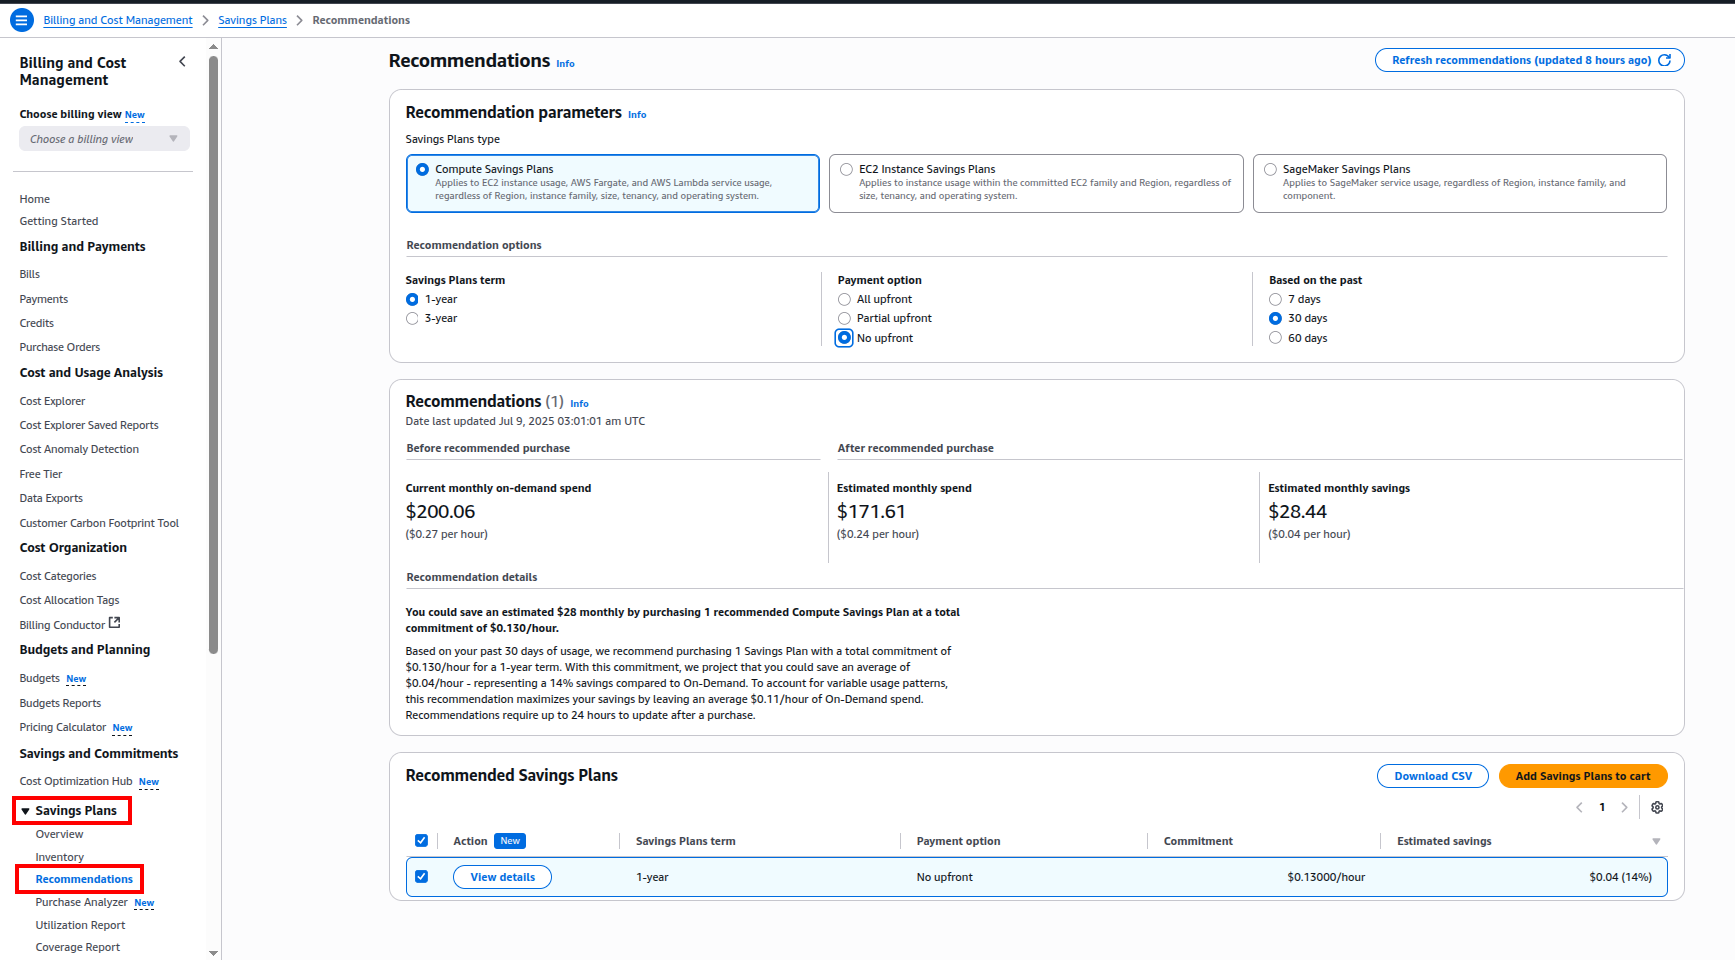
Tip: Use these as a baseline, especially if unsure how much to commit.
Step 3: Use the Purchase Analyzer for Custom Planning
Now go to Savings Plans > Purchase Analyzer to do a self-guided commitment planning:
- This tool allows simulation of different commitment levels, terms, and payment types.
- It displays estimated savings and utilization for each scenario, making it easy to compare “what-if” options before finalizing the plan.
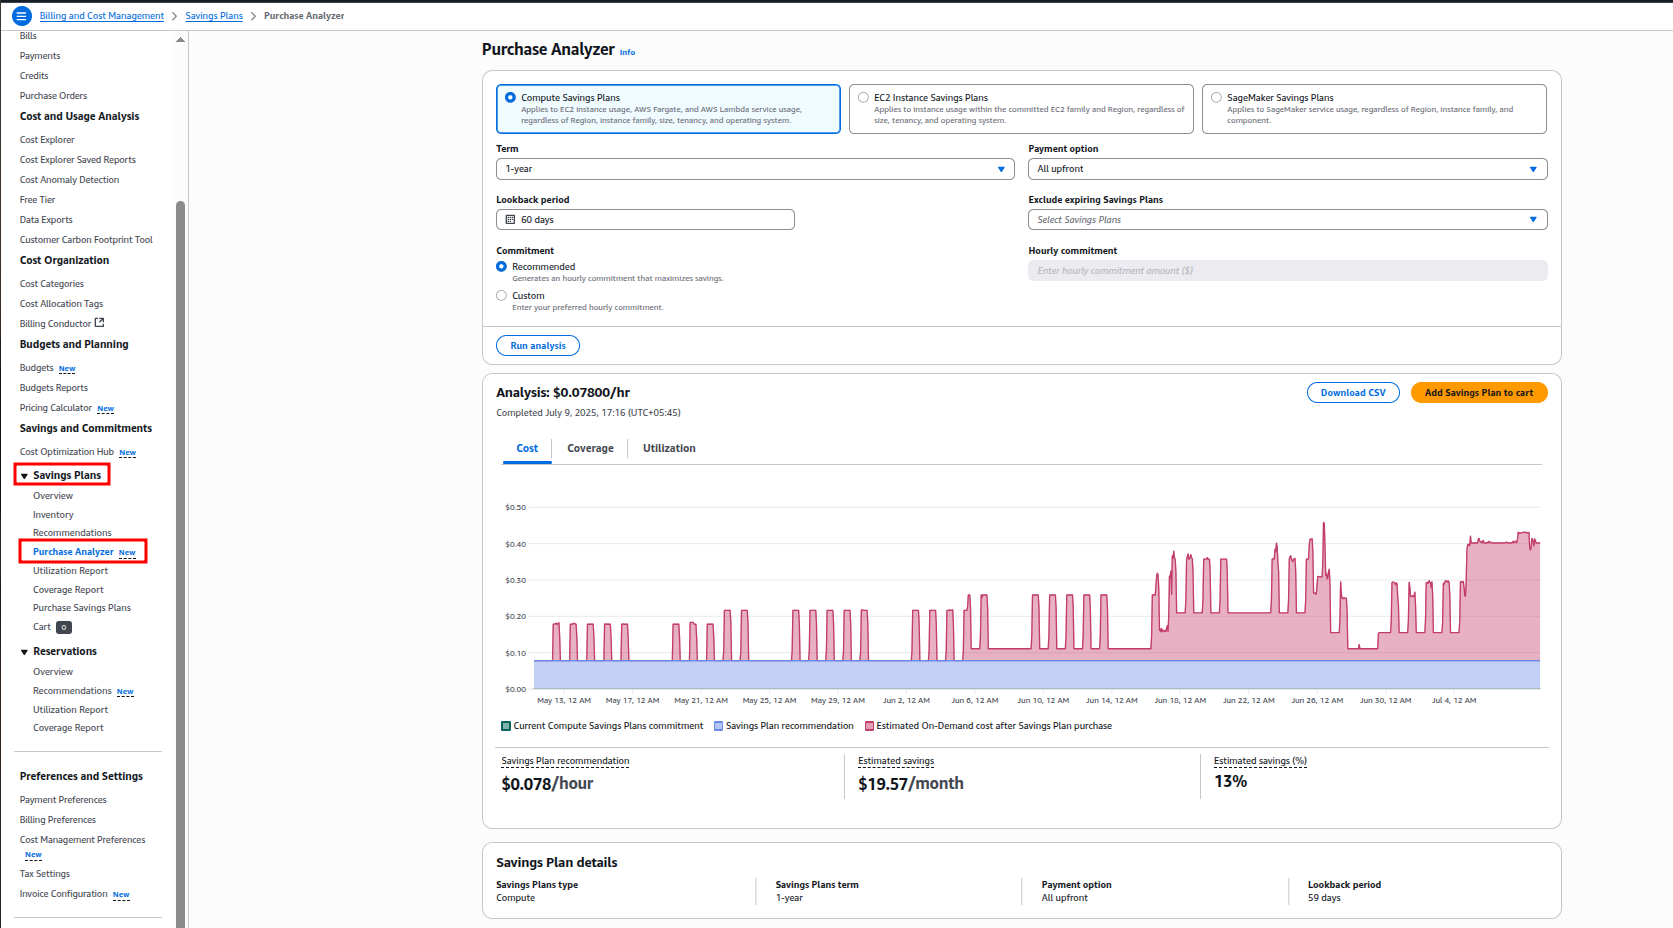
Tip: Use Recommendations for a baseline and Purchase Analyzer to tailor your commitment to budget and forecasted usage.
Step 4: Select Plan Type and Proceed to Purchase
- Go to Savings Plans > Purchase Savings Plans.
- Under “Select Plan Type”, select one of the following:
– Compute Savings Plan: Most flexible and widely recommended.
– EC2 Instance Savings Plan: Better discounts but less flexibility; choose only if the workload is consistent.
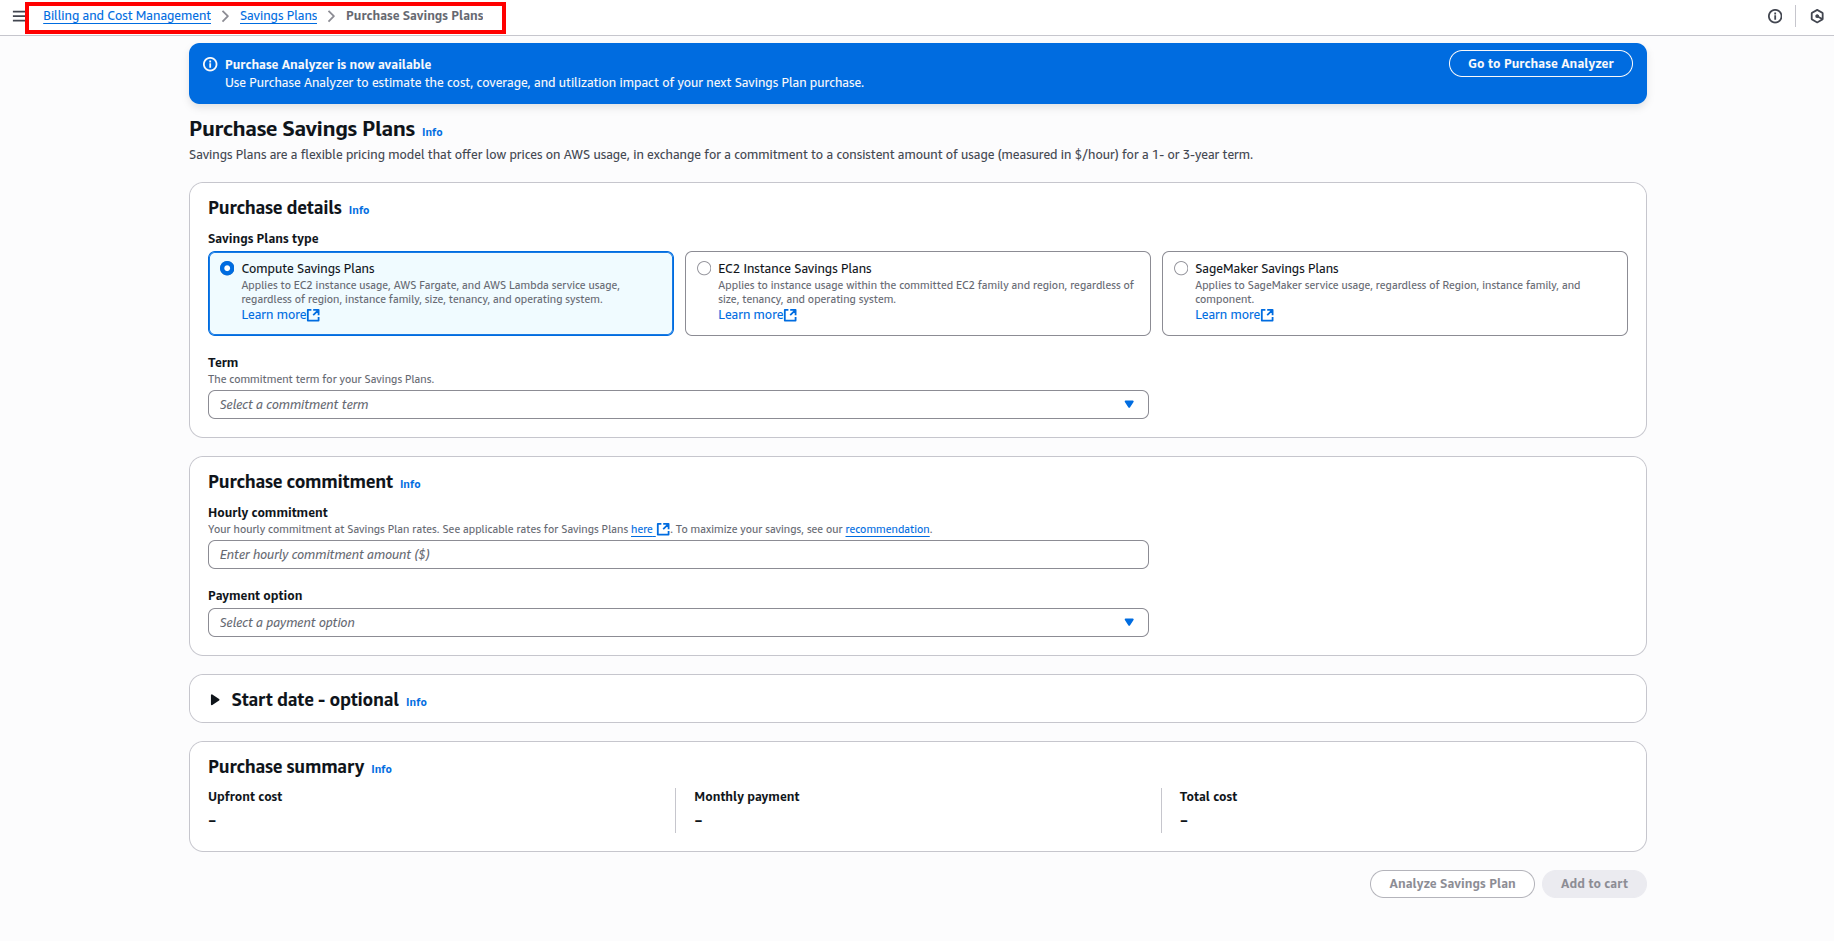
Step 5: Choose Commitment Term and Payment Option
- Choose the commitment term:
– 1-Year Plan: Good balance between savings and flexibility.
– 3-Year Plan: Highest discount (up to 72%) for long-term, predictable usage. - Select a payment option:
– All Upfront: Best discount, largest initial payment.
– Partial Upfront
– No Upfront: Pay monthly; ideal for cash flow management.
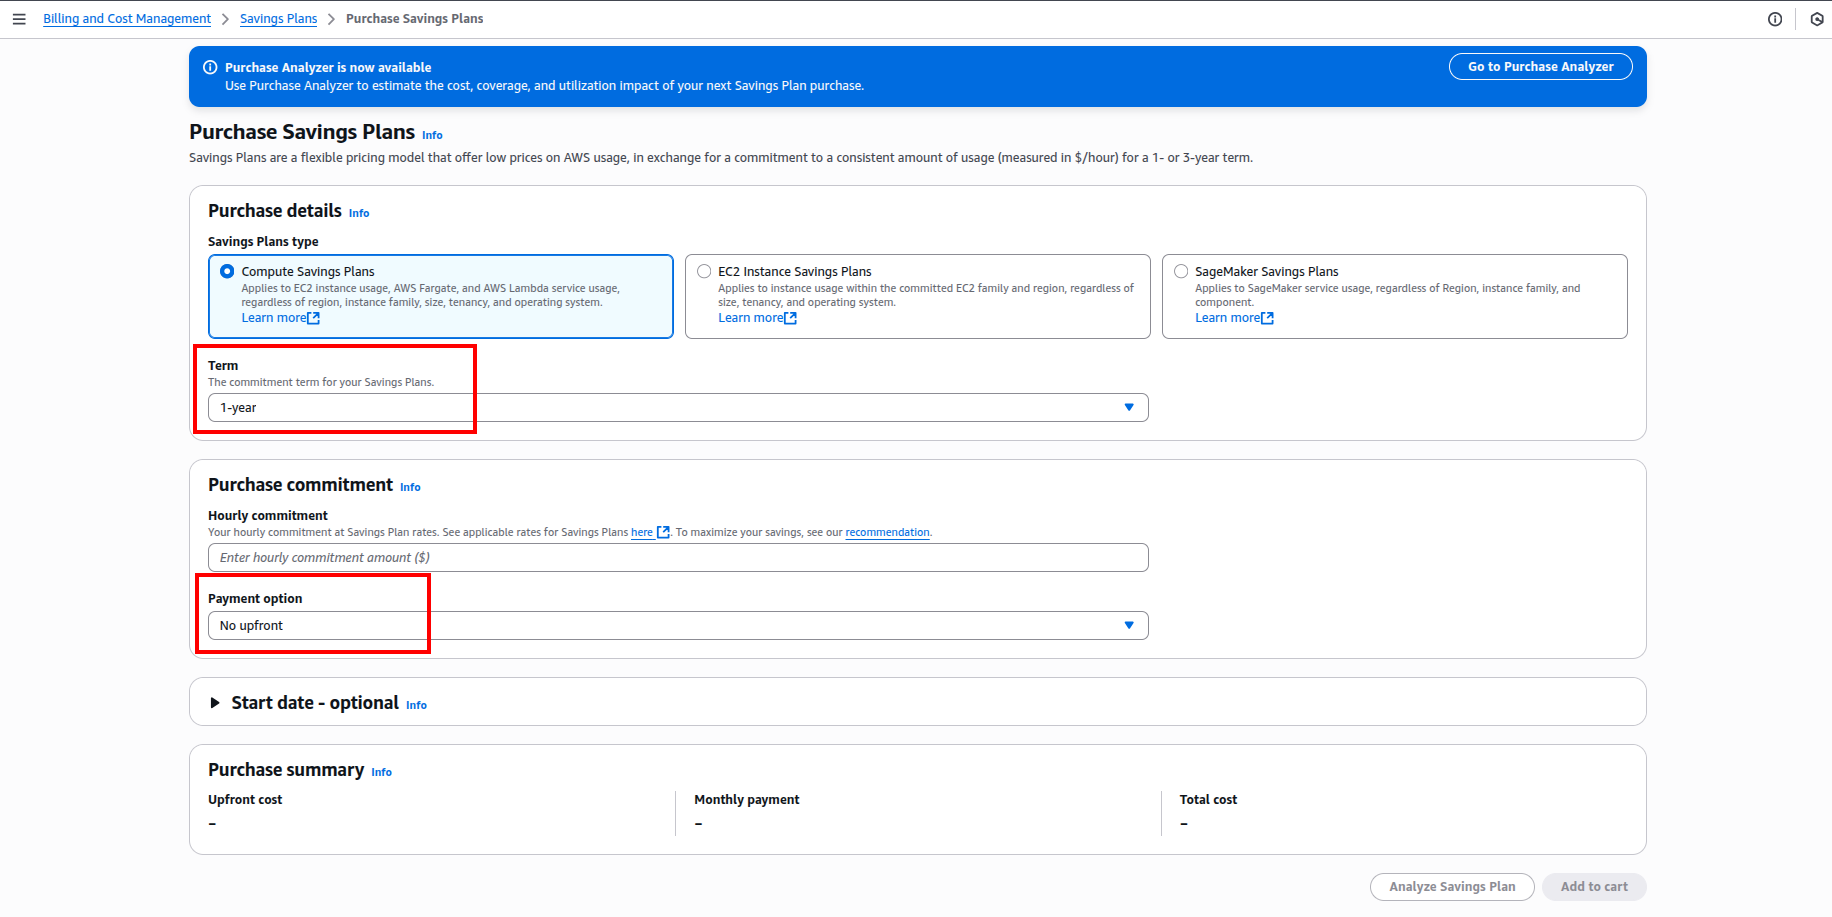
Tip: Start with a 1-year, No Upfront if just getting started with commitment-based pricing.
Step 6: Estimate and Set Hourly Commitment
- Enter hourly spend commitment, for example $25/hour (AWS recommends a value based on historical usage).
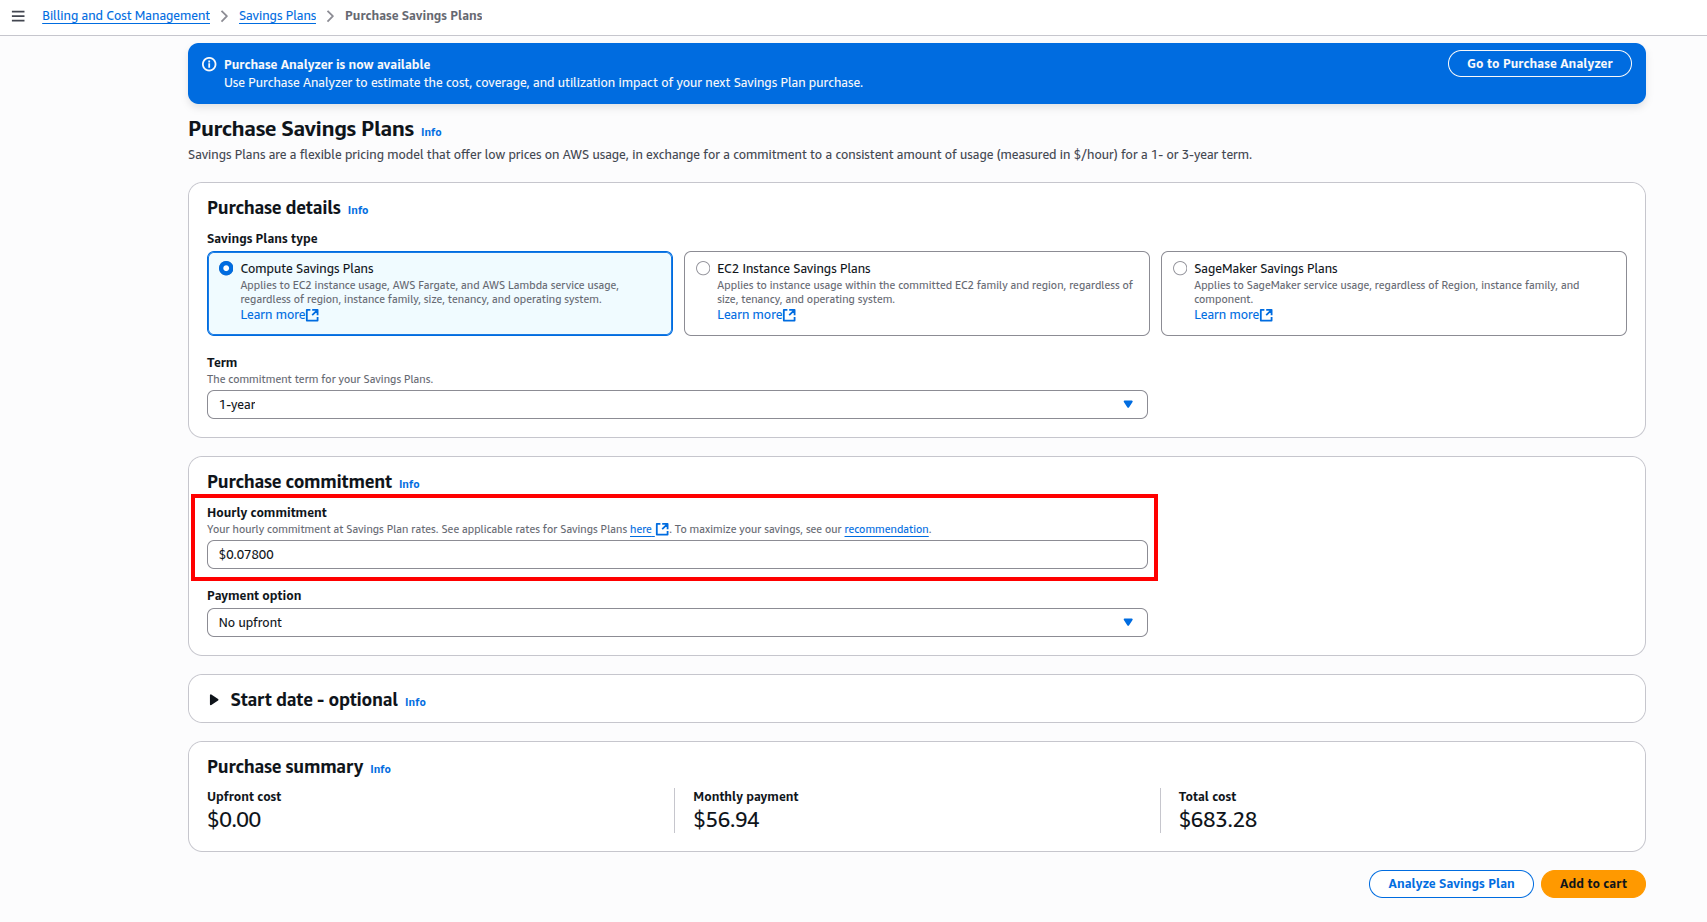
- Use the Purchase Analyzer to validate savings, coverage, and utilization for the amount.
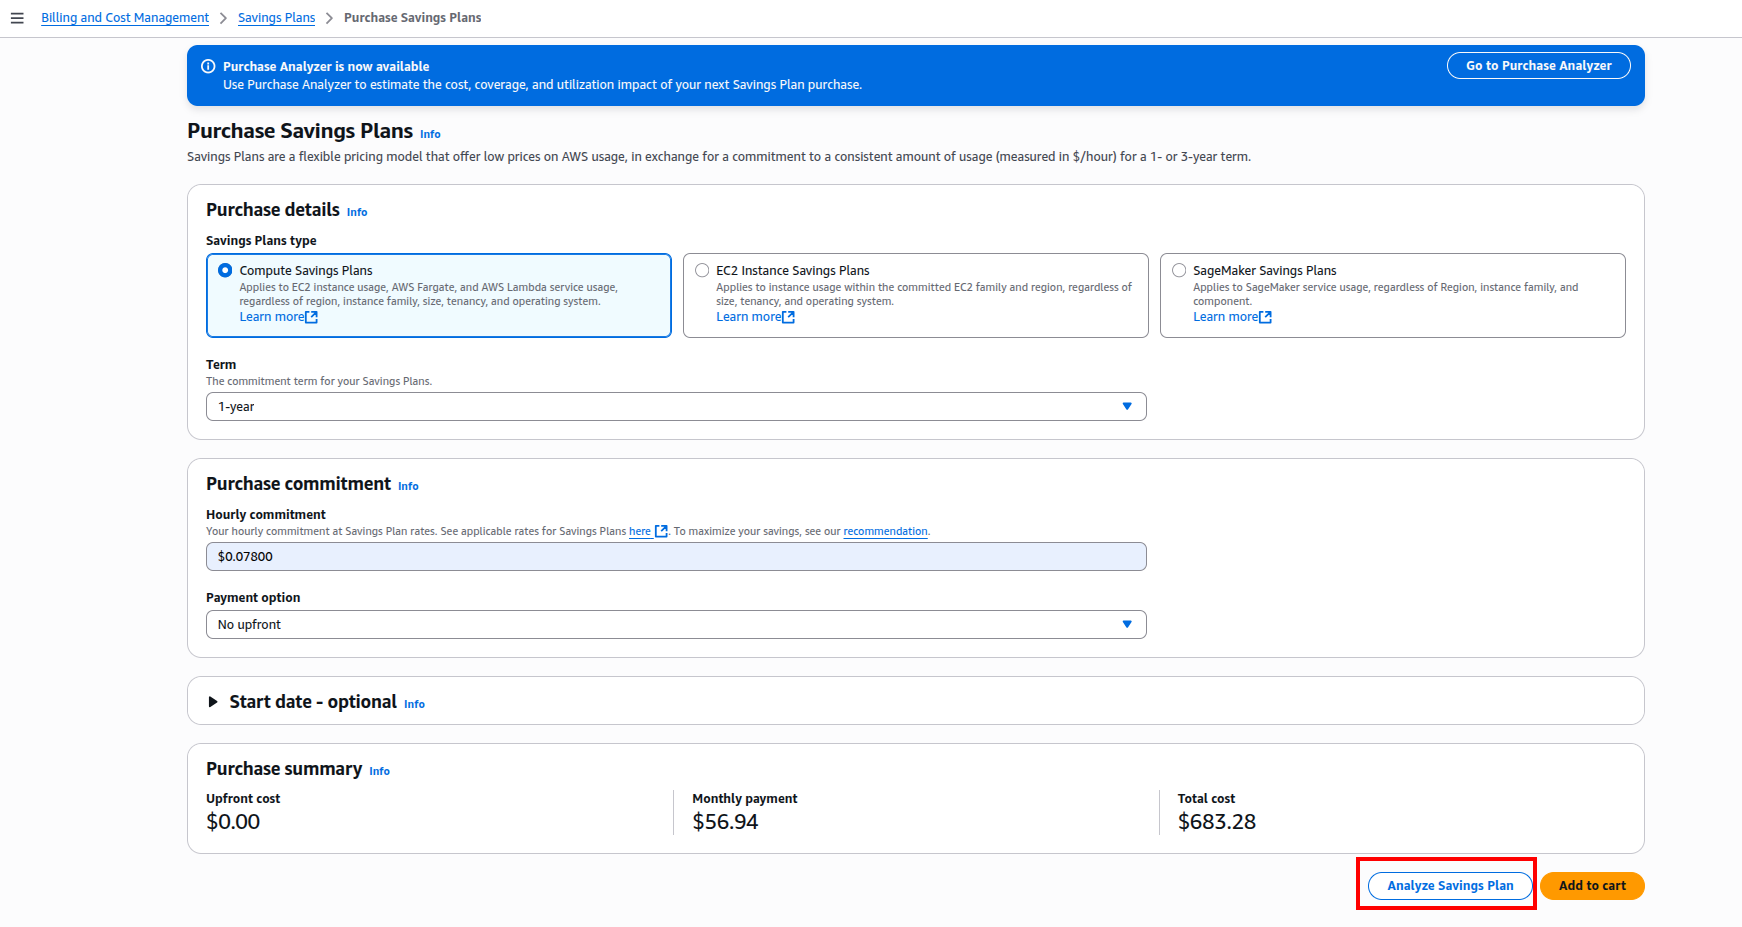
- See the Estimated Savings on that hourly commitment.
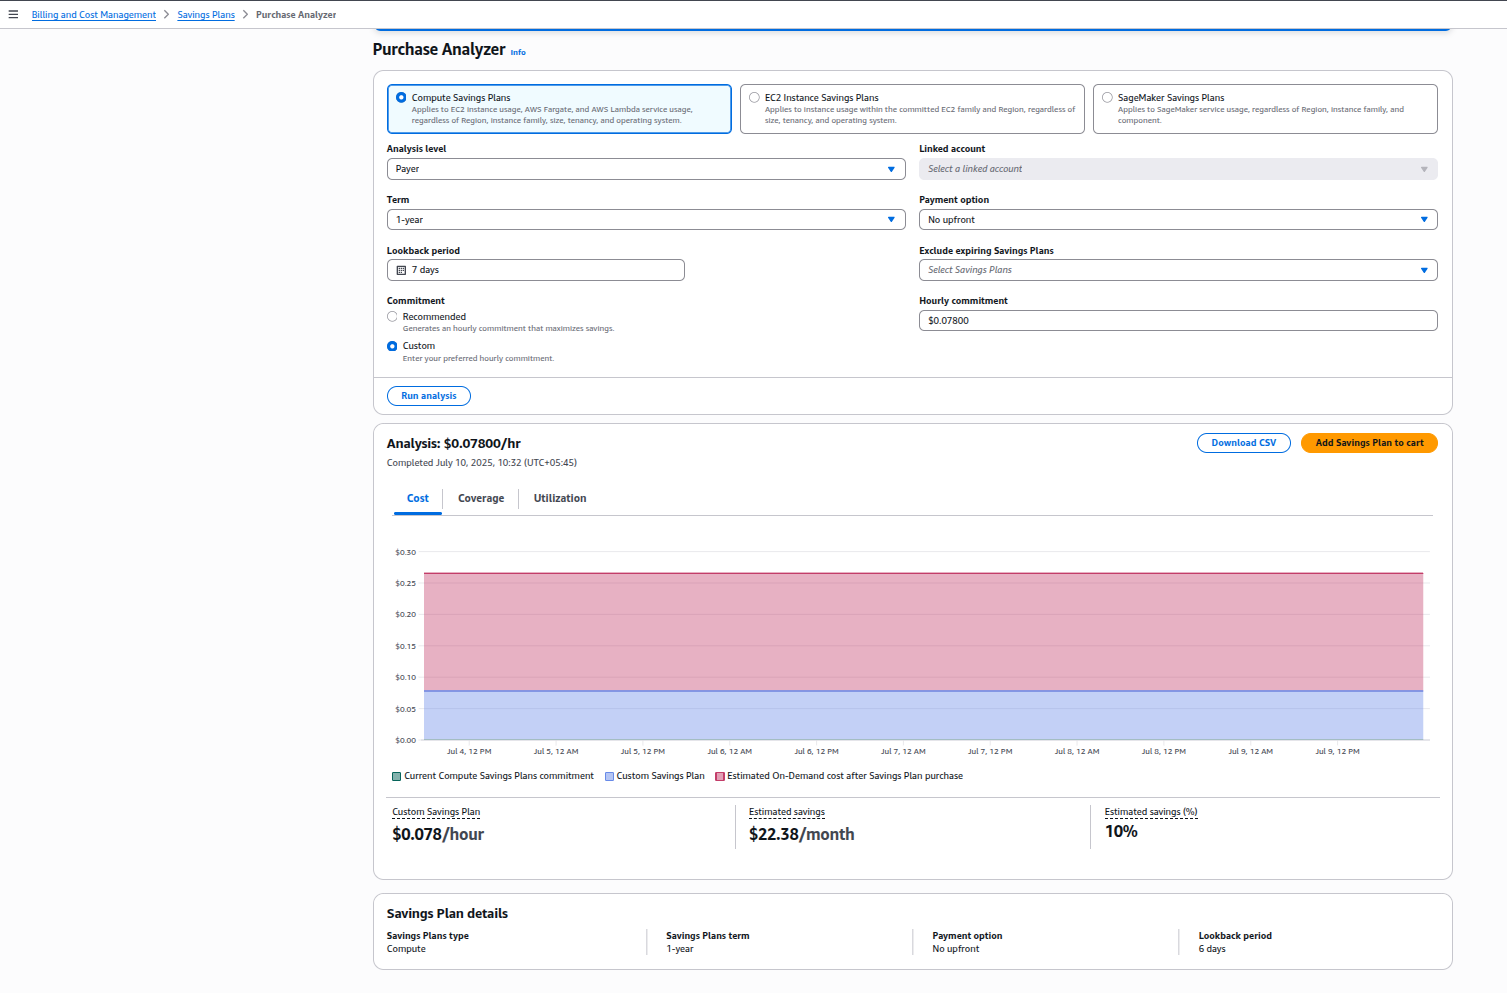
Note: If unsure, consider starting with a conservative commitment and adjusting later.
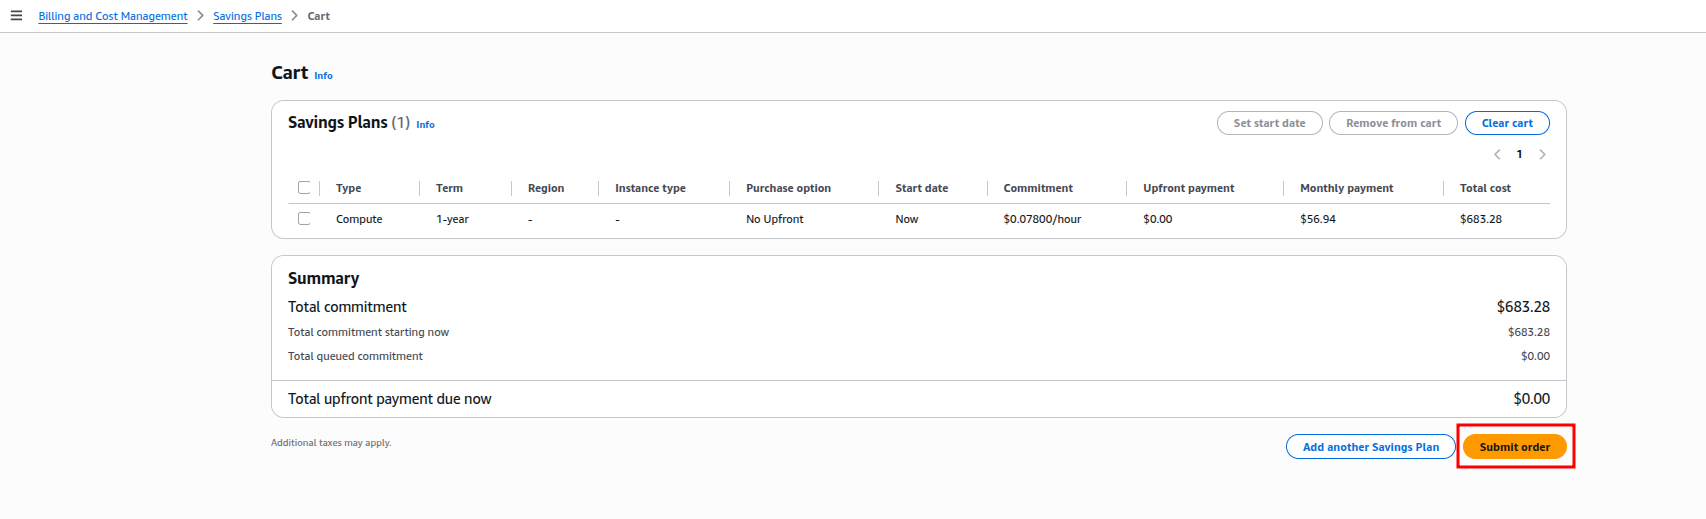
Step 7: Add To Cart And Submit Order
Once the analysis looks satisfactory and the commitment amount aligns with the cost goals:
- Click Add to Cart to proceed with the selected Savings Plan.
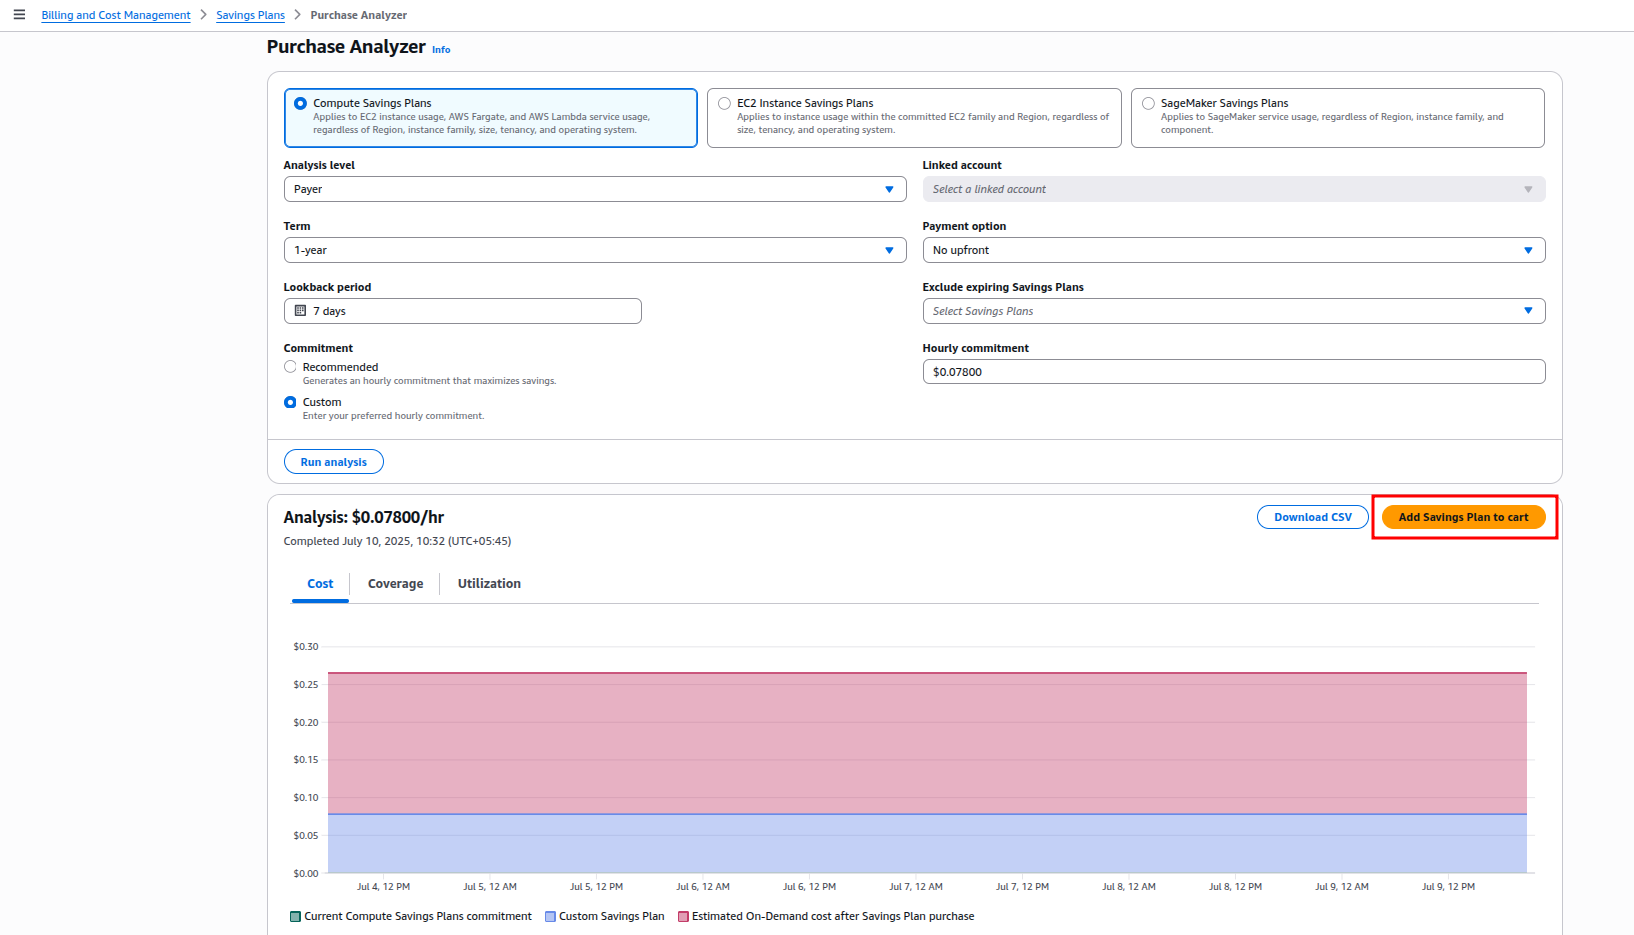
- Review the commitment summary:
– Commitment amount
– Term (1 or 3 years)
– Payment option
– Plan type (Compute or EC2 Instance) - After confirming all details, click Submit Order to complete the purchase.
Best Practices When Purchasing Savings Plans
- Start small, especially if new to Savings Plans.
- Review Savings Plan Utilization and Coverage reports monthly.
- Use Consolidated Billing to apply the plan across multiple accounts.
- Reassess commitments every 3–6 months based on usage trends.
Common Pitfalls to Avoid
| Mistake | Why It’s a Problem |
| Overcommitting on Hourly Spend | Leads to unnecessary costs if actual usage is lower than the committed amount. |
| Choosing EC2 Instance Plan Without Stable Usage | Limits flexibility across instance types and regions, resulting in poor savings utilization. |
| Overlooking Payment Option Implications | Impacts cash flow and budget forecasting, especially with upfront payments. |
| Failing to Monitor Plan Utilization | Can lead to underutilized commitments and missed savings opportunities over time. |
Final Thoughts
AWS Savings Plans provide a practical approach to reducing compute costs across EC2, Fargate, and Lambda. By aligning commitments with usage patterns, organizations can benefit from lower pricing without losing operational flexibility.
Choosing between 1-year and 3-year terms or between Compute and EC2 Instance plans should be guided by workload predictability, architectural flexibility, and budget governance. Savings Plans deliver maximum value when utilization and coverage are regularly monitored and adjusted to align with evolving infrastructure needs.


