
Azure Bastion is a fully managed Platform-as-a-Service (PaaS) that allows you to securely connect to your Azure VMs using Remote Desktop Protocol (RDP) and Secure Shell (SSH) without publicly exposing them.
The service is deployed inside your virtual network (VNet), providing a secure connection to your VMs directly from the Azure portal or using Azure CLI.
Benefits of Azure Bastion
- Increased Security: No need to expose VMs to the internet using public IP addresses.
- No Client Software Needed: You can connect directly from the Azure portal using your browser.
- Seamless RDP and SSH Access: Connect to Linux and Windows VMs without managing a separate jump box or VPN.
- Increased Security: No need to expose VMs to the internet using public IP addresses.
- Integrated with Azure AD: Supports Azure Active Directory (Azure AD) authentication.
Scenario
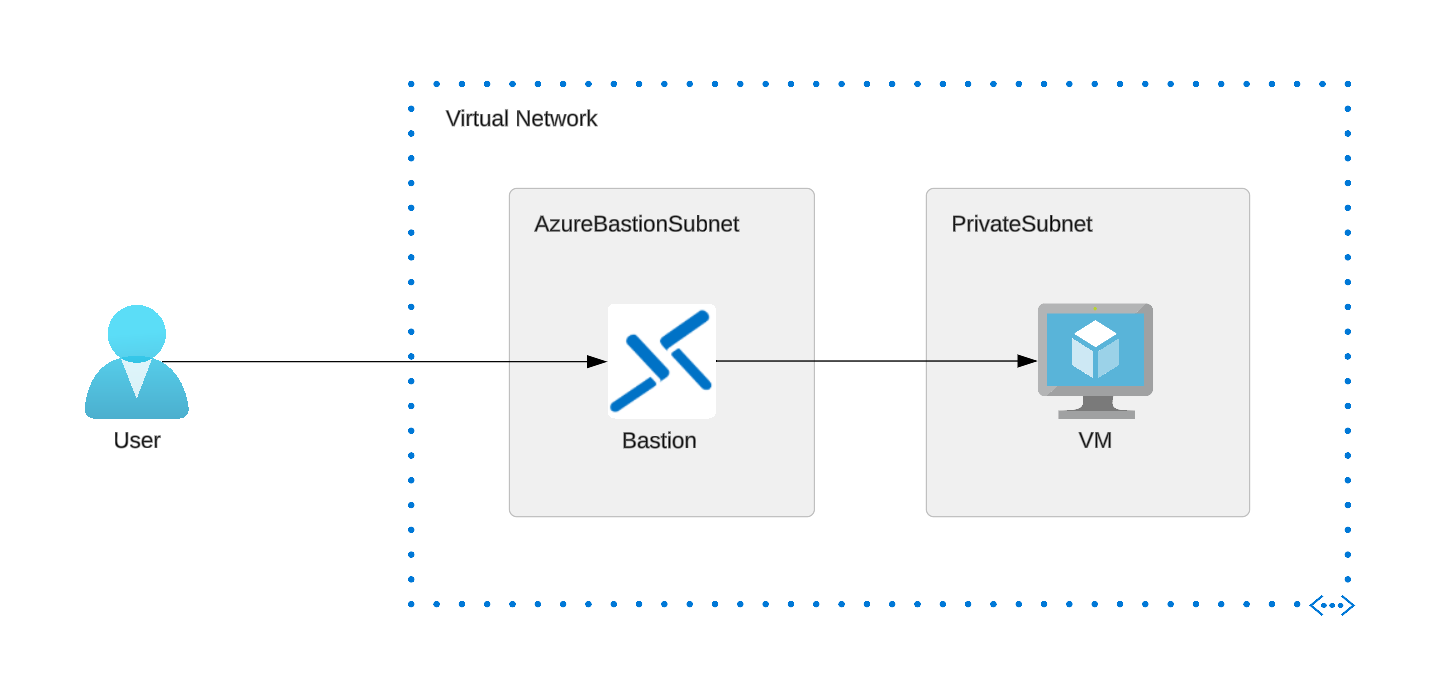
Suppose we have a production server that needs to be deployed as a private VM in an Azure Virtual Network (VNet) with no public IP address. This VM can only be accessed from the same VNet where it is launched.
We need to use Azure Bastion to access it securely via RDP (Remote Desktop Protocol) or SSH without exposing it to the public internet.
Azure Bastion allows secure, seamless RDP/SSH connections to VMs over SSL. The bastion service acts as a jump box, ensuring the VM remains isolated in the private network without needing a public IP or complex VPN setups.
To connect to the VM in a private subnet using the Bastion host, we will have two subnets in our Virtual Network, each for Bastion and VM. Bastion will have a Public IP, and we will be able to access VM through Bastion as shown below:
Prerequisites
- Create an Azure Account. If you don’t already have an Azure account, sign up at Microsoft Azure.
- Virtual Network (VNet): Set up a virtual network where your resources reside.
- Two Subnets: PrivateSubnet and AzureBastionSubnet
Procedure:
1) Create a Virtual Machine (VM)
1.1 Go to Azure Portal > Virtual Machines
1.2 Click on Create > Azure virtual machine
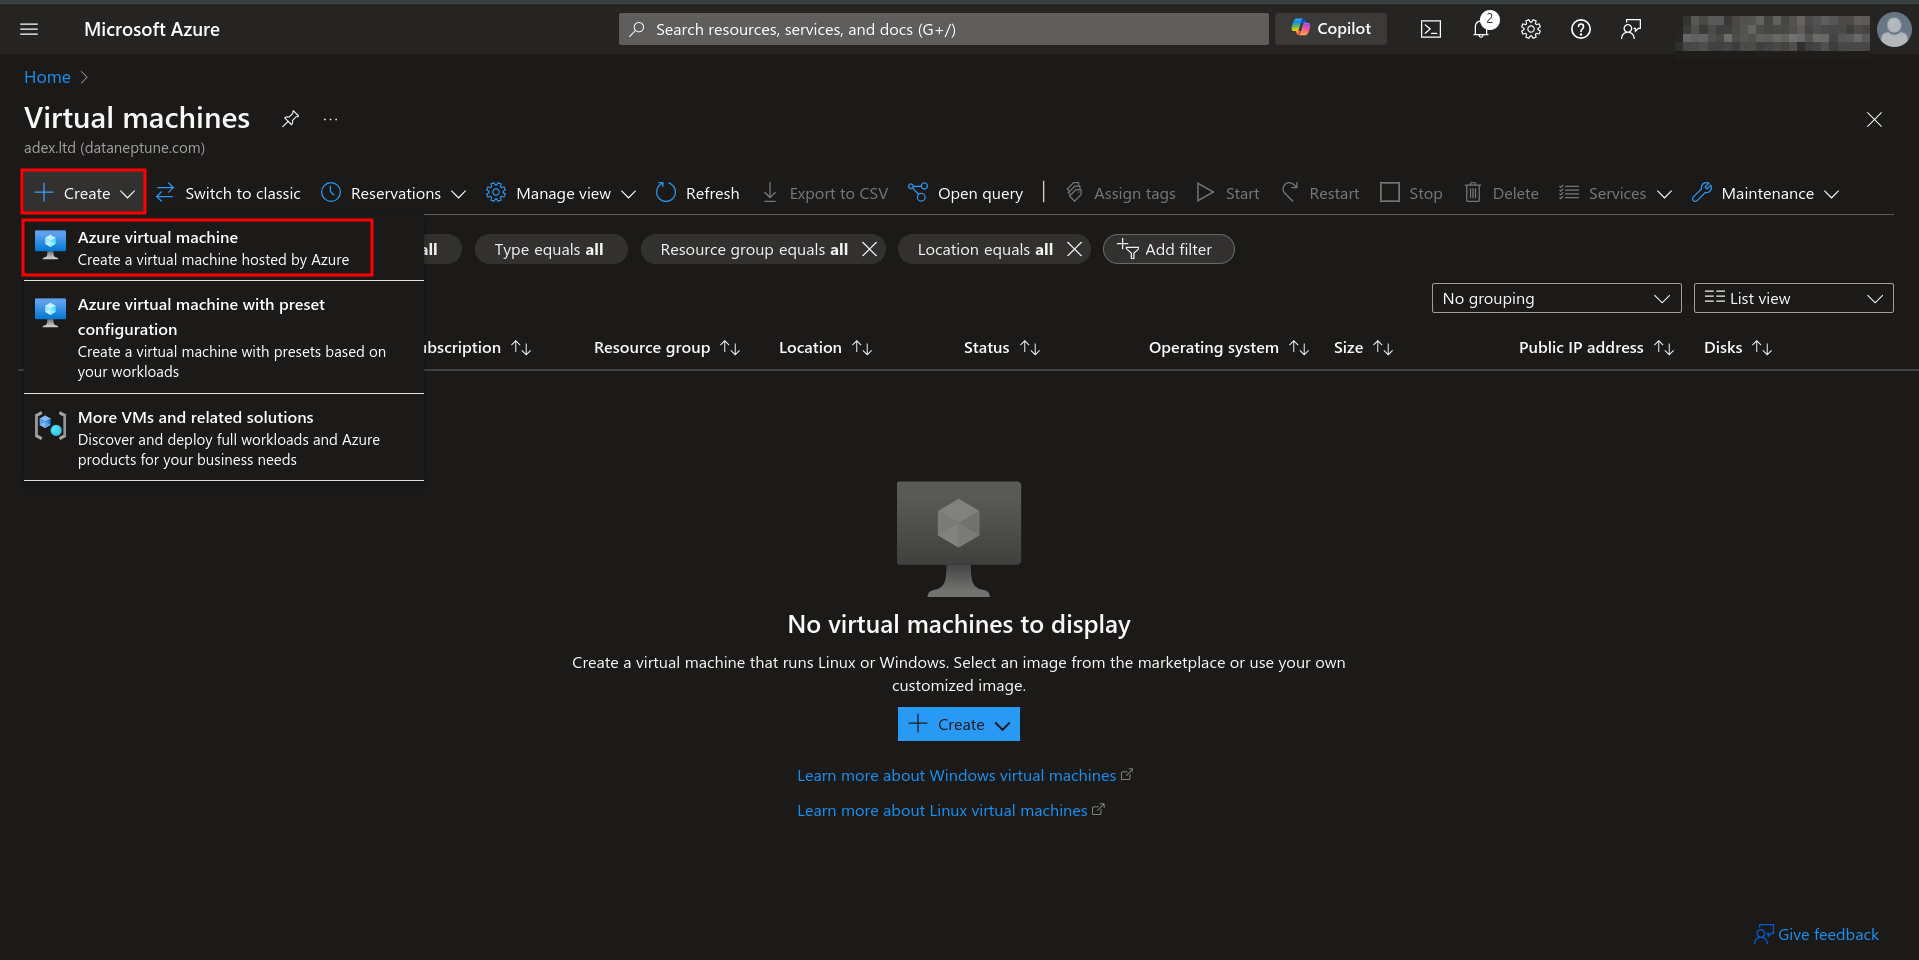
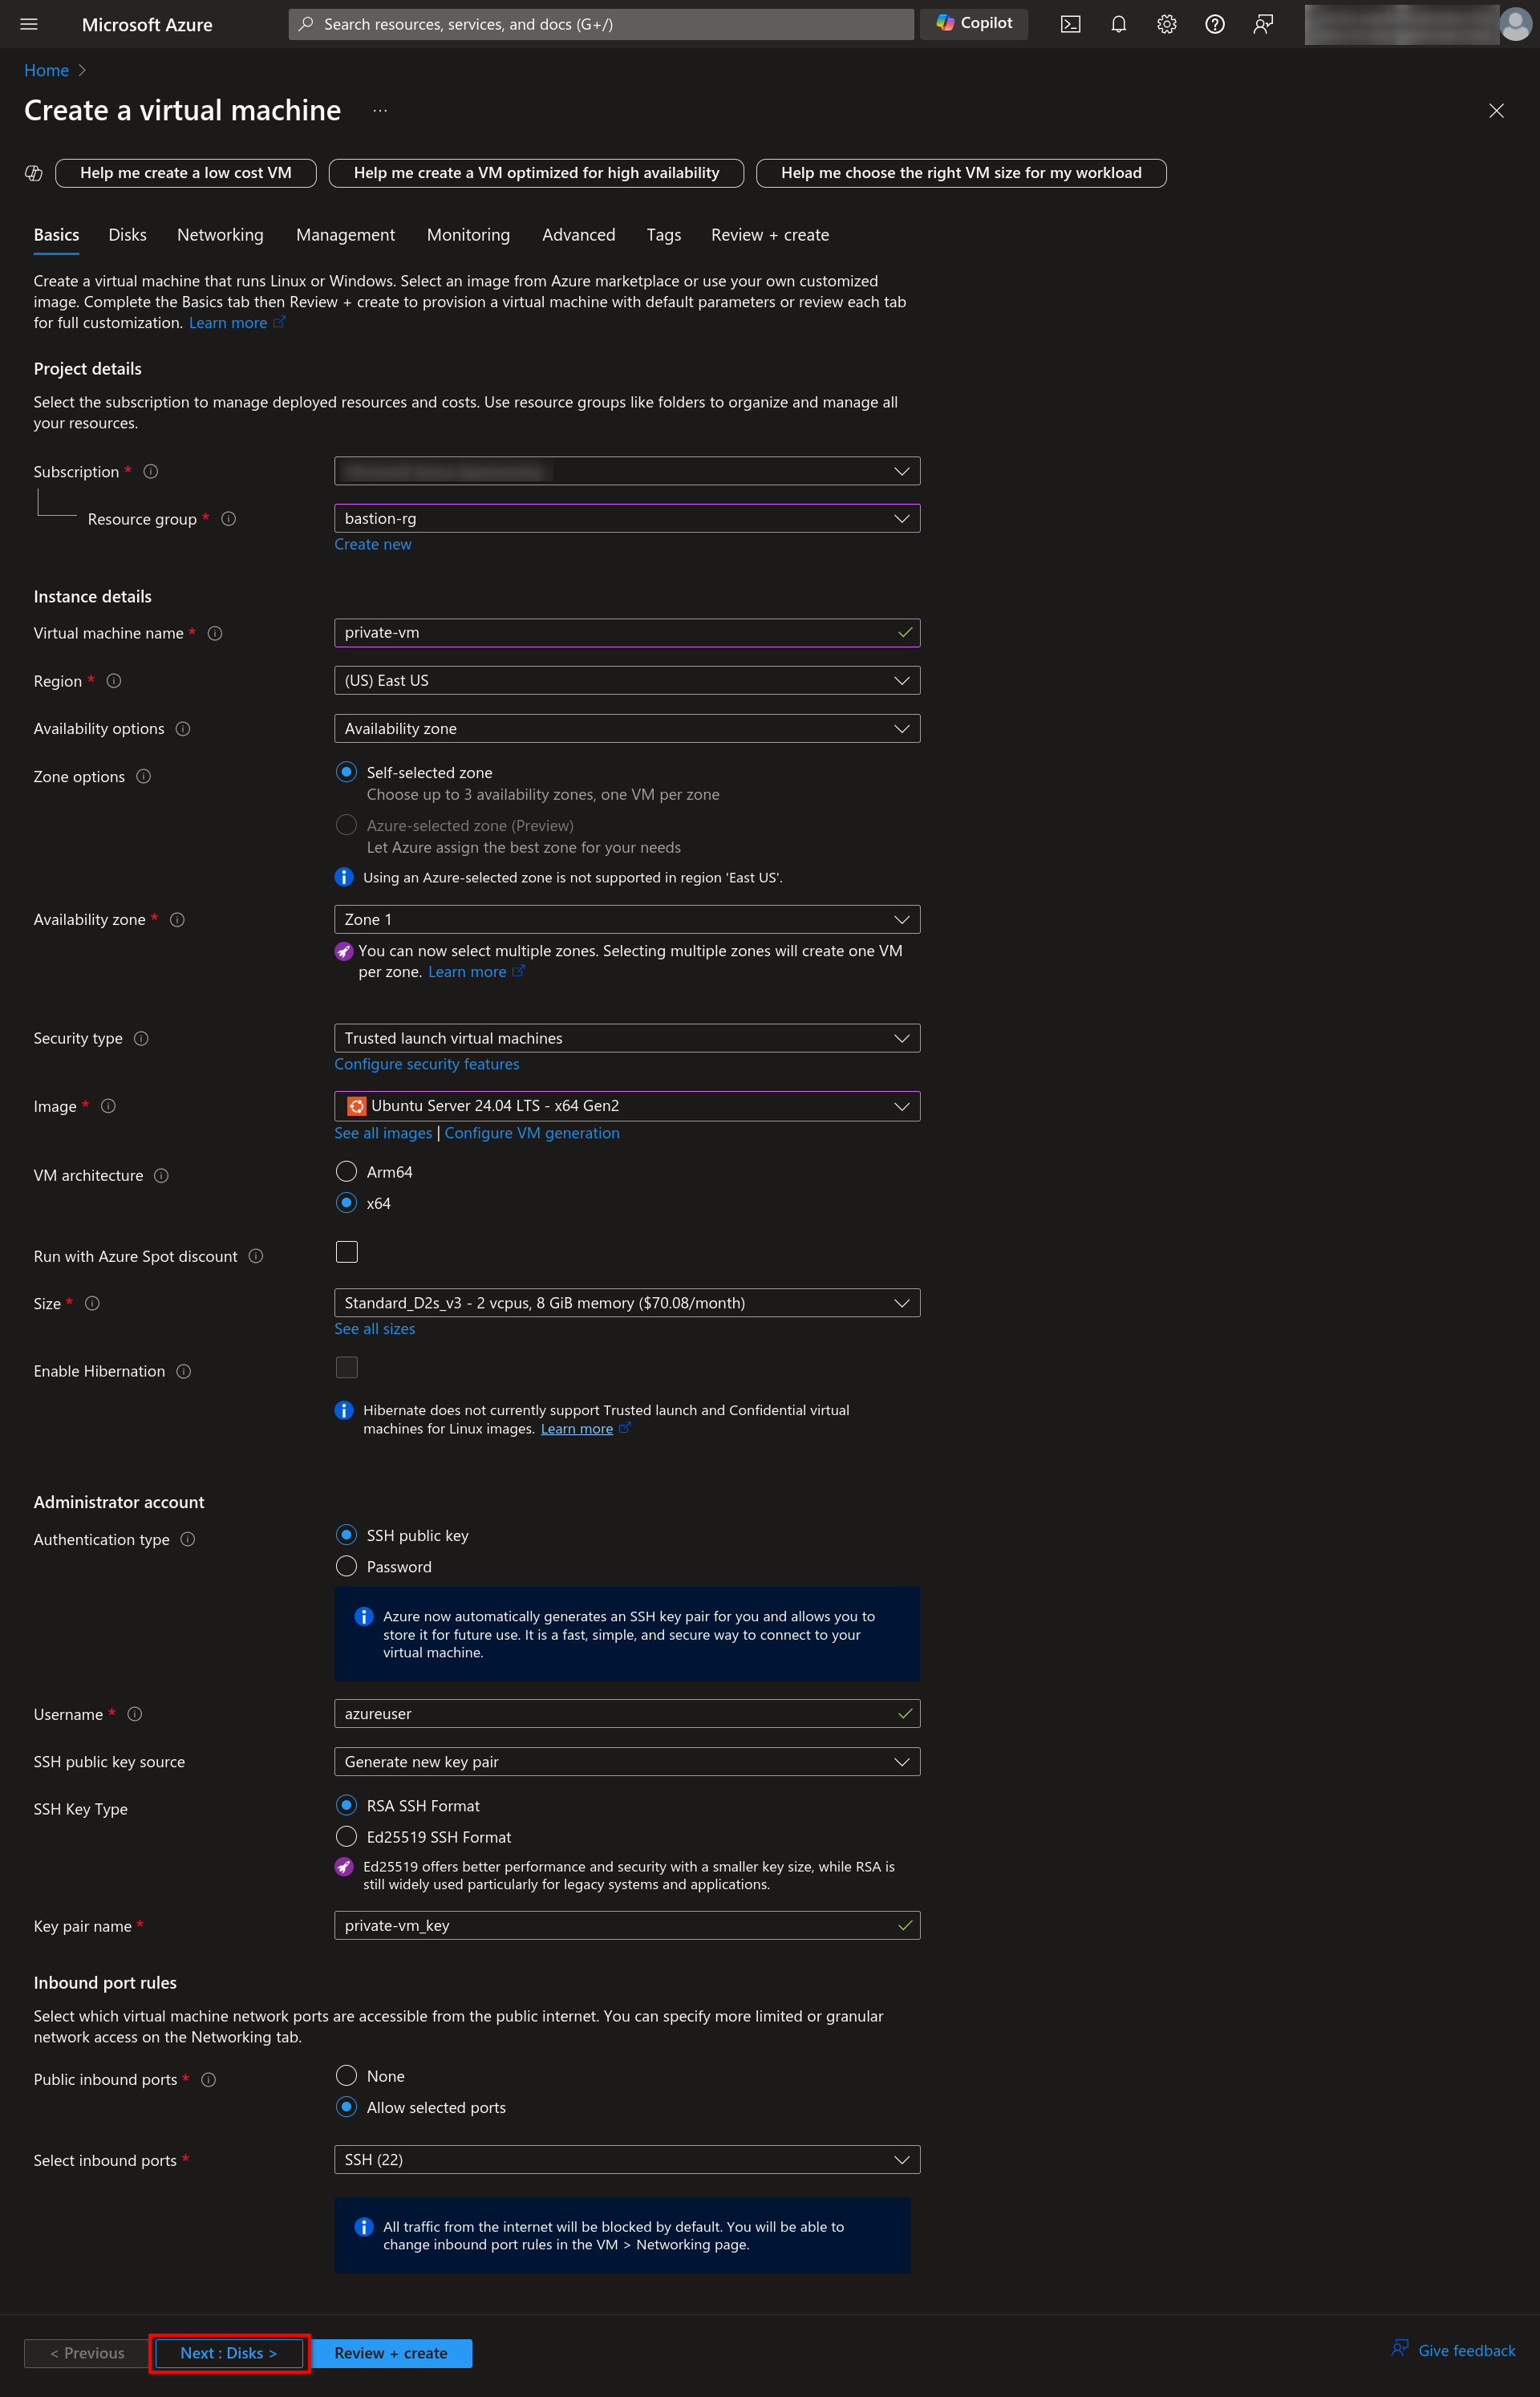
1.3 Select Subscription and Resource Group. Leave other fields as default. Click on “Next: Disks.”
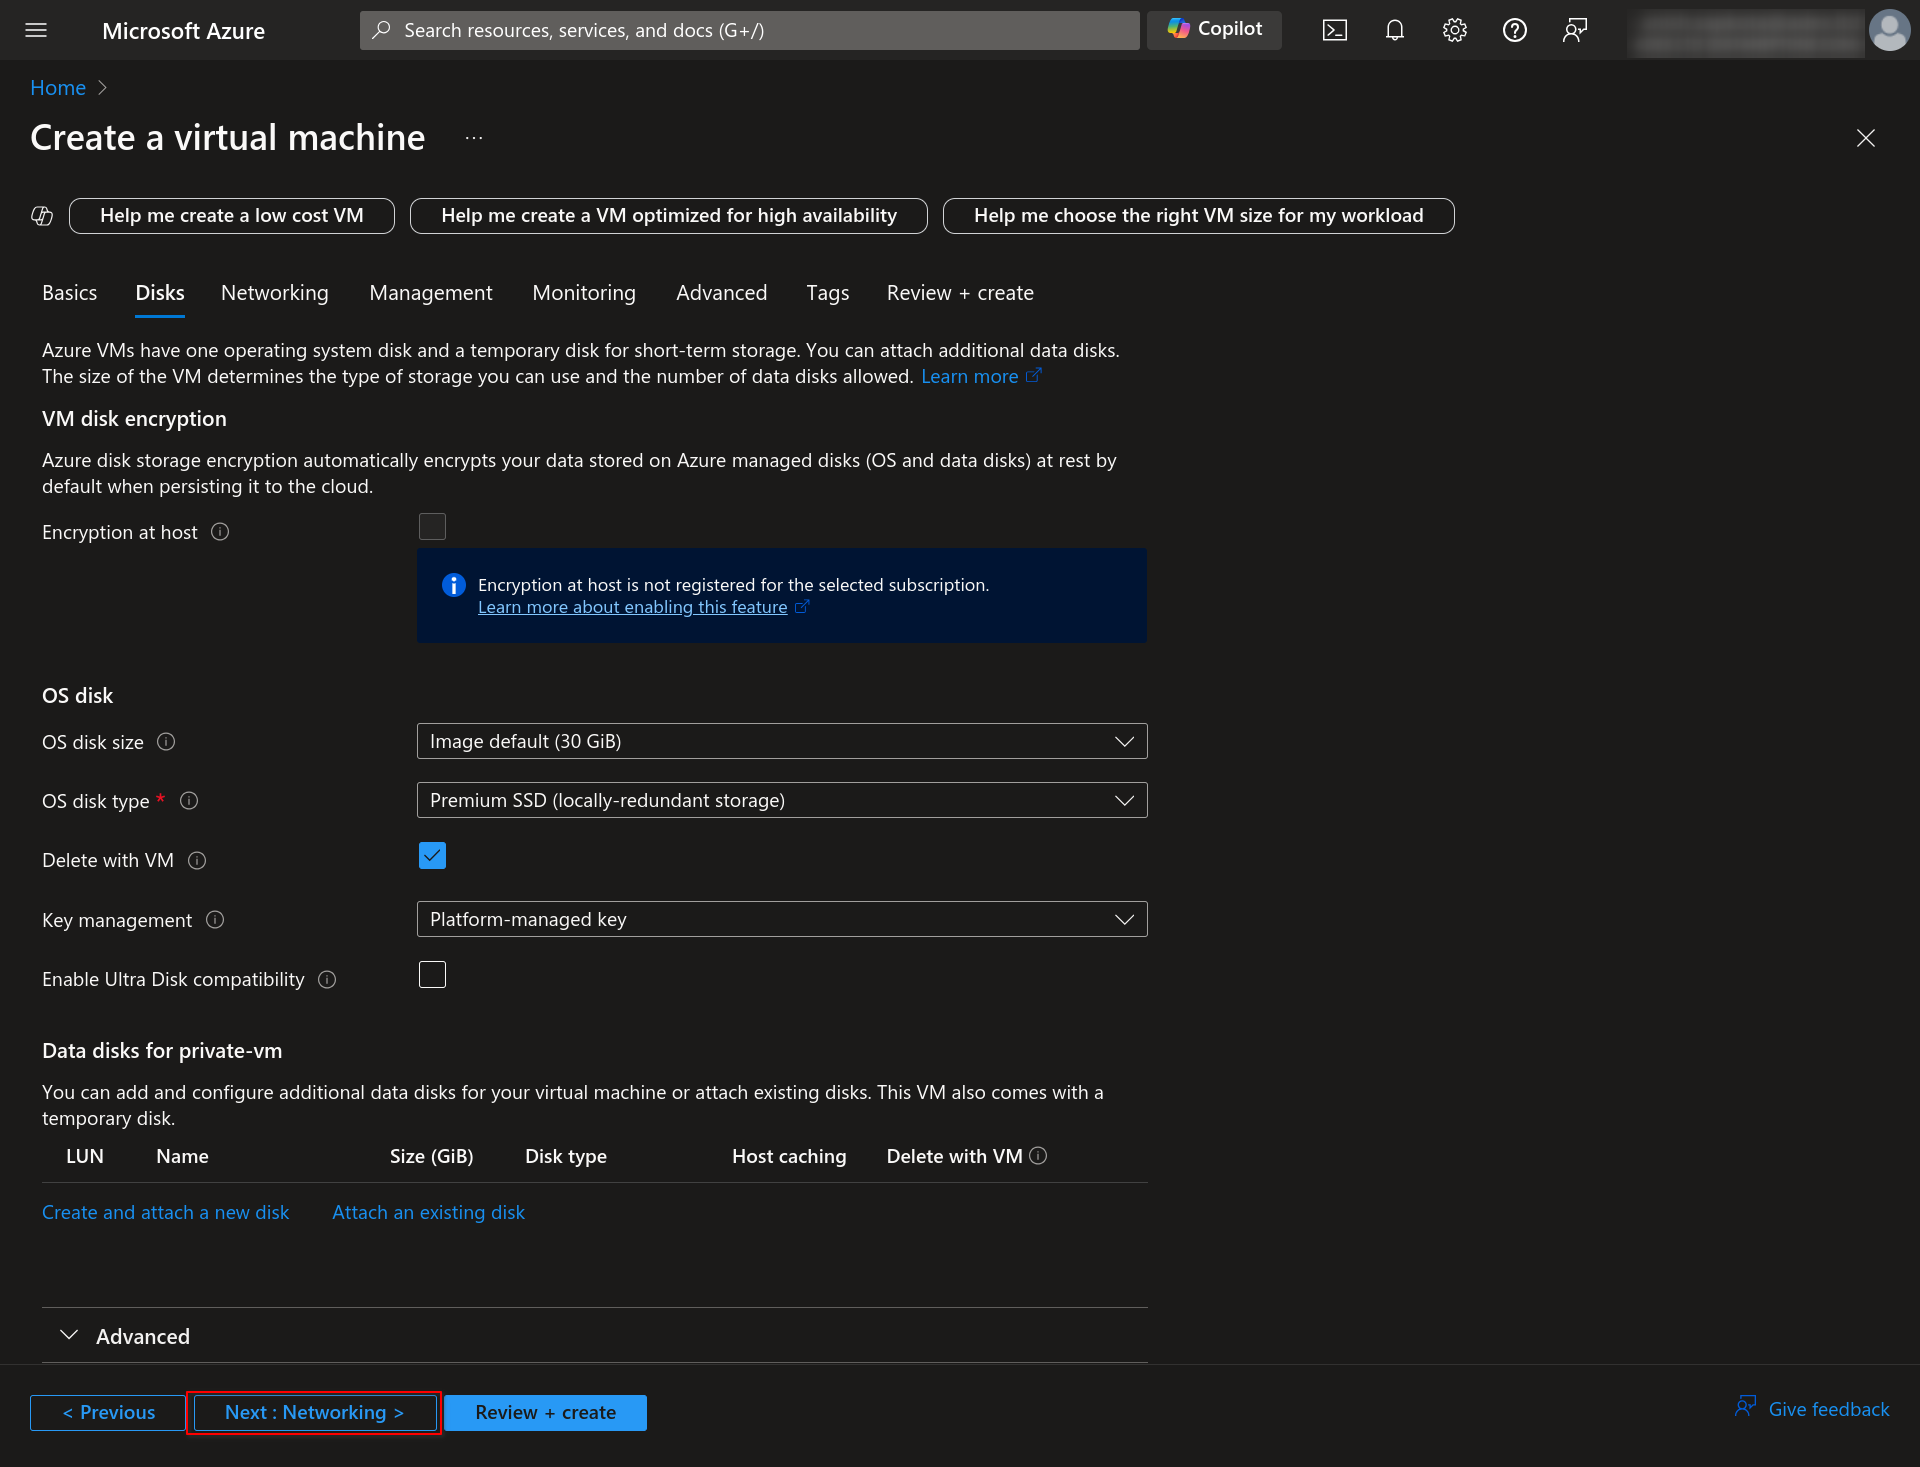
1.4 In the Disks section, leave all fields default and click the Next: Networking button.
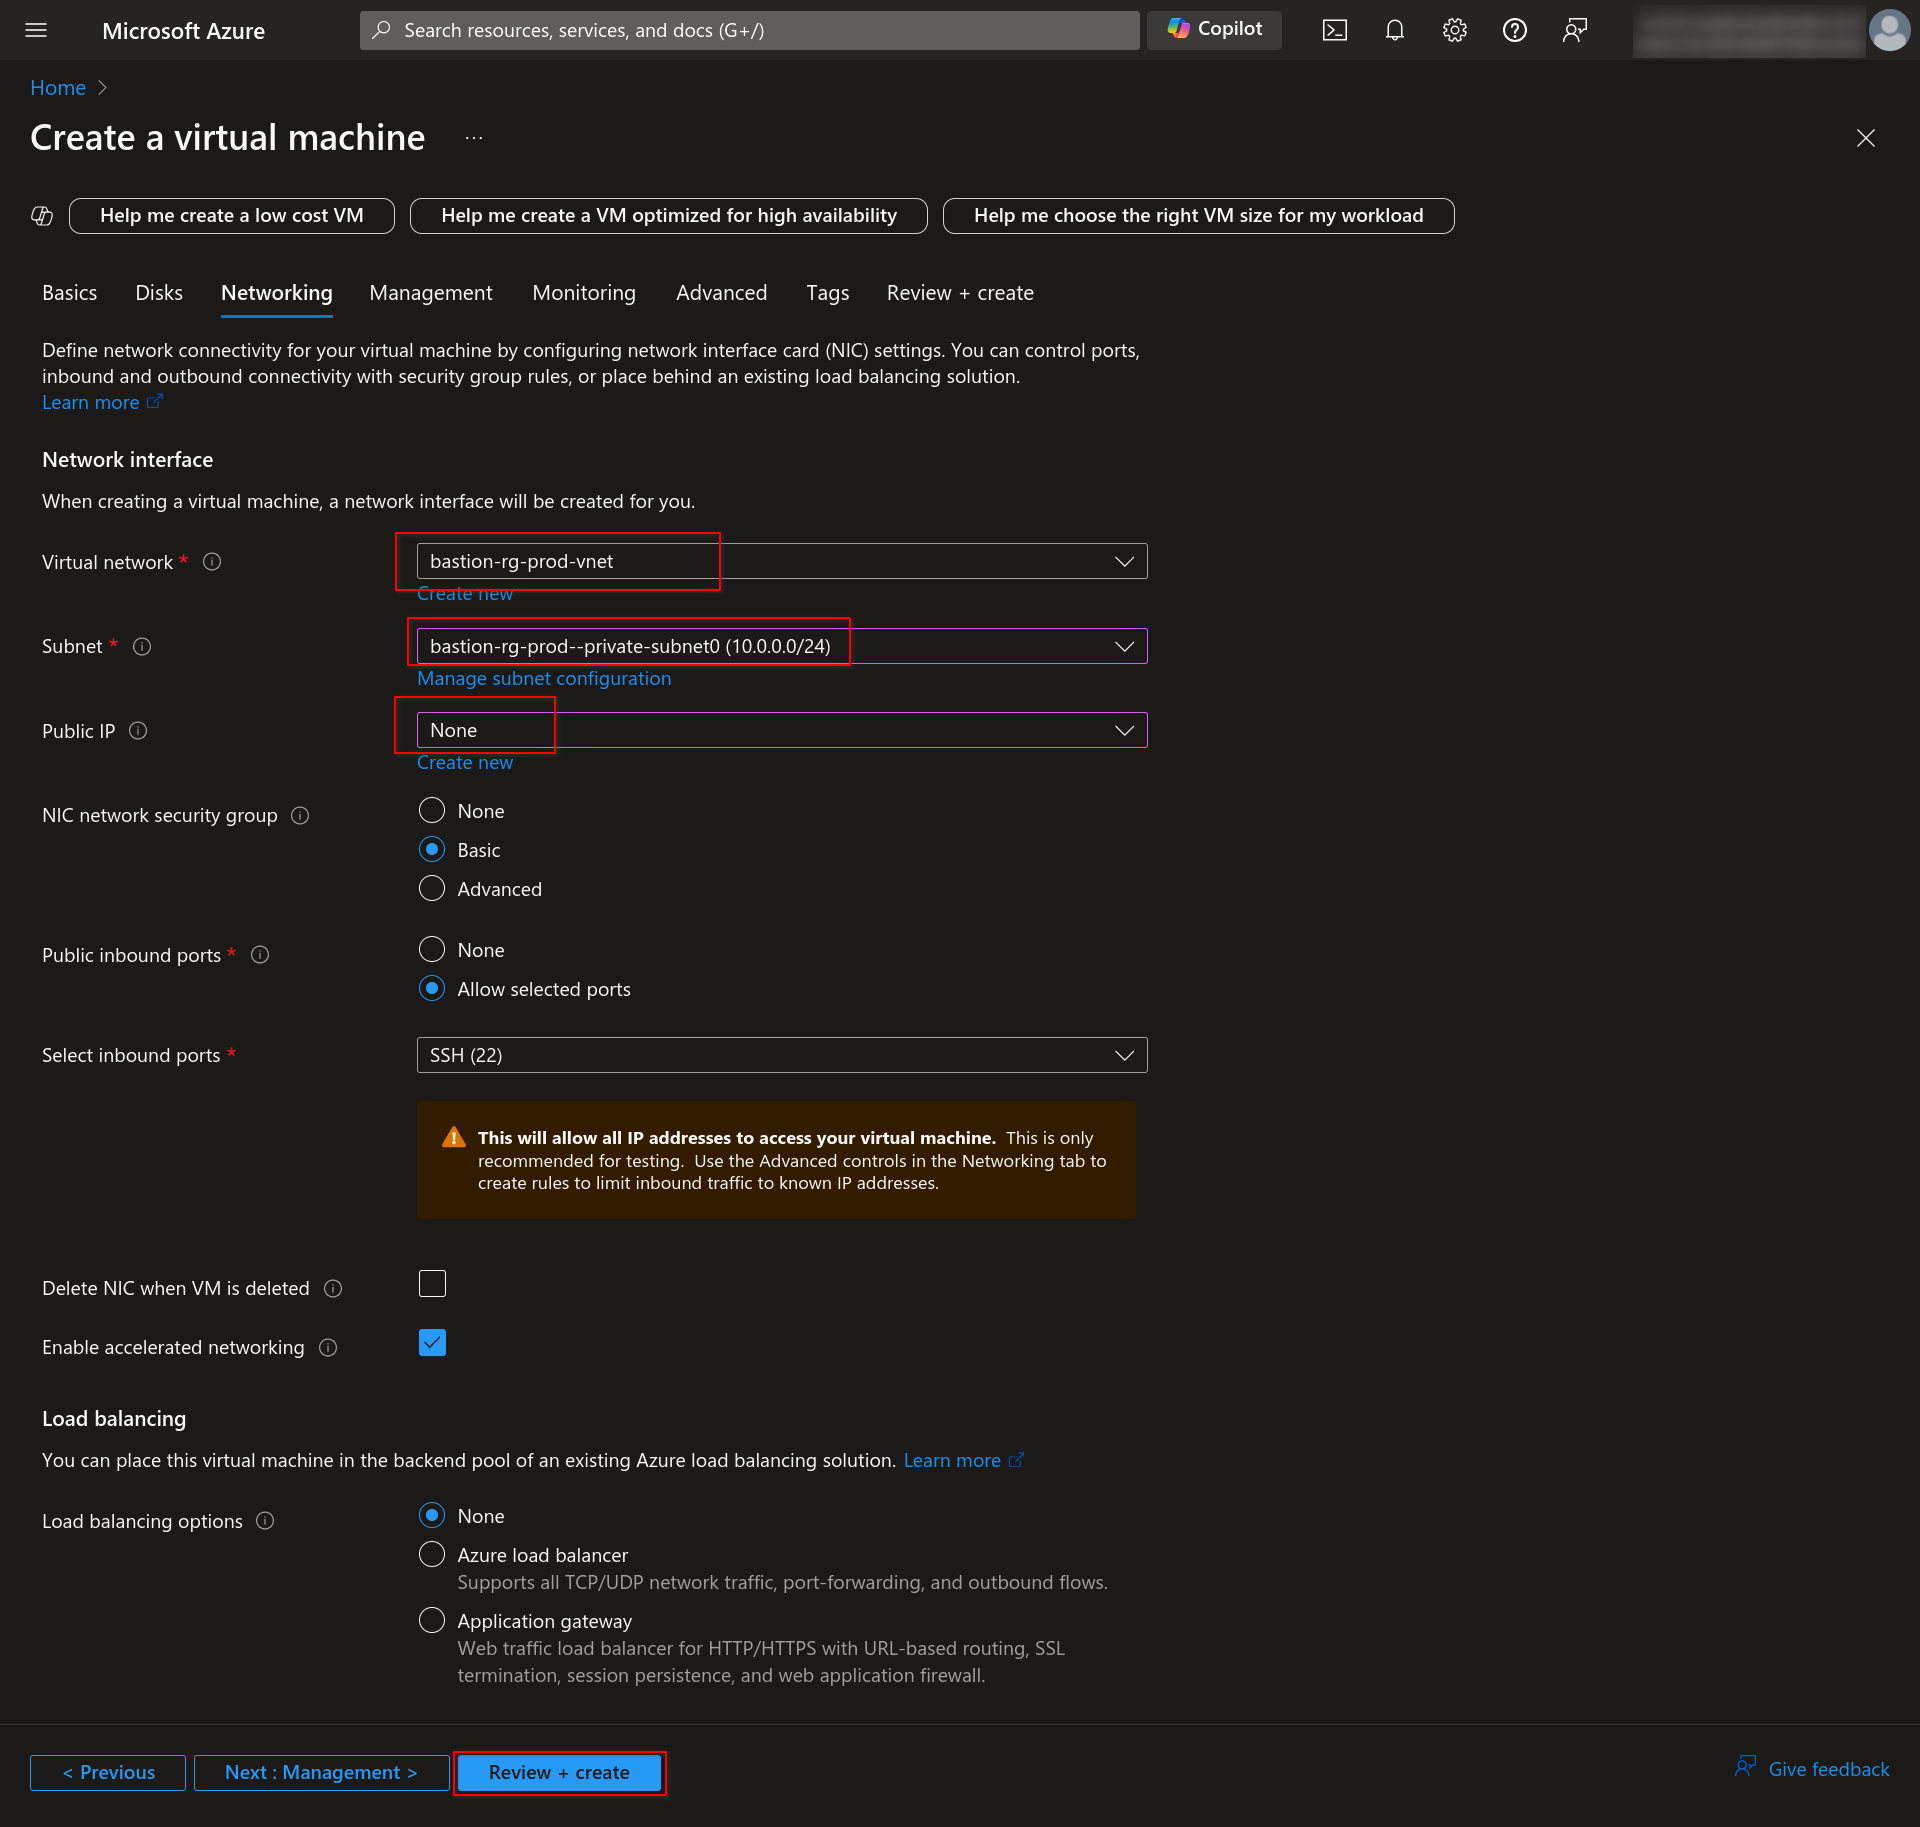
1.5 In the Networking section, select the Virtual Network you have created and choose a private subnet. Also, disable the Public IP. Then click on the “Review + Create” button.
1.6 Finally, verify your VM details and click on Create.
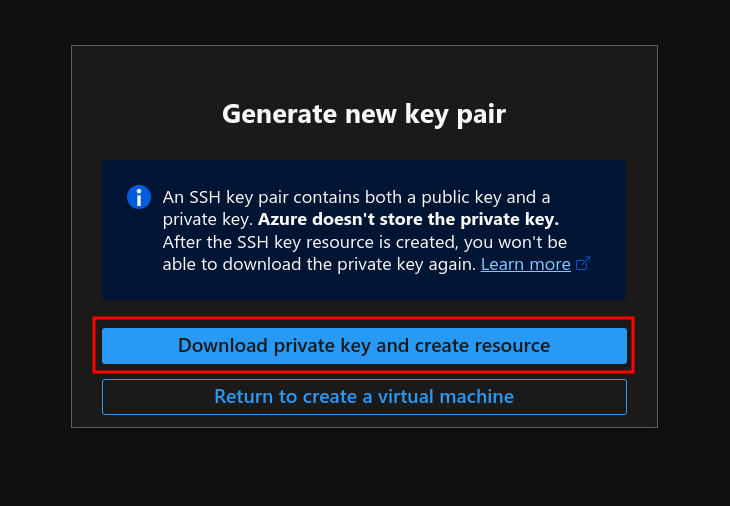
1.7 You will be prompted to download the private key during the Virtual Machine’s creation. Click on the Download button and keep it safe. We will need it later.
2. Create Azure Bastion
2.1 The process is the same as creating a VM in Azure Portal earlier: Go to Azure Portal > Bastion and click “Create.”
2.2 Choose your preferred Tier. You need at least a Standard Tier to connect to the server via AZ CLI. Select the same Virtual network as earlier and select AzureBastionSubnet as its subnet, leaving the other fields default.
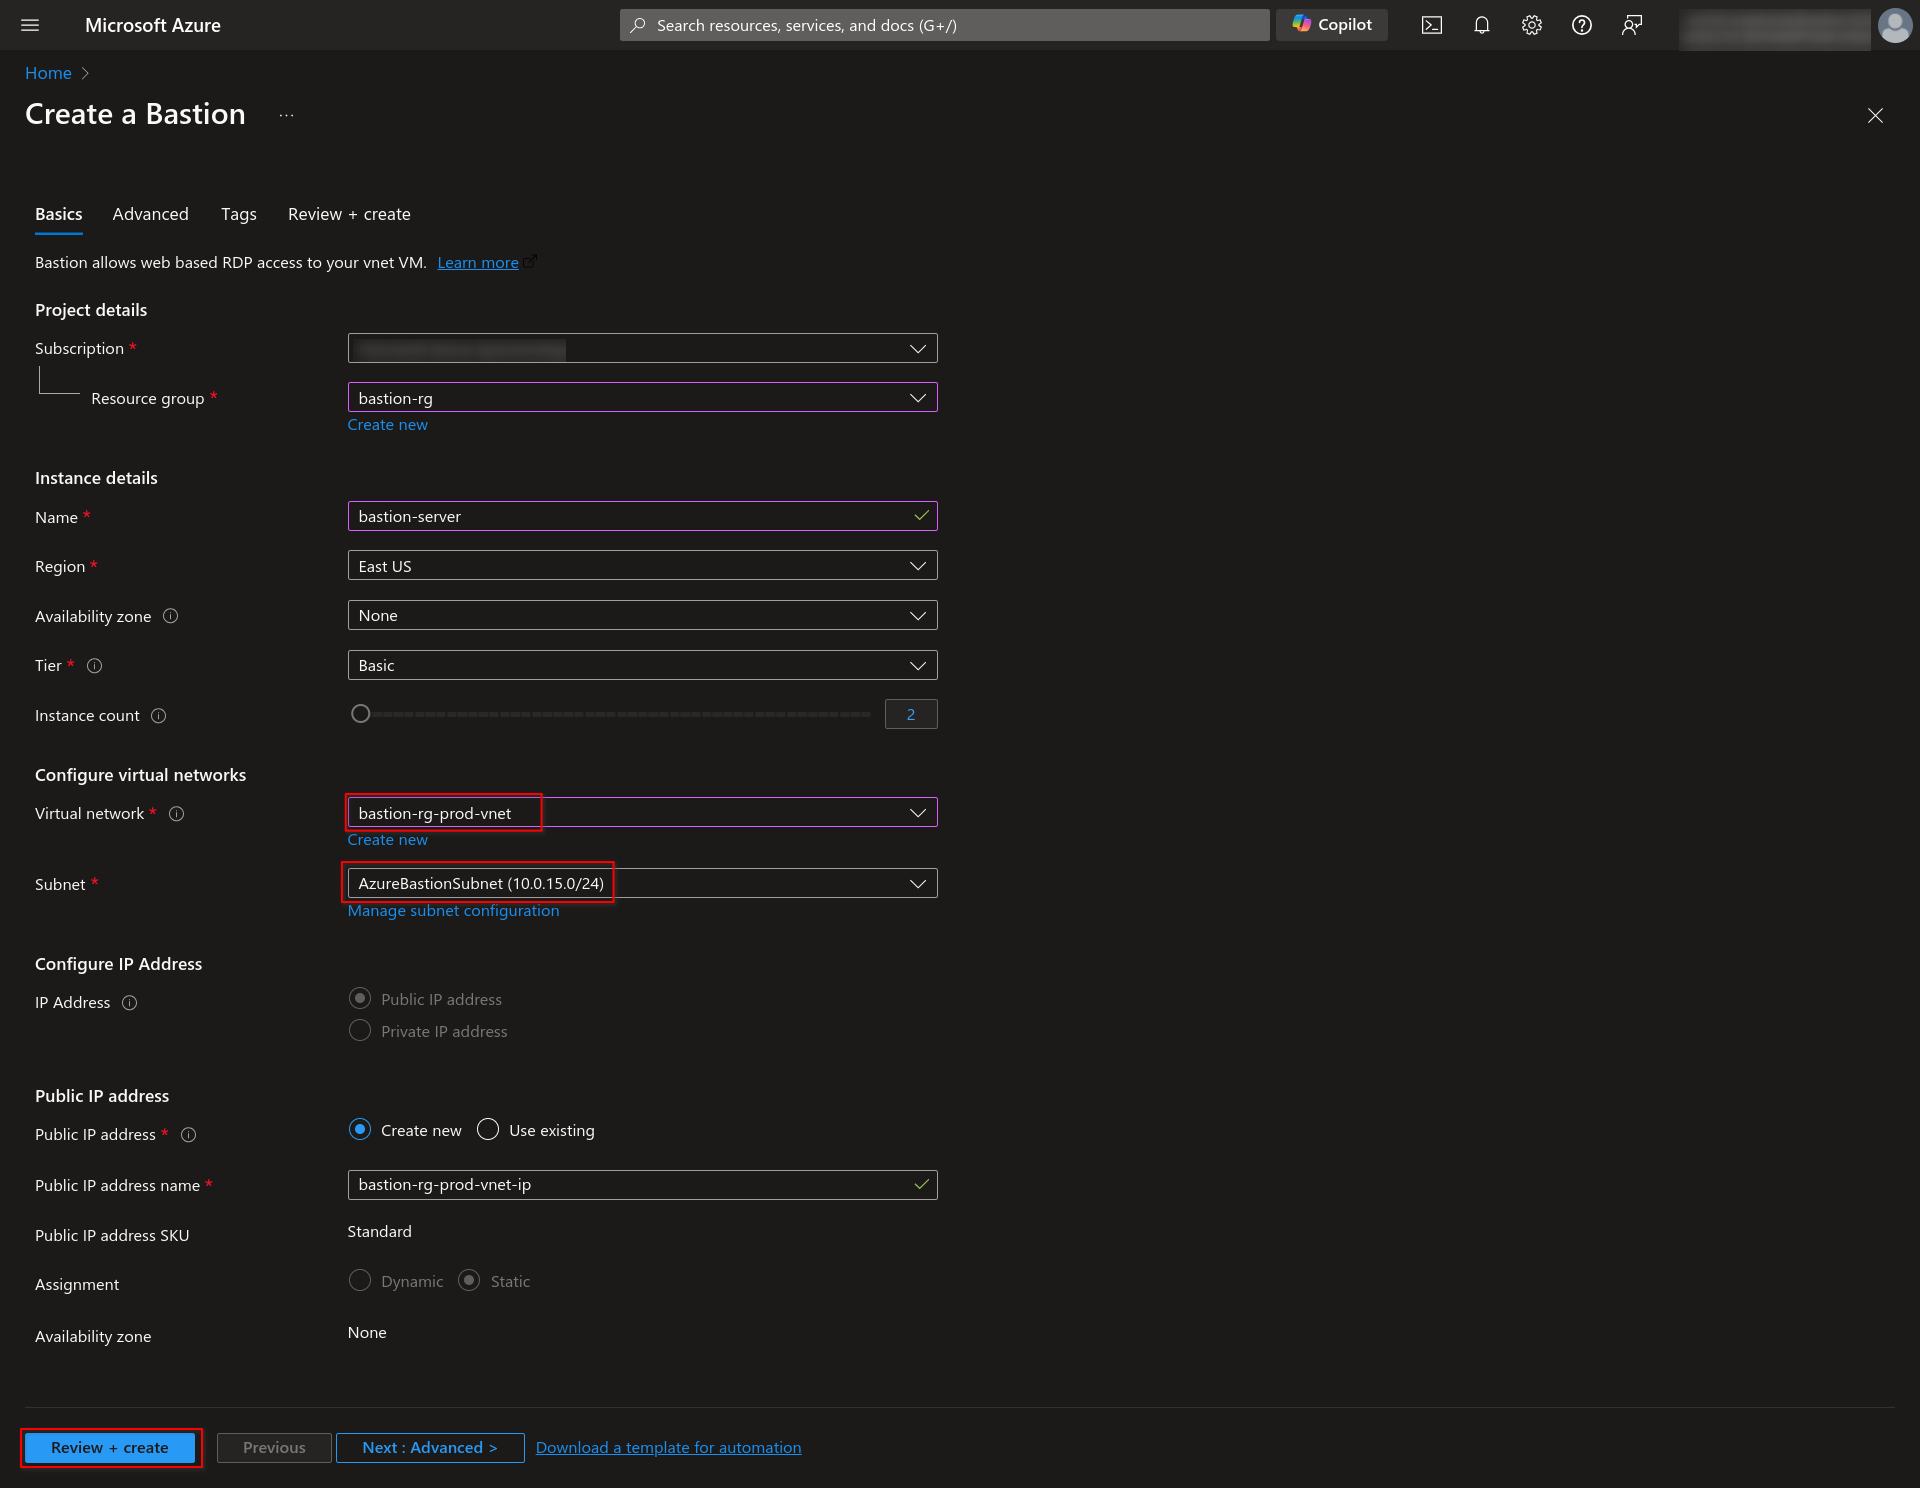
2.3 Click on Review+create, and after successful validation, click “Create.”

3. Connect to VM using Azure Bastion
As we have our Virtual Machine (VM) and Azure Bastion ready, there are two methods by which we can connect to the VM using Azure Bastion: (a) Azure Portal and (b) Azure CLI.
(A) Using Azure Portal
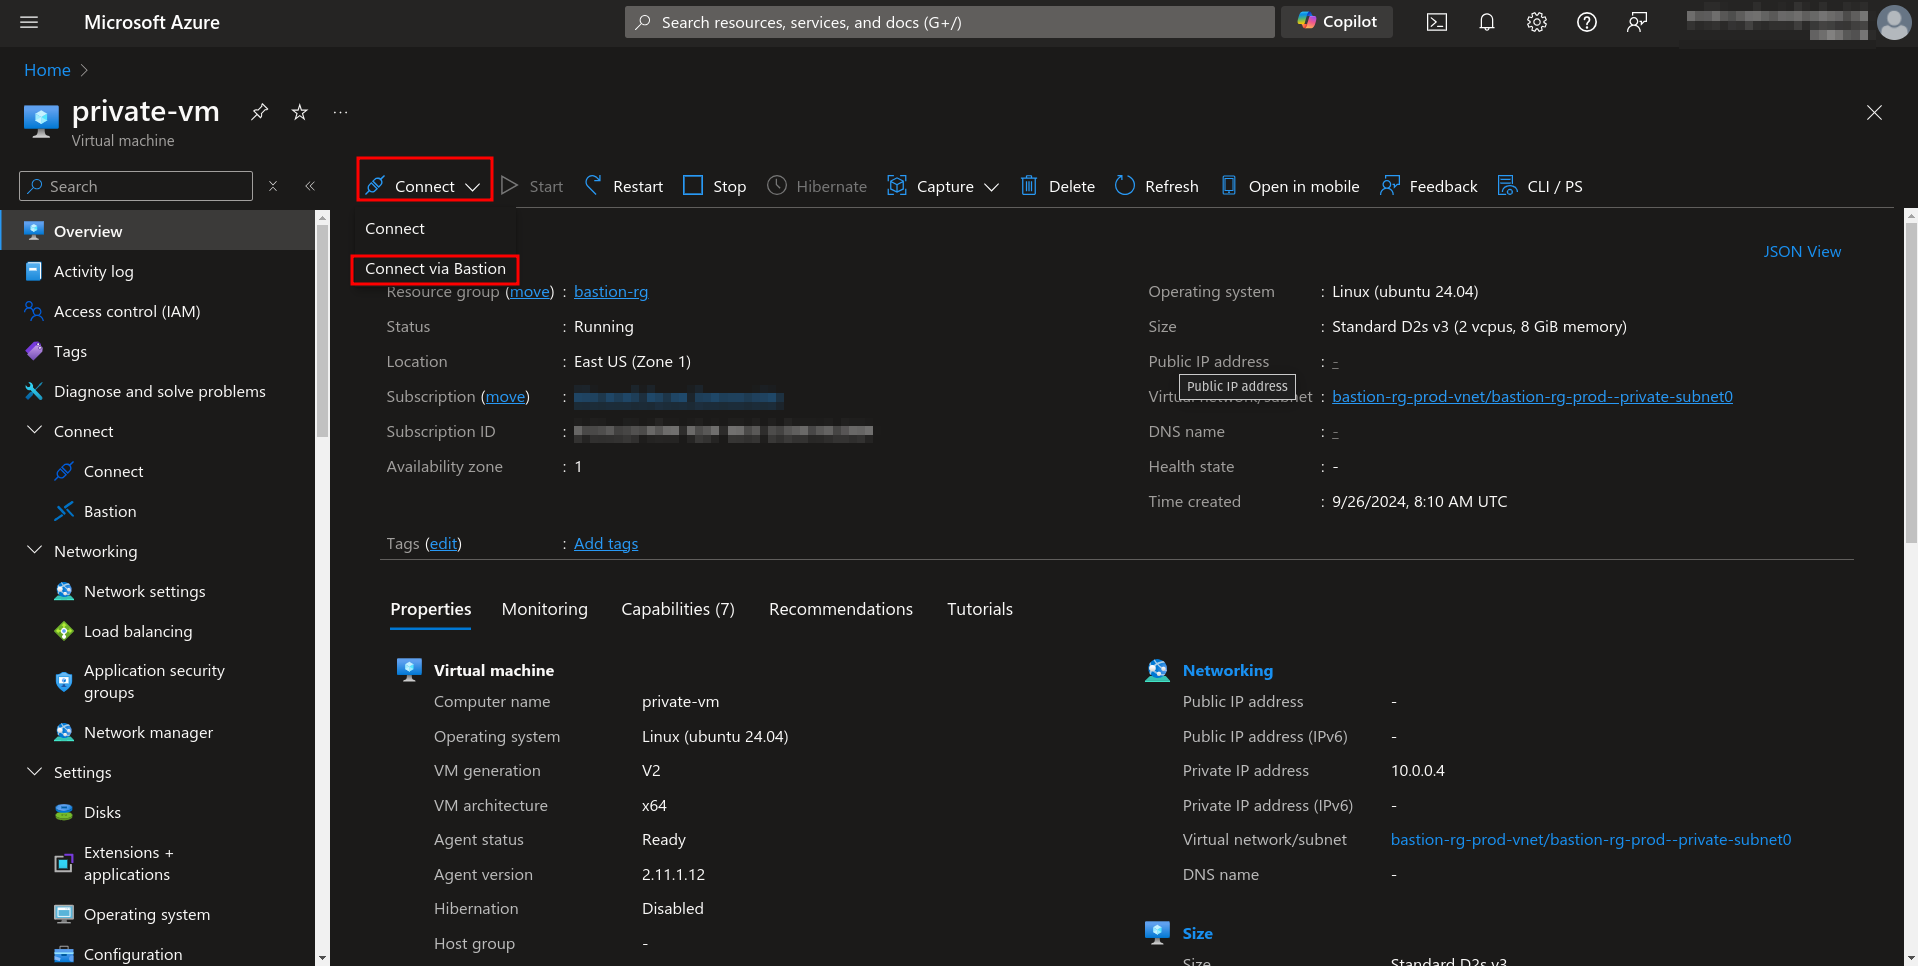
1. Go to the Virtual machine we created earlier.
2. Click on Connect > Connect via Bastion.
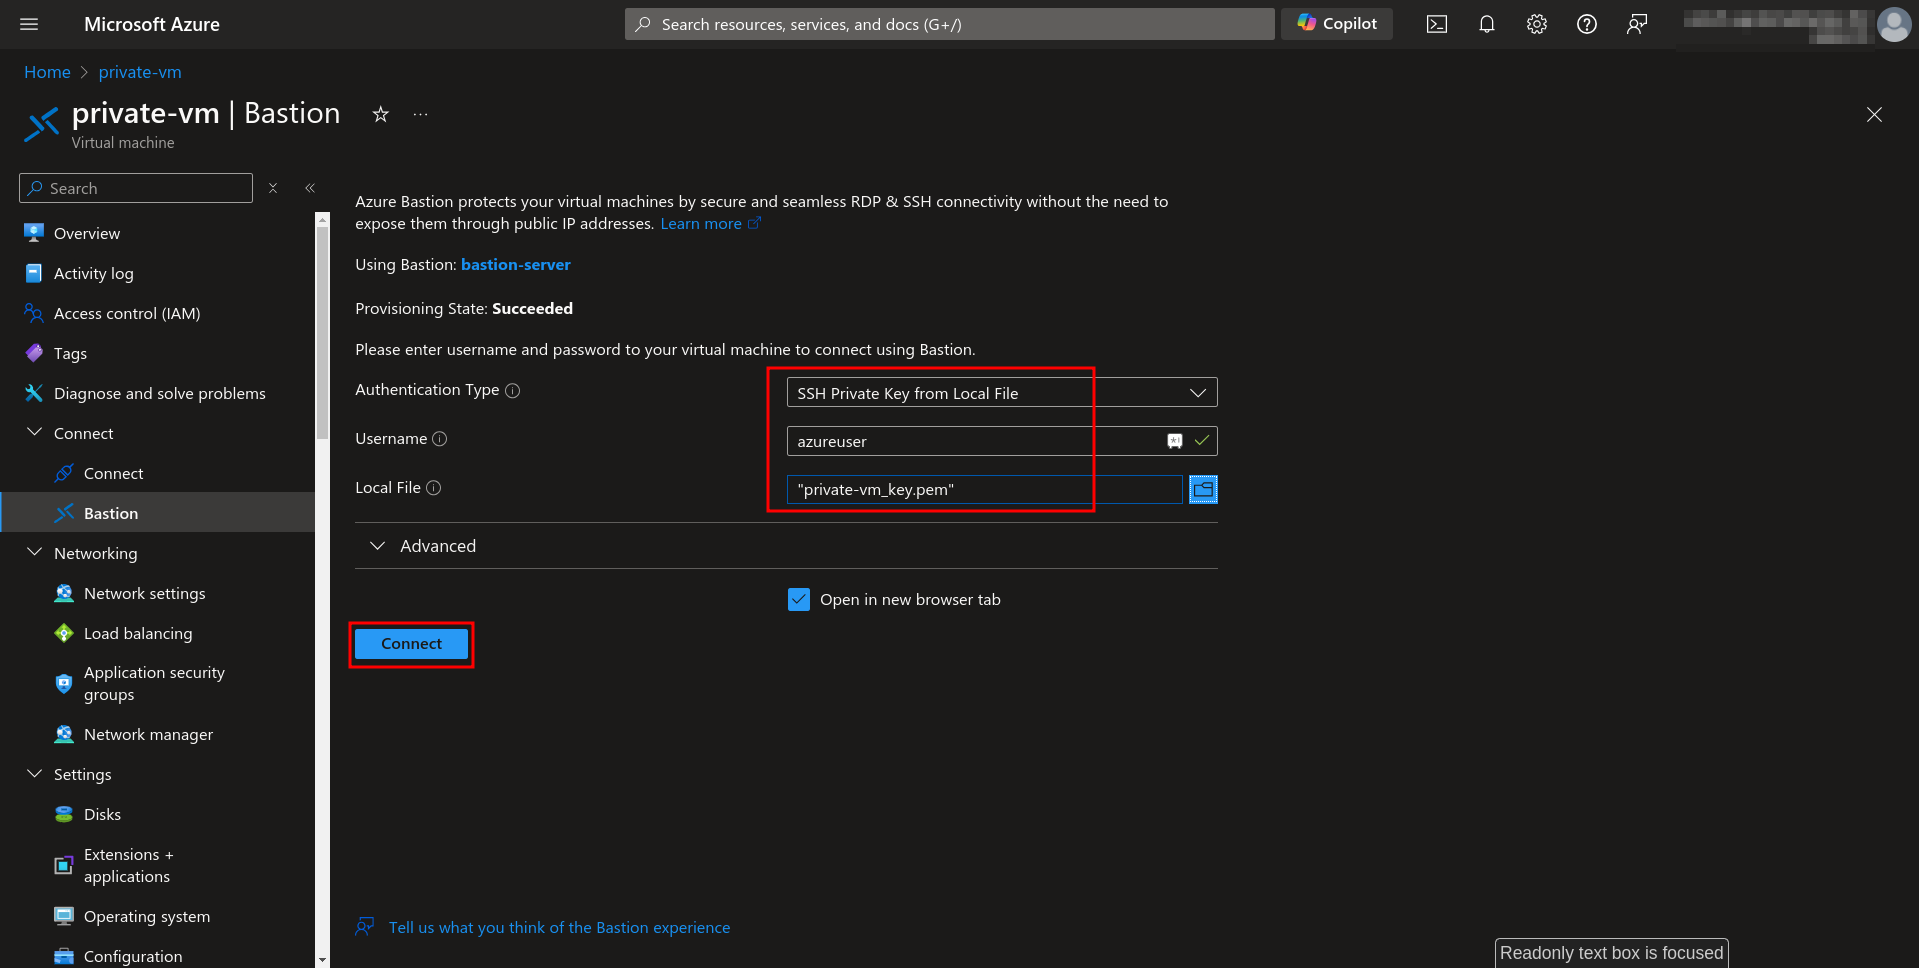
3. You will be required to fill in authentication details.
Select SSH Private Key from Local File as the Authentication Type and browse the previously downloaded private key file in the Local File section.
Click on the Connect button.
4. A new tab will open where you will get into the CLI of the private server.
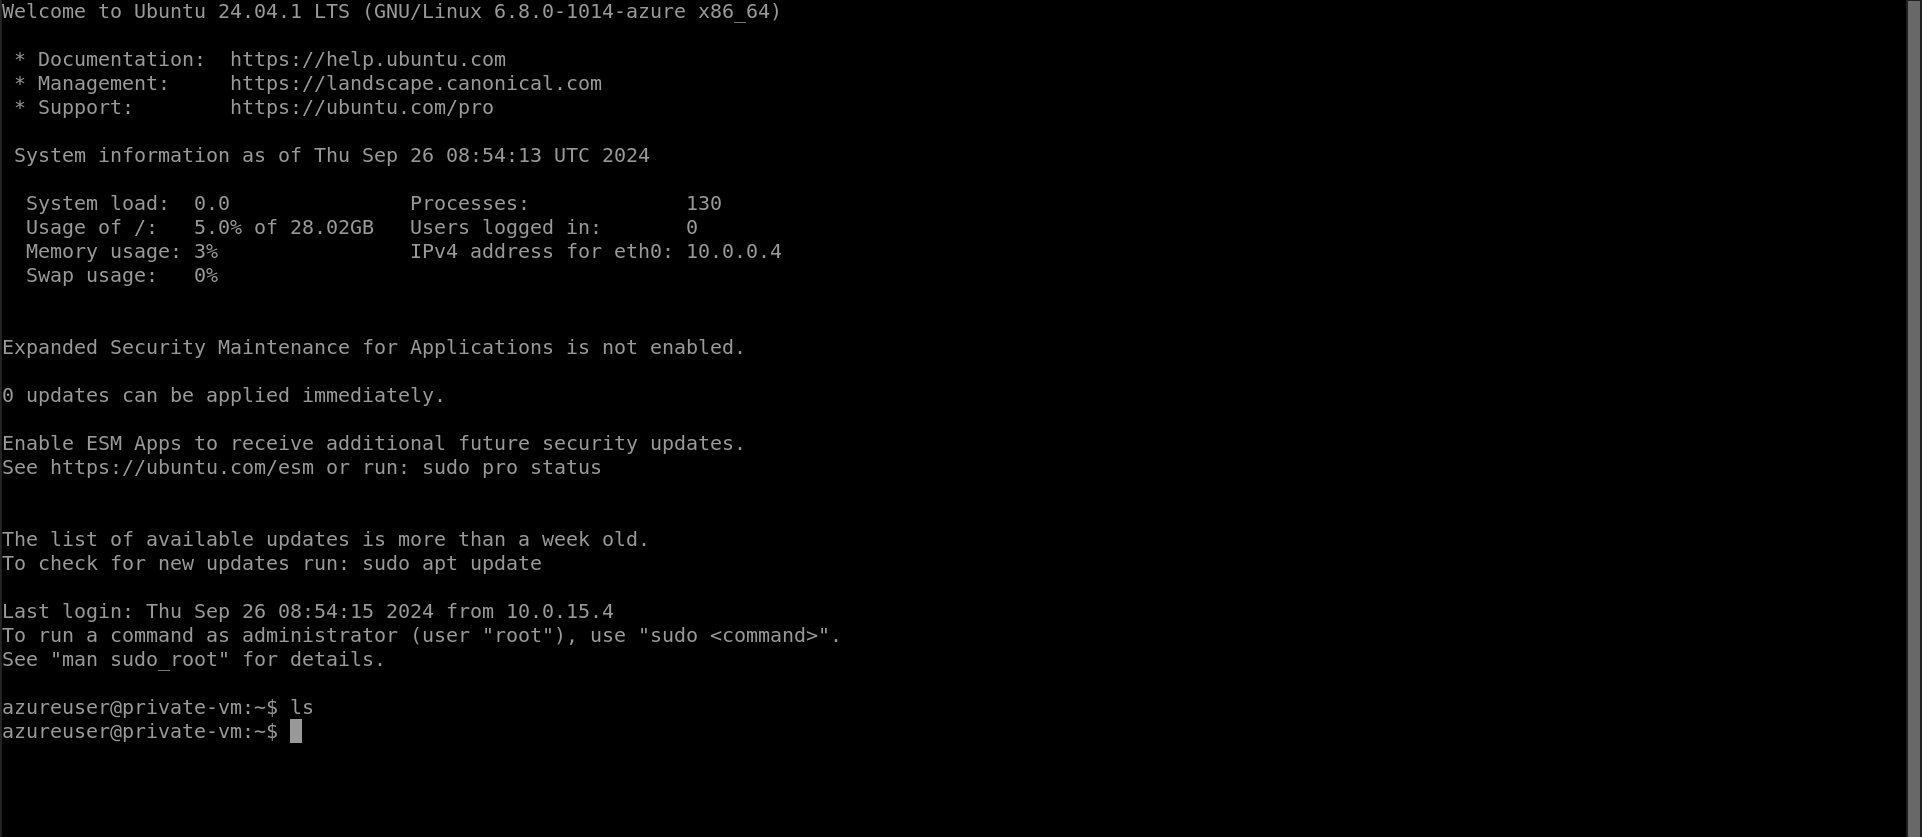
You have successfully connected to the VM using Azure Bastion with the Azure portal.
(B) Using Azure CLI
Requires Standard or Premium Azure Bastion.
1. Install Azure CLI and required AZ extensions
curl -sL https://aka.ms/InstallAzureCLIDeb | sudo bash
az extension add -n bastion
2. Log in to Azure from a public server
az login --identity3. Use AZ CLI to connect to the private server from the public server
az network bastion ssh --name --resource-group --target-resource-id "/subscriptions//resourceGroups//providers/Microsoft.Compute/virtualMachines/" --auth-type ssh-key --username --ssh-key Finally, we will be connected to the Private Server.
Conclusion
Azure Bastion Host is a powerful tool for securely accessing your private Azure VMs without exposing them to the public Internet. This service can significantly improve the security of your infrastructure while maintaining easy and seamless access to your servers.


