
In web development, it’s essential to maintain a growing and consistent database schema. The database schema needs to be frequently changed as applications expand, new features are added, performance is improved, and errors are addressed. Many database migration tools are available, but the most useful and most often used option for handling this modification is Alembic.
This article will explain how to configure and use Alembic for database migrations in the FastAPI project. This guide will give you a clear route forward, regardless of whether you’re just getting started or want to improve what you’re doing.
Note: If you are new to Alembic, you can learn more about it here. To setup Poetry, visit the Poetry documentation.
What is Alembic?
Alembic is a lightweight database migration tool that allows users to manage changes in the database schema in a version-controlled way. It provides a systematic way for creating, managing, and invoking changes using SQLAlchemy as the underlying engine.
Why Use Alembic with FastAPI?
FastAPI is a modern, high-performance Python framework known for being quick and simple to operate. With FastAPI and Alembic, developers can handle both database migrations and ensure the database schema maintains consistency with the data models.
1. Setting Up Your FastAPI Project
First, you need a FastAPI project. If you don’t have one yet, create a new project directory and set up Poetry:
mkdir fastapi-alembic-demo
cd fastapi-alembic-demo
poetry init
After running poetry init, it will ask for the package name and other values. You can enter all of them or choose as you desire.

Follow the prompts to set up your project. Then, add FastAPI and Uvicorn as dependencies:
poetry add fastapi uvicorn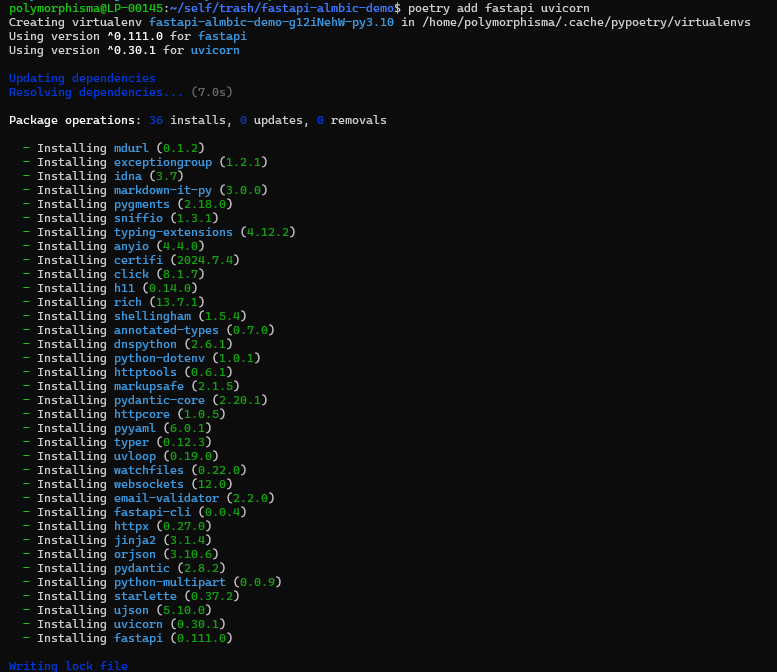
Activate the Poetry environment:
To activate the poetry environment, run the below’s prompt:
poetry shellCreate a basic FastAPI application in main.py:
To create a basic FastAPI application in main.py here's the prompt:
from fastapi import FastAPI

app = FastAPI()

@app.get("/")
def read_root():
    return {"Hello": "World"}
You can test if your FastAPI app works by running uvicorn main:app --host 0.0.0.0 --port 8000 --workers. Then, open any browser and go to localhost:8000.
You should see the following in your browser:

In the terminal, you will see the following:

2. Adding SQLAlchemy and Alembic.
Next, add SQLAlchemy and Alembic as dependencies:
poetry add sqlalchemy alembicCreate a new directory for your database models:
mkdir app
touch app/__init__.py
touch app/models.py
In app/models.py, define a simple SQLAlchemy model:
from sqlalchemy import Column, Integer, String, create_engine
from sqlalchemy.ext.declarative import declarative_base
from sqlalchemy.orm import sessionmaker

SQLALCHEMY_DATABASE_URL = "sqlite:///./test.db"

engine = create_engine(SQLALCHEMY_DATABASE_URL)
SessionLocal = sessionmaker(autocommit=False, autoflush=False, bind=engine)

Base = declarative_base()

class User(Base):
    __tablename__ = "users"

    id = Column(Integer, primary_key=True, index=True)
    name = Column(String, index=True)
    email = Column(String, unique=True, index=True)
    password = Column(String)
Read also: Case Study of AWS Migration for an Innovative Logistics Platform
3. Initializing Alembic
To initialize Alembic in your project, run the given prompts:
alembic init alembicIf alembic init alembic runs successfully, you should get an Alembic folder and follow things in the terminal.

This command creates an alembic directory with a configuration file (alembic.ini) and a migrations environment script (env.py).
4. Configuring Alembic
Edit the alembic.ini file to point to your database. Update the sqlalchemy.url configuration:
sqlalchemy.url = sqlite:///./test.dbIn alembic/env.py, import your SQLAlchemy Base and set up the target metadata:
from logging.config import fileConfig

from sqlalchemy import engine_from_config
from sqlalchemy import pool

from alembic import context
from app.models import Base

# this is the Alembic Config object, which provides
# access to the values within the .ini file in use.
config = context.config

# Interpret the config file for Python logging.
# This line sets up loggers basically.
fileConfig(config.config_file_name)

# add your model's MetaData object here
# for 'autogenerate' support
# from myapp import mymodel
# target_metadata = mymodel.Base.metadata
target_metadata = Base.metadata

# other values from the config, defined by the needs of env.py,
# can be acquired:
# my_important_option = config.get_main_option("my_important_option")
# ... etc.


def run_migrations_offline():
    """Run migrations in 'offline' mode.

    This configures the context with just a URL
    and not an Engine, though an Engine is also acceptable
    here. By skipping the Engine creation we don't need
    a DBAPI to be available.

    Calls to context.execute() here emit the given string to the
    script output.

    """
    url = config.get_main_option("sqlalchemy.url")
    context.configure(
        url=url,
        target_metadata=target_metadata,
        literal_binds=True,
        dialect_opts={"paramstyle": "named"},
    )

    with context.begin_transaction():
        context.run_migrations()


def run_migrations_online():
    """Run migrations in 'online' mode.

    In this scenario, we need to create an Engine
    and associate a connection with the context.

    """
    connectable = engine_from_config(
        config.get_section(config.config_ini_section),
        prefix="sqlalchemy.",
        poolclass=pool.NullPool,
    )

    with connectable.connect() as connection:
        context.configure(
            connection=connection, target_metadata=target_metadata
        )

        with context.begin_transaction():
            context.run_migrations()


if context.is_offline_mode():
    run_migrations_offline()
else:
    run_migrations_online()
5. Creating and Applying Migrations
Generate your first migration script:
alembic revision --autogenerate -m "Create users table"You should get the following response:

Alembic will inspect your Base metadata and generate a migration script in the alembic/versions directory. Review the generated script to ensure it accurately represents your changes.
If you inspect the file generated by alembic, it should look like the following:

You can check your migration file in yourpathwheremain.pyis/alembic/versions/*******************.py
After the migration file is generated, run the following to apply the migration to the database.
alembic upgrade head
Instead of using the command line to apply the migration, you can integrate the migration process directly into your FastAPI project. Create a script to run the migration programmatically:
# app/alembic_runner.py
import alembic.config

def run_migration():
    alembicArgs = [
        '--raiseerr',
        'upgrade', 'head',
    ]
    alembic.config.main(argv=alembicArgs)
You can now call run_migration() whenever you need to apply the latest migrations. For example, you might call this function during application startup.
Using Alembic with FastAPI
Now, you can manage your database migrations alongside your FastAPI application. As your application evolves, you can continue to create and apply migrations to keep your database schema in sync with your models.
Example: Adding a New Column
Suppose you want to add a new column to the User model. First, update the model in app/models.py:
class User(Base):
    __tablename__ = "users"

    id = Column(Integer, primary_key=True, index=True)
    name = Column(String, index=True)
    email = Column(String, unique=True, index=True)
    password = Column(String)
    age = Column(Integer)  # New column
Generate a new migration:
alembic revision --autogenerate -m "Add age column to users table"
Another migration file is generated in the alembic/version folder. Review the generated script, then apply the migration.
To apply migration again, run the following:
alembic upgrade head
Or through a Python script:
# Run the migration
from app.alembic_runner import run_migration

run_migration()
Your database schema has now been updated to include the new age column. You can find all the code in the Github: fastapi-alembic
Conclusion
Alembic provides a robust solution for managing database migrations in web applications. Following this article, you can now set up Alembic, generate migrations, and apply them. As you continue to develop and scale your FastAPI projects, Alembic will be a valuable tool in maintaining database consistency.
Happy coding!


