
Deploying applications to the cloud reliably can be challenging due to inconsistent environments, scaling requirements, and manual deployment steps that can cause errors or downtime.
Containerization with Docker standardizes application environments, allowing them to run identically across development and production, while managed AWS services like AWS ECS provide scalable, fault-tolerant hosting for containers. Automation pipelines such as GitHub Actions handle builds and deployments, reducing manual effort and keeping production aligned with code changes.
This guide walks through deploying a Dockerized Python Flask app to AWS ECS using GitHub Actions, creating an end-to-end deployment pipeline that deploys code changes automatically.
Prerequisites
Before proceeding with the steps, ensure you have the following:
- An AWS account with an IAM user having programmatic access (AWS Access Key ID & Secret Access Key) and permissions for ECS, ECR, and IAM.
- A GitHub account with a repository for the project.
- Local setup: Python 3.x, Docker, and Git installed.
- Basic familiarity with Python, Docker, and Git.
Steps To Deploy a Dockerized Python App to AWS ECS Using GitHub Actions
Step 1: Create a Python Flask App
- First, let’s create a project directory on the local machine where the Python app will be created.
mkdir <name-for-python-app> && cd <name-for-python-app>
- Inside the project directory (example: Python-app-for-ECS), create a file named
app.pywith the script below.
from flask import Flask, request, jsonify, render_template_string

app = Flask(__name__)

HTML = """
<h2>What is the capital of France?</h2>
<input id="a"><button onclick="s()">Submit</button>
<p id="r"></p>
<script>
function s() {
  fetch('/answer', {
    method:'POST',
    headers:{'Content-Type':'application/json'},
    body: JSON.stringify({a: document.getElementById('a').value})
  })
  .then(r => r.json())
  .then(d => document.getElementById('r').innerText = d.m)
}
</script>
"""

@app.route('/')
def home():
    return render_template_string(HTML)

@app.route('/answer', methods=['POST'])
def answer():
    a = request.get_json().get('a','').strip().lower()
    if a == 'paris':
        return jsonify(m='Correct!')
    return jsonify(m=' Wrong! The correct answer is Paris.')

if __name__ == '__main__':
    app.run(host='0.0.0.0', port=5000)
[It creates a lightweight Flask app that delivers an interactive browser-based quiz. Users submit answers through API calls, and the backend responds with JSON messages indicating whether answers are correct or incorrect.]
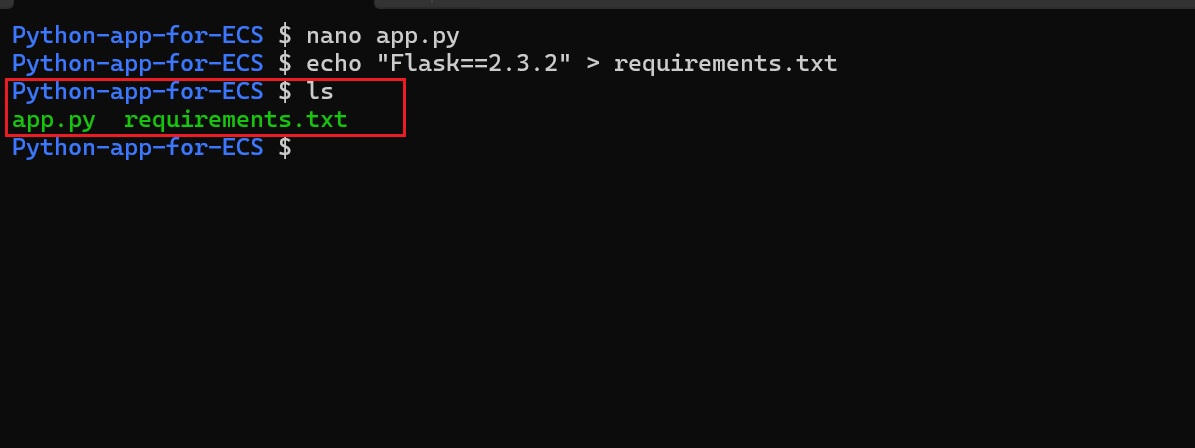
- Create a
requirements.txtfile in the project directory.
Step 2: Dockerize The Python App
With the Python app ready, the next step is to package it into a Docker container. This allows the app to run consistently across different environments, from local development to cloud deployment on AWS ECS.
- Create the Dockerfile inside the project directory where the
app.pyandrequirements.txtfiles are located with the following code:
FROM python:3.11-slim
WORKDIR /app
COPY requirements.txt .
RUN pip install --no-cache-dir -r requirements.txt
COPY app.py .
EXPOSE 5000
CMD ["python", "app.py"]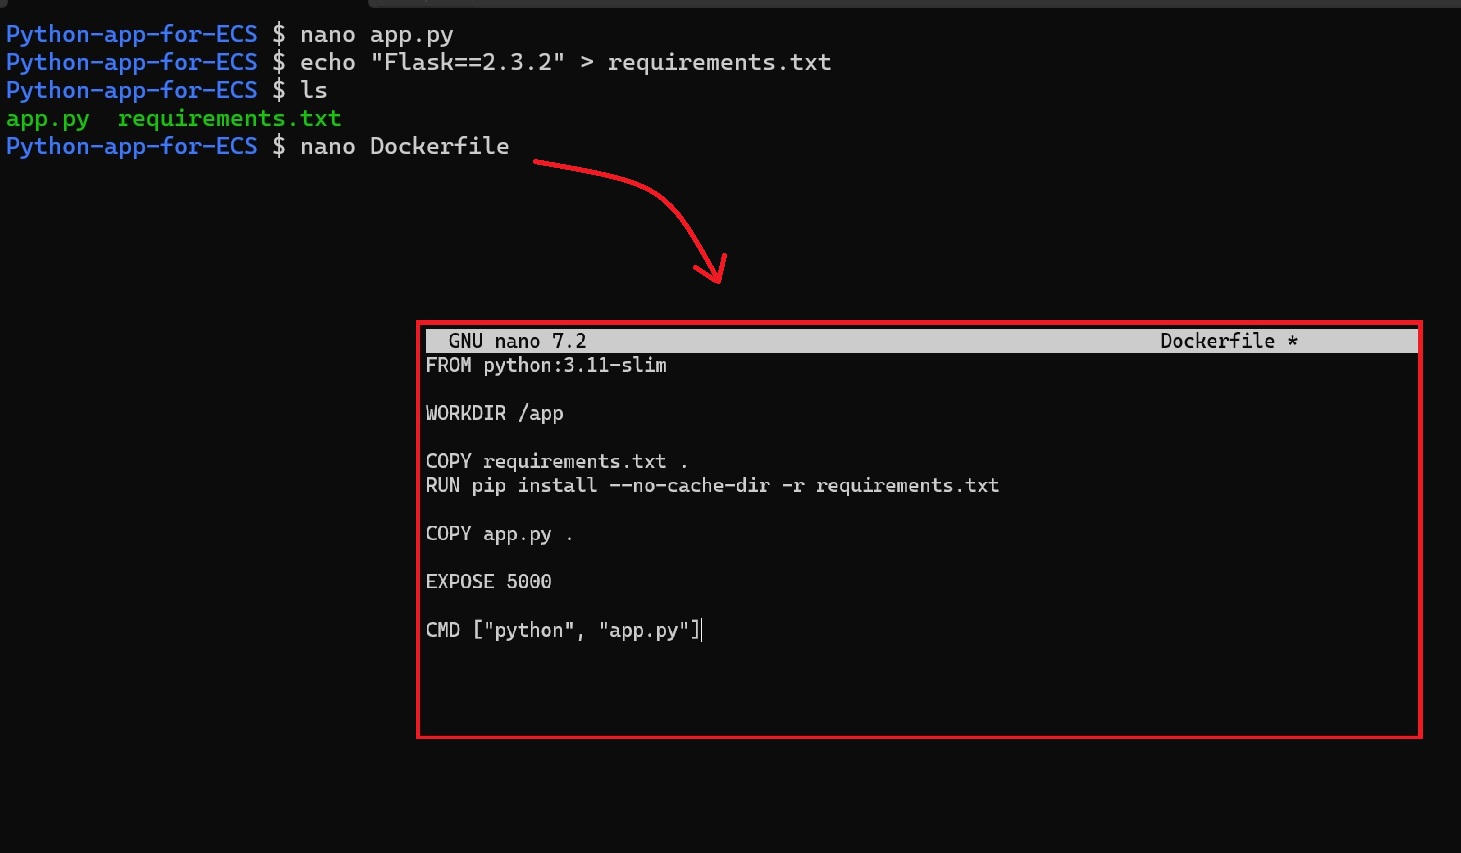
Refer to the Containerizing app on Docker documentation to learn more.
(Optional) Test Docker Image Locally
Before deploying the Docker image to ECS, test it in the local environment to ensure it works as expected.
- Build the Docker image and run the container on the local machine with the following command:
docker build -t <app-name-for-local-test> .
docker run -p 5000:5000 <app-name-for-local-test>
Note: Replace the placeholders with the desired name.

- Verify local testing by opening the web browser and visiting
http://localhost:5000.

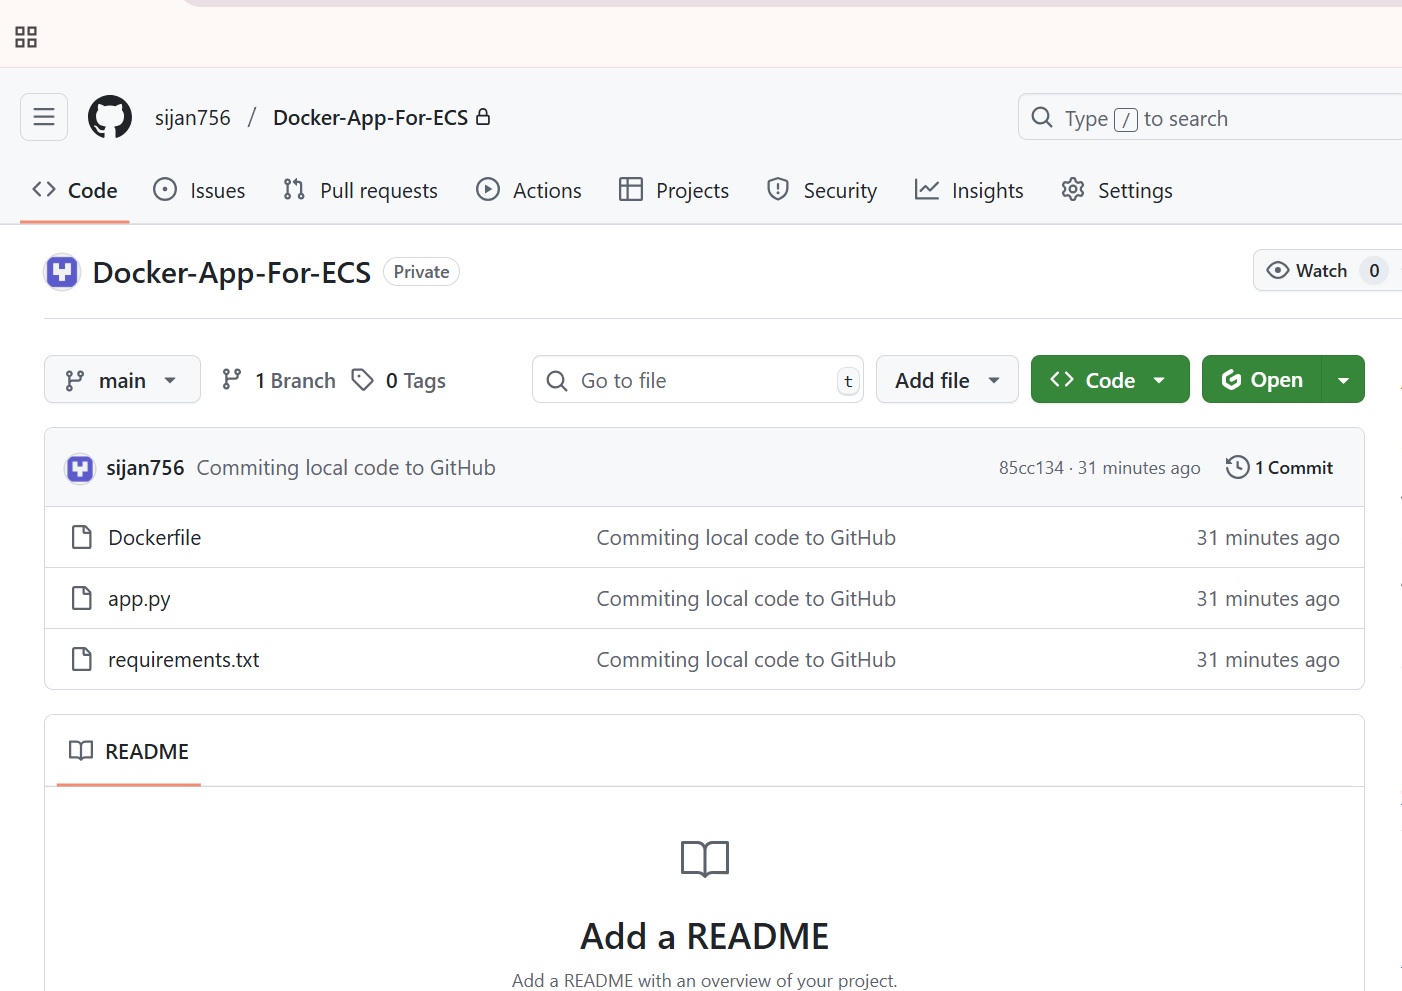
Step 3: Push Code to GitHub
To prepare for deployment using GitHub Actions, the local project needs to be pushed to a GitHub repository. Run the following commands in sequence from the project’s root directory:
git init
git add .
git commit -m "Commiting local code to GitHub"
git branch -M main
git remote add origin https://github.com/<username>/<repository-name>.git
git push -u origin main
Note: Replace <username> and <repository-name> placeholders in the repository URL with your actual GitHub username and repository name.

Authentication Tip: During the git push process, GitHub requires a Personal Access Token (PAT) instead of a password for HTTPS pushes, as seen in the figure above. A PAT can be created in GitHub account settings under Developer settings > Personal access tokens.
Step 4: Prepare AWS ECS Environment
To run the Dockerized Python app on AWS ECS, begin by configuring the core infrastructure components: an ECR repository to store the container image, an ECS cluster to host the application, and task and service definitions to manage its execution.
4.1 Create an ECR Repository
- Navigate to Elastic Container Registry (ECR) in AWS Console and click “Create repository.”
- Under General settings, enter the repository name (example: ecr-repo-for-app).
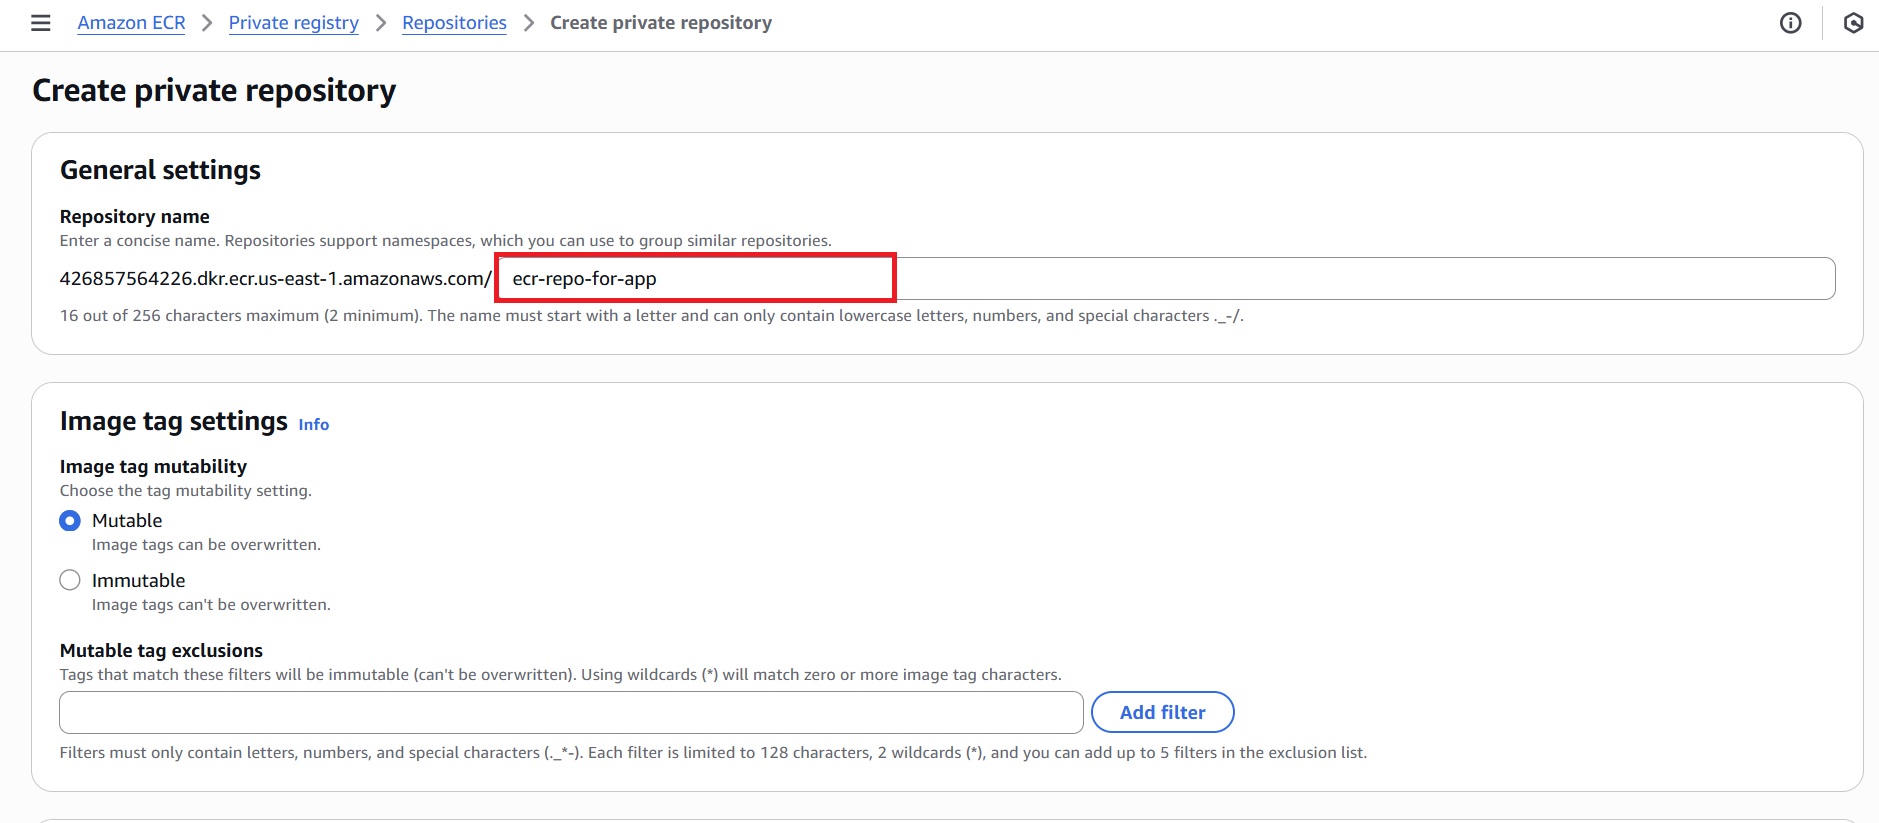
- Leave other settings as default and click “Create.”
4.2 Create an ECS Cluster
- Navigate to the Amazon ECS (Elastic Container Service) console and click on Clusters in the sidebar, then click “Create Cluster.”
- In the Cluster configuration, enter a cluster name (for example, flask-ecs-cluster).
- Under Infrastructure, select AWS Fargate (serverless).
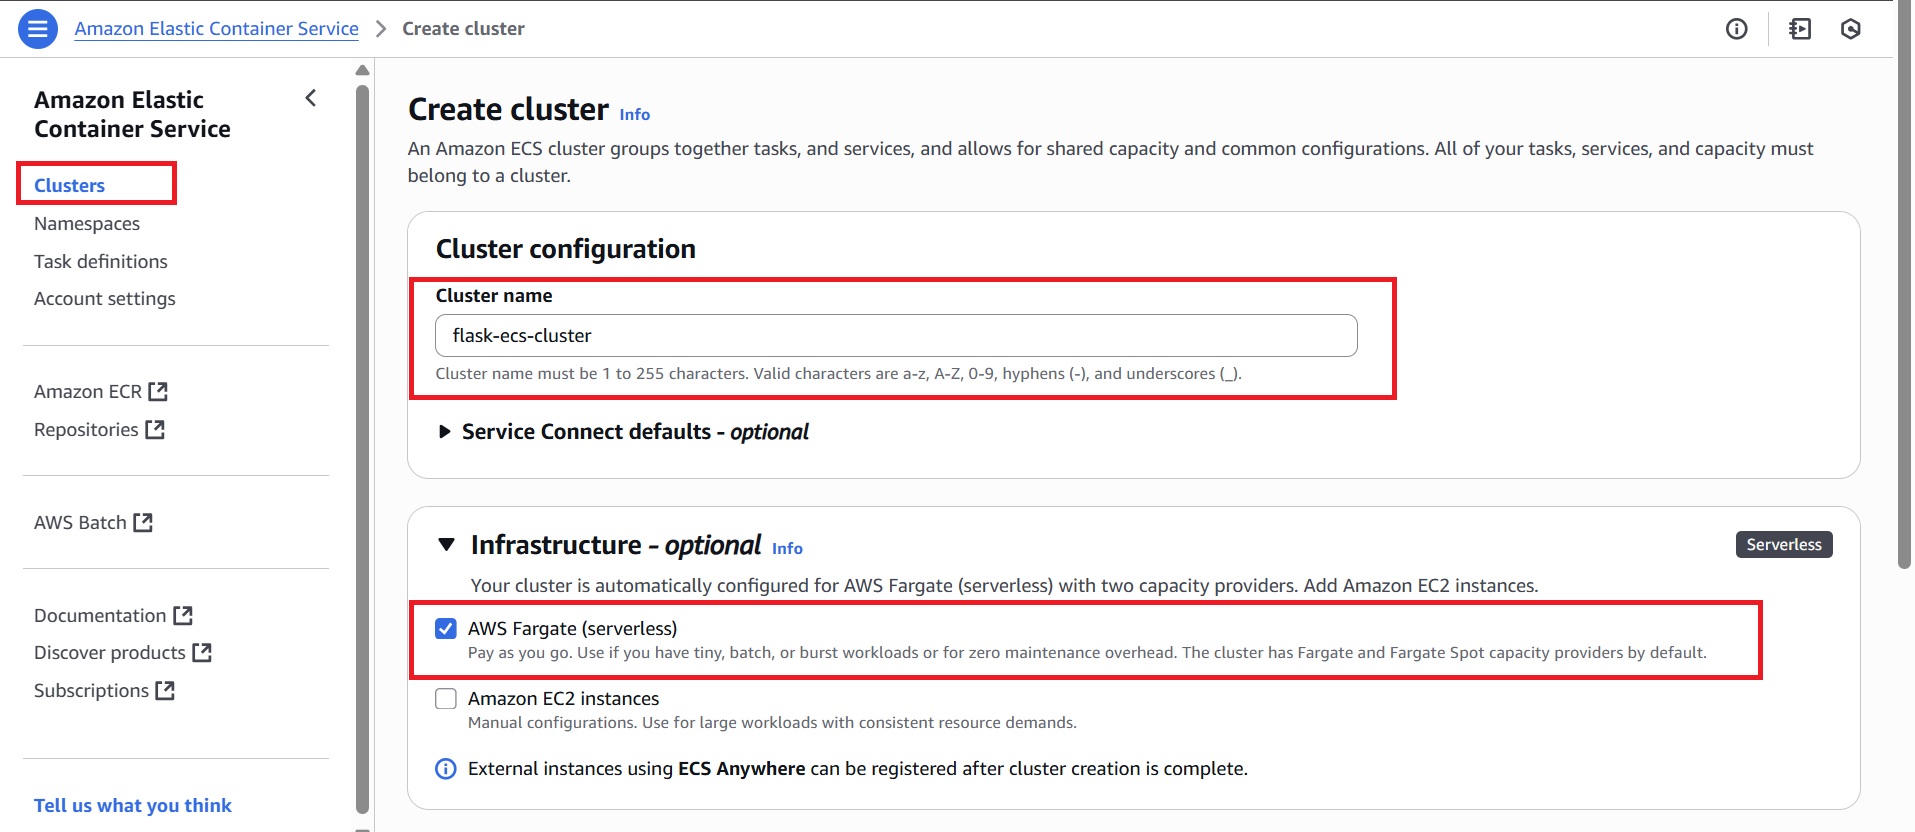
- Leave other settings at their default values, including optional features such as CloudWatch Container Insights and encryption.
- Click Create.
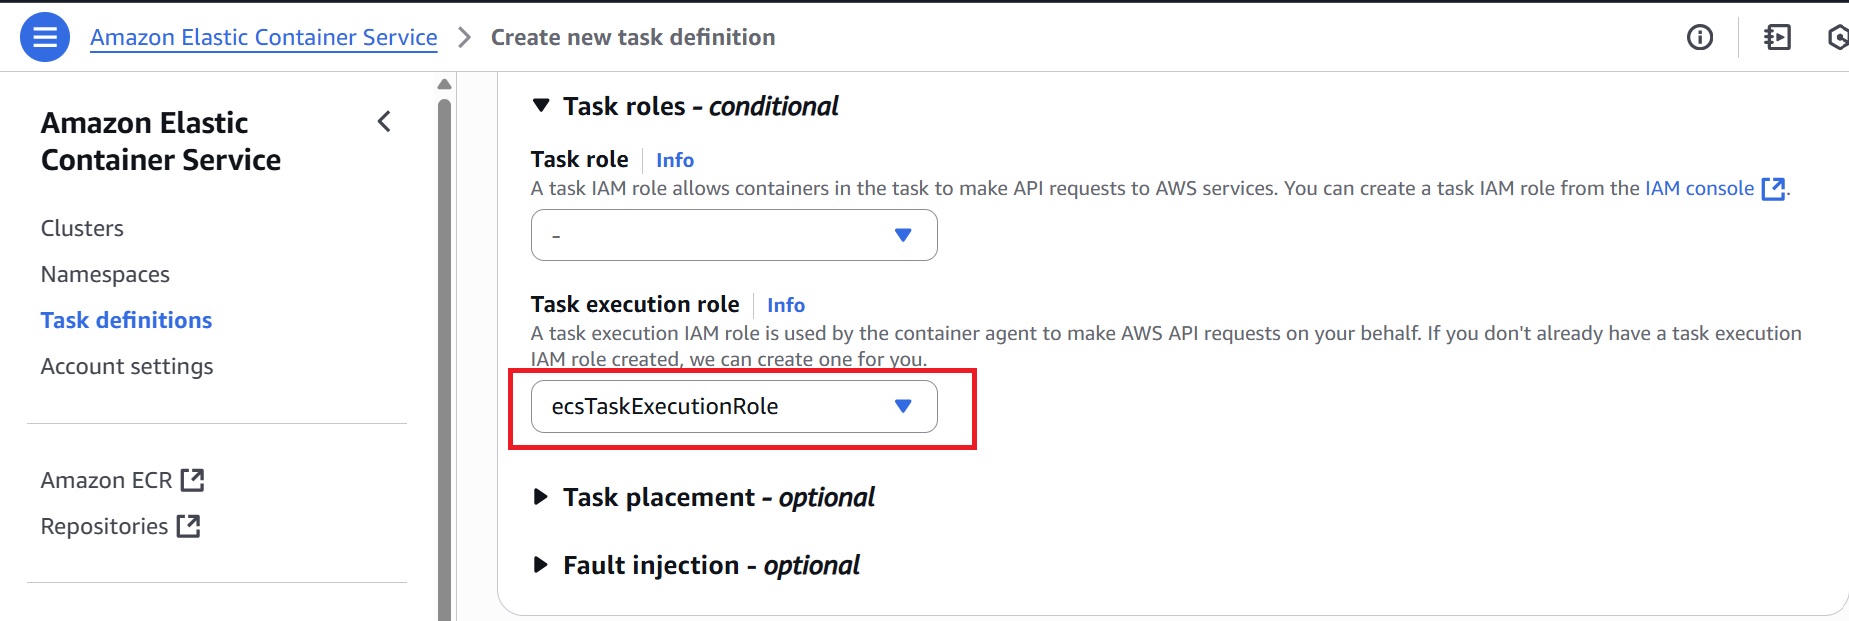
4.3 Create a Task Definition
- Navigate to the ECS console, select Task Definitions from the left sidebar, and click “Create new task definition.”
- Enter the task definition name (example, my-app-task-definition).
- Choose AWS Fargate as the launch type.
- Choose an appropriate “Task size” (CPU and Memory settings) based on the application’s expected workload. (This guide uses 0.25 vCPU and 0.5 GB of memory to support a lightweight Flask app.)

- For the Task execution role, select the pre-defined
ecsTaskExecutionRole(if available) or create a new IAM role with the permissions to pull images from ECR and send logs to CloudWatch.
Under Container details, provide:
– Container name: <any-name> (eg: flask-container)
– Image URI: Enter a valid image URI (e.g., nginx if your app image isn’t ready). The GitHub Actions workflow will update it with the actual Docker image URI after pushing to ECR.
– Container port: Set to 5000 (the default port used by Flask apps running inside the Docker container)

- Click Create to save the task definition.
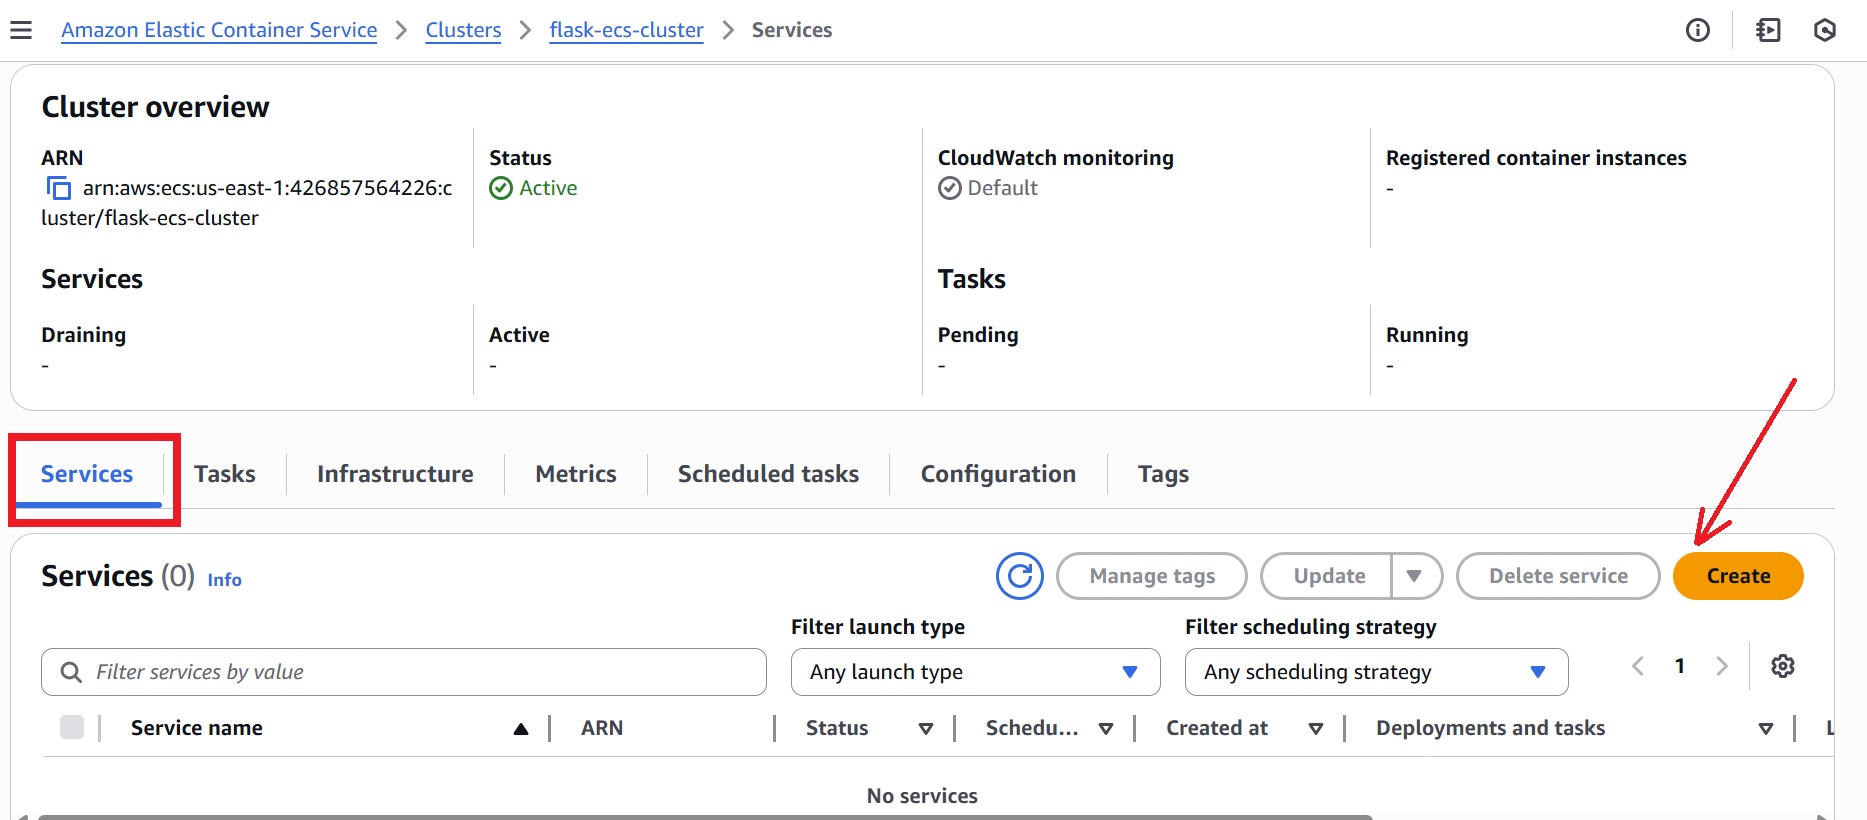
4.4 Create an ECS Service
- In the AWS Console, go to ECS > Clusters, select the existing cluster created earlier (e.g., flask-ecs-cluster).
- Click the Services tab, then click Create.
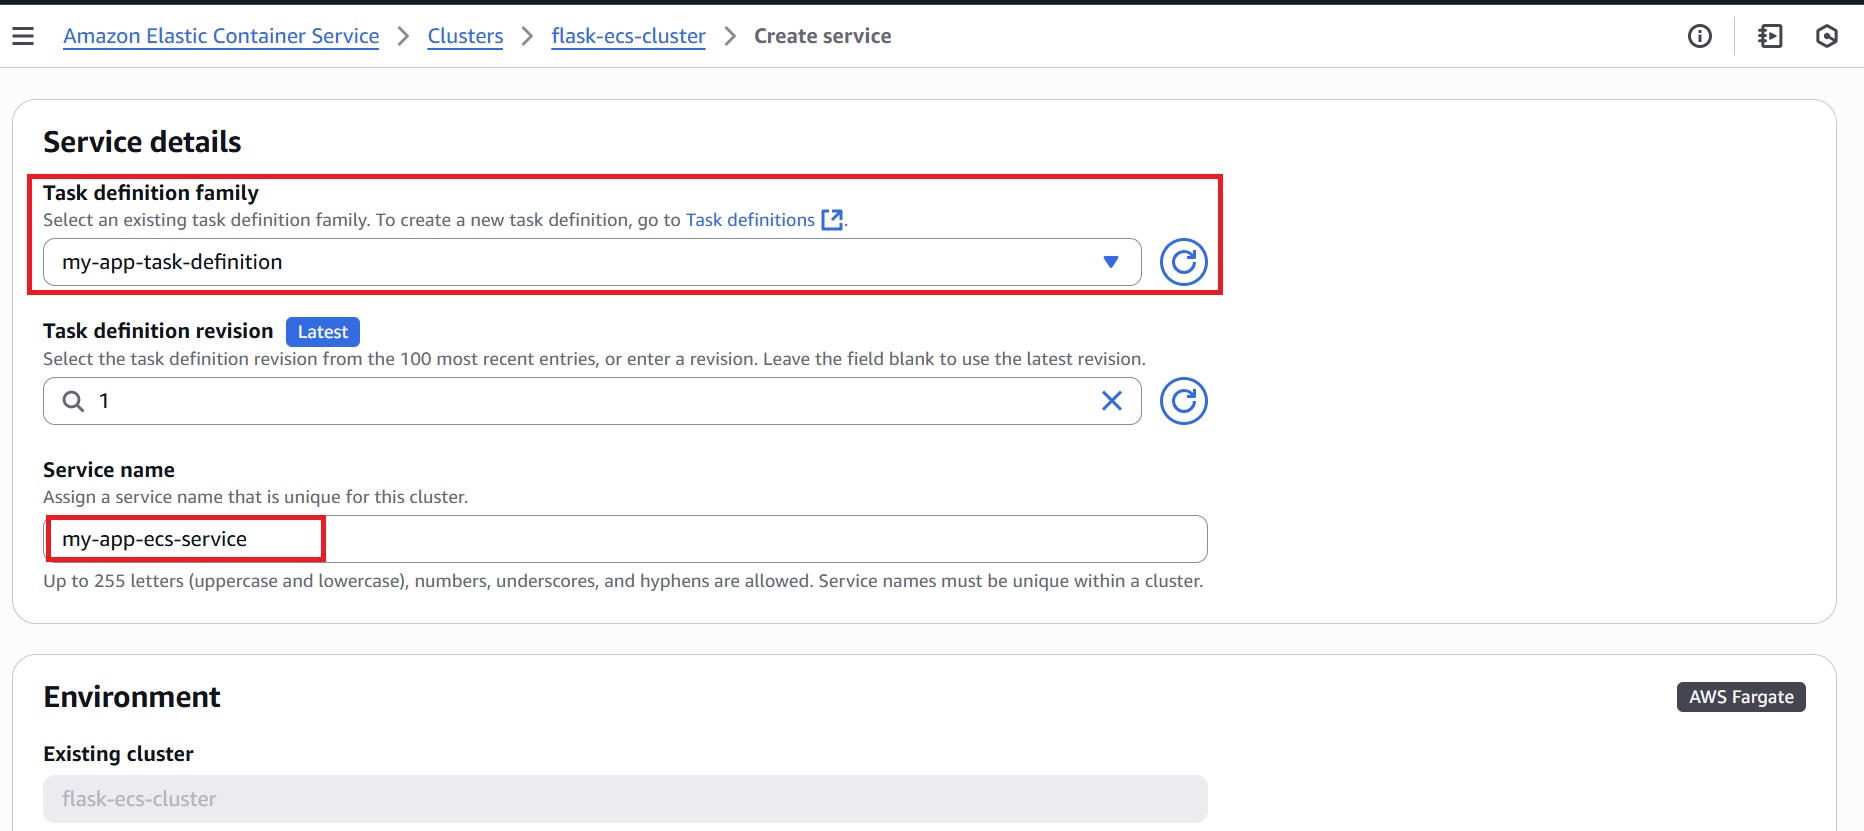
- Configure the Service details:
– Task definition family: Select the task definition created earlier
– Service name: Enter a unique name (eg, my-app-ecs-service)
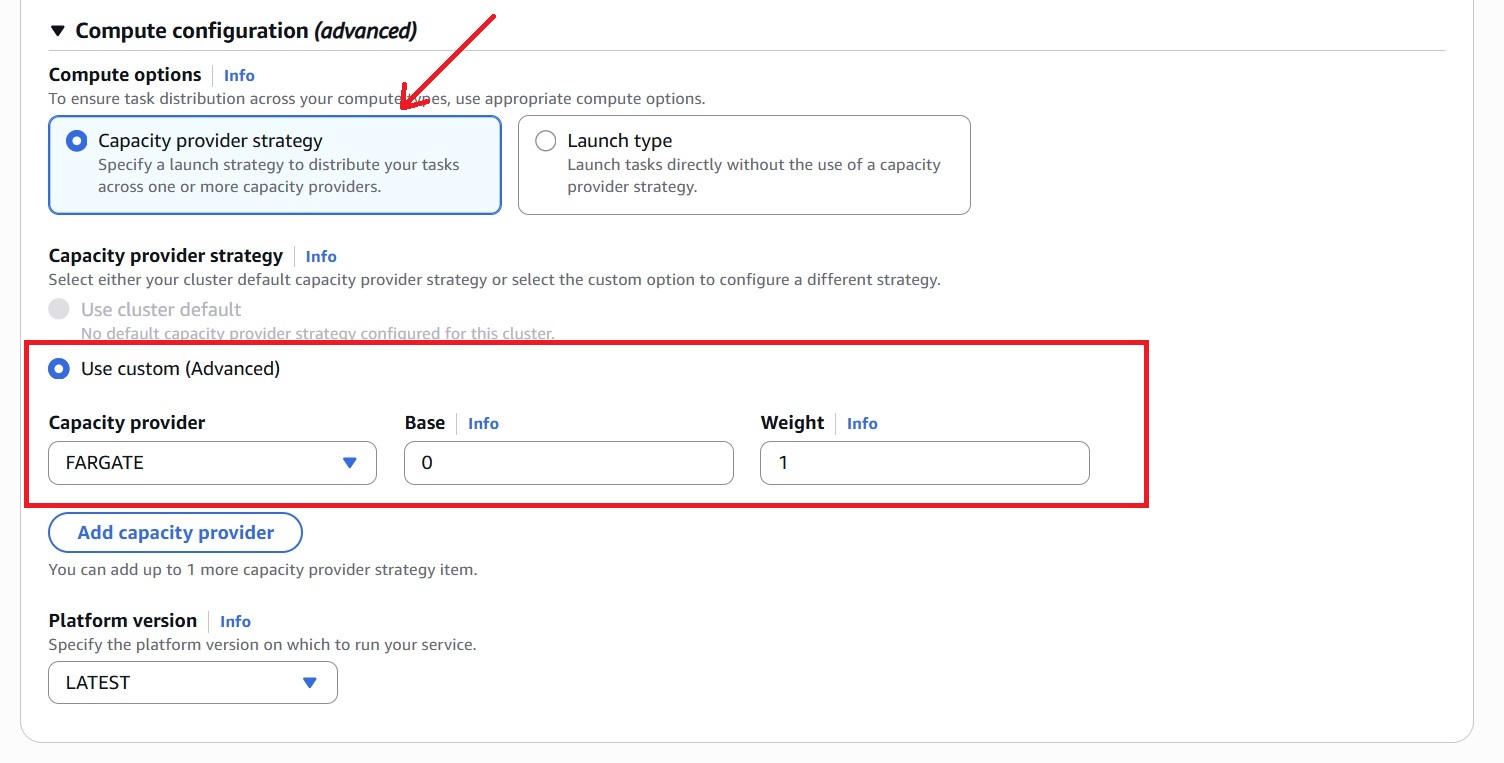
- Under Compute configuration (advanced), select “Capacity provider strategy” and configure the following:
– Capacity provider strategy: Use custom (Advanced)
– Capacity provider: FARGATE
– Base: 0
– Weight: 1
– Platform version: LATEST
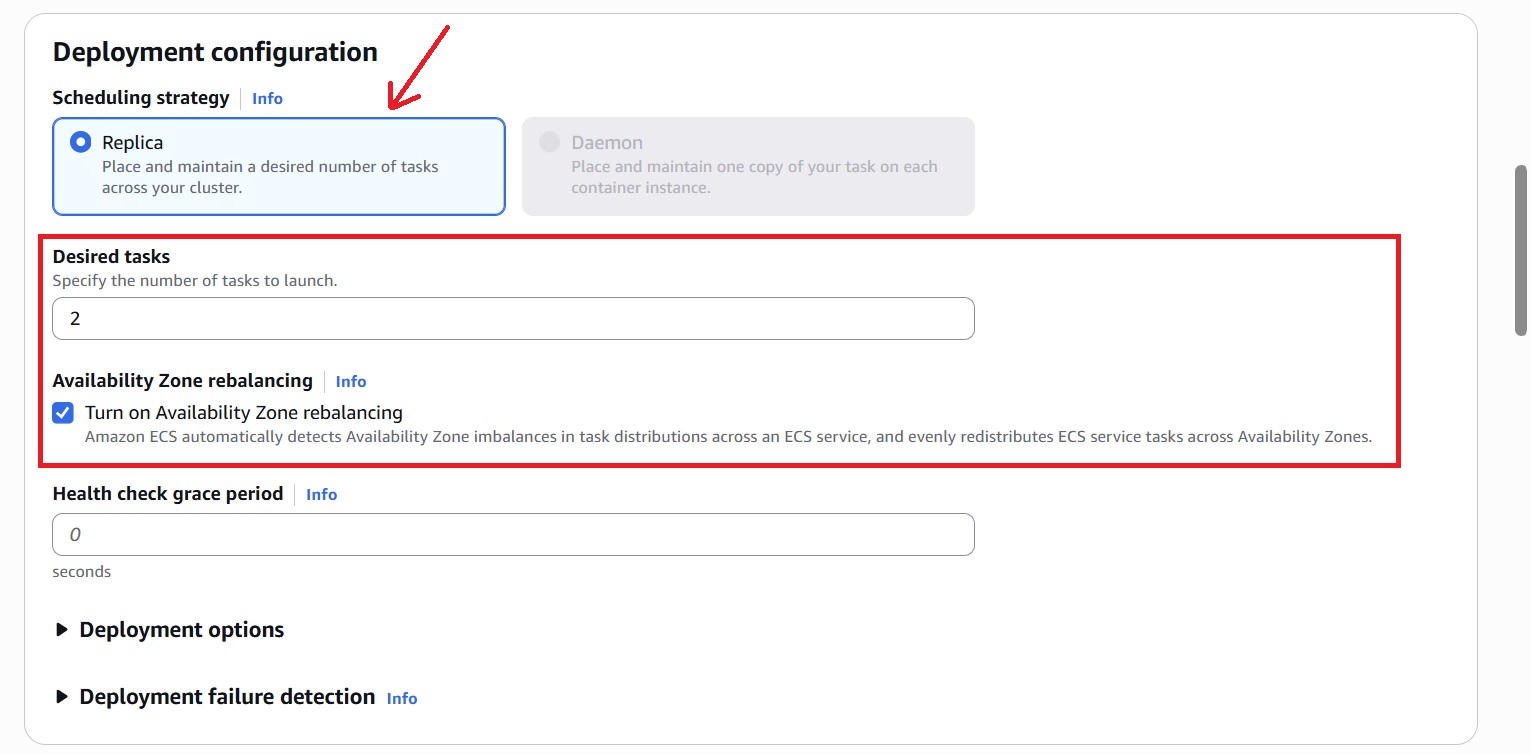
- In the Deployment configuration section, select:
– Scheduling strategy: Select Replica
– Desired tasks: Enter the number of tasks to run (e.g., 2).
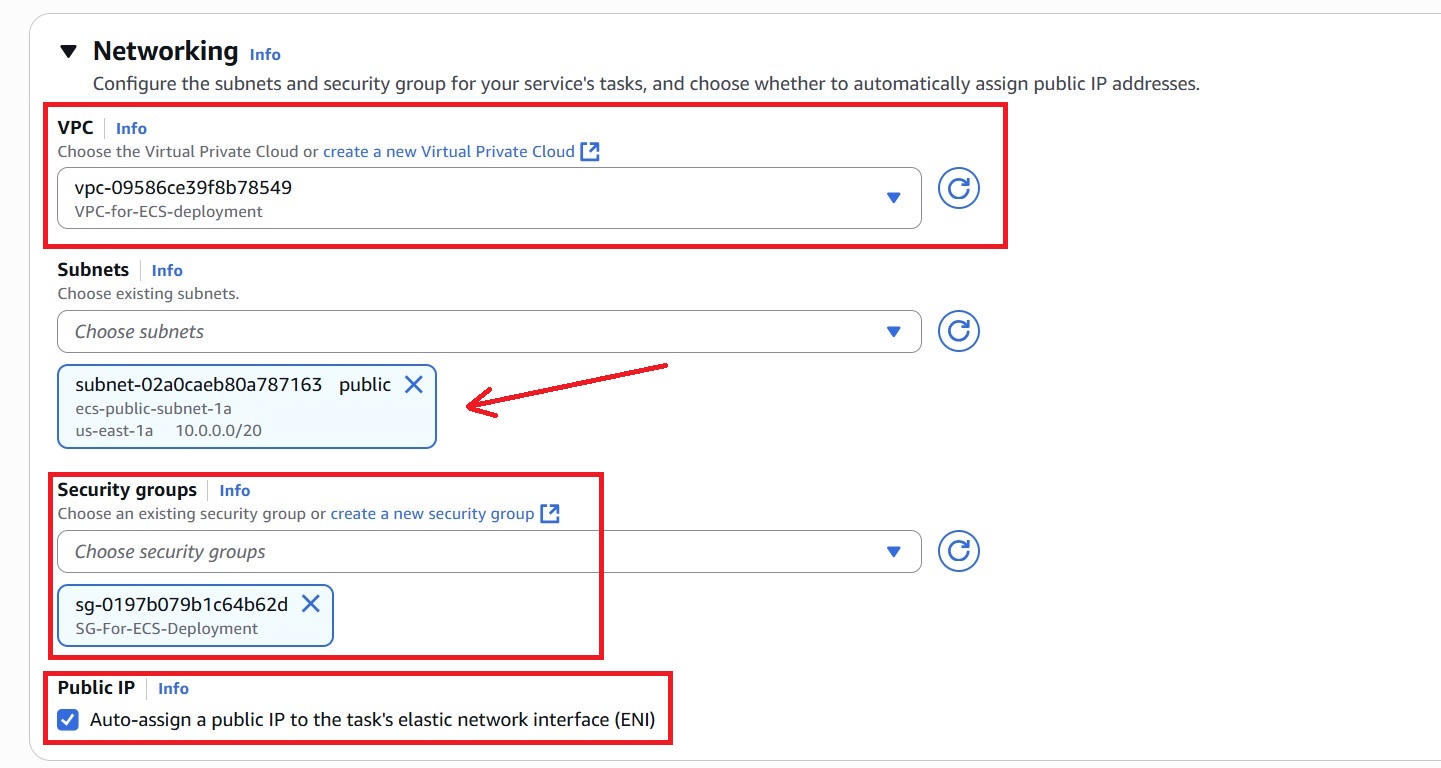
- Under Networking, select:
– VPC: Select the default VPC (or your custom VPC if preferred for better control).
– Subnets: Choose at least one public subnet within the selected VPC.
– Security group: Create or select a security group that allows inbound traffic on the port5000.
– Auto-assign public IP: Enable to allow your ECS tasks to have public IP addresses for internet access.
- Leave the remaining optional sections at their default settings.
- Click “Create” to launch the service.
Step 5: Configure AWS Credentials as GitHub Secrets
GitHub Actions requires AWS credentials for authentication, plus environment details to deploy to ECS.
In the GitHub repository:
- Navigate to Settings > Secrets and variables > Actions. This opens the secrets management section within the same tab.
- Click New repository secret to add a new secret.
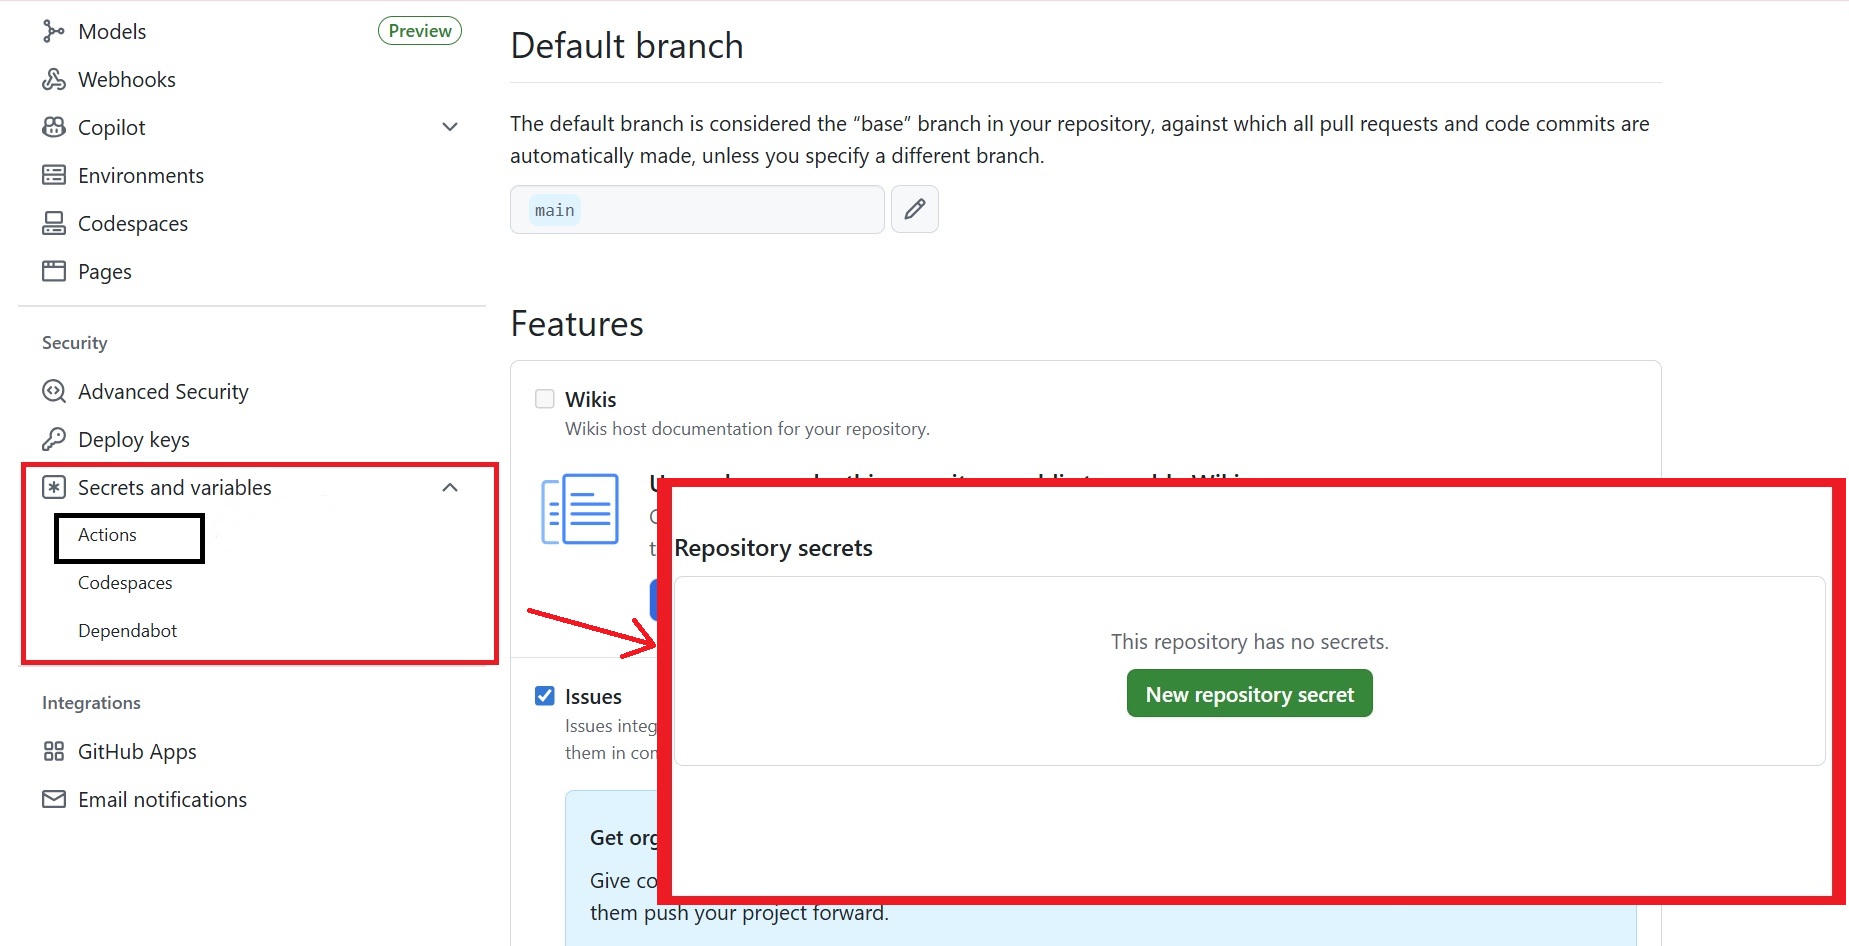
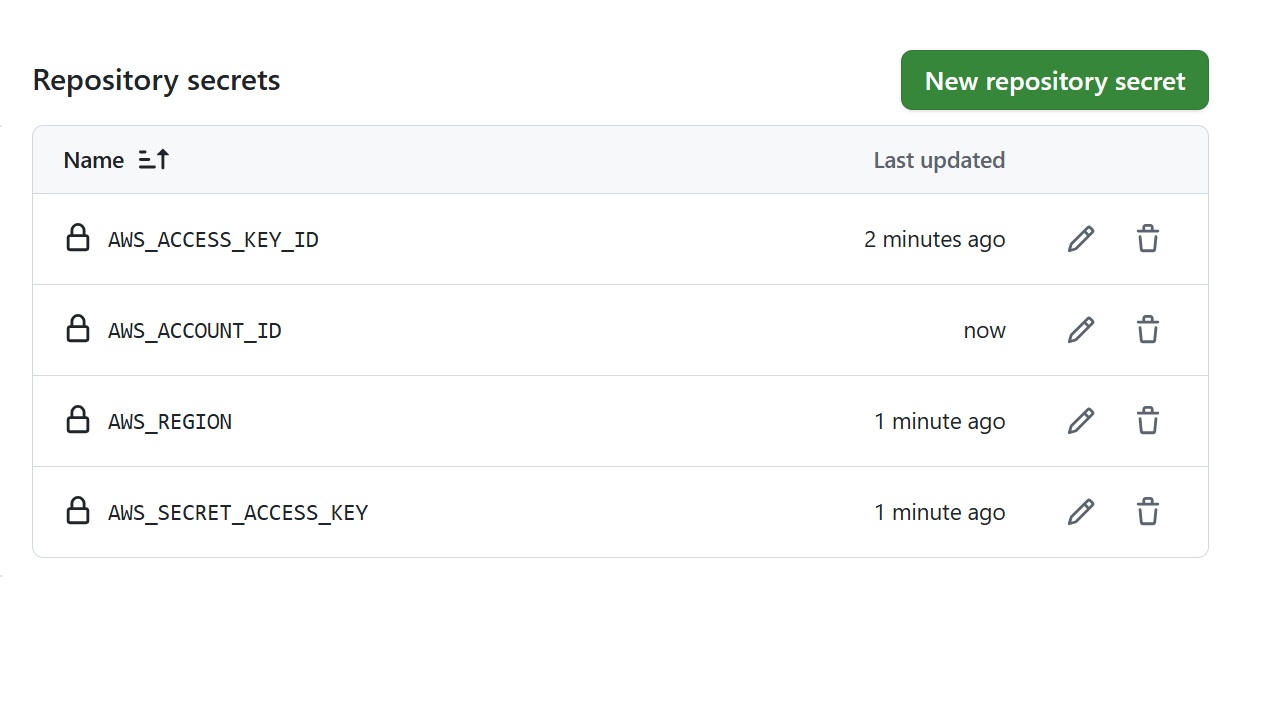
- Then, add the following secrets (one at a time):
– AWS_ACCESS_KEY_ID: <your-access-key-id>
– AWS_SECRET_ACCESS_KEY: <your-secret-access-Key>
– AWS_REGION: <desired-aws-region> (e.g. us-east-1)
– AWS_ACCOUNT_ID: <your-12-digit-aws-account-id>
Step 6: Create GitHub Actions Workflow
The workflow builds and pushes the Docker image to ECR, updates the ECS task definition with the new image, and deploys the updated service automatically on code changes.
- On the local machine, inside the project root directory (example: Python-app-for-ECS), create a workflow directory and a
.ymlfile.
mkdir -p .github/workflows
nano .github/workflows/deploy.yml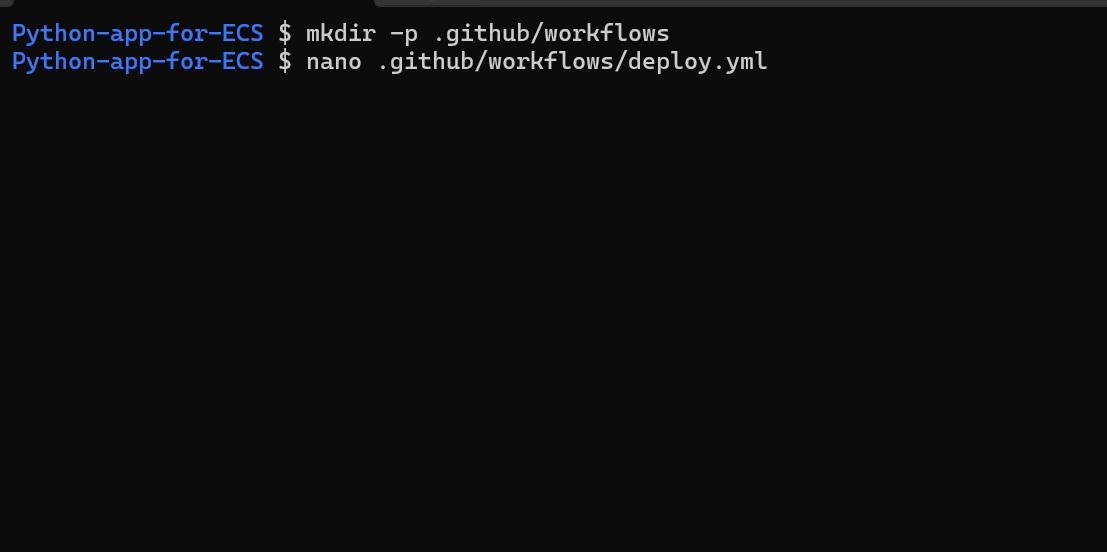
- Paste the following content into the
.ymlfile:
name: Deploy to ECS via GitHub Actions

on:
  push:
    branches: [main]

env:
  AWS_REGION: ${{ secrets.AWS_REGION }}
  ECR_REPO_NAME: <your-ecr-repo-name>
  ECS_CLUSTER_NAME: <your-ecs-cluster-name>
  ECS_SERVICE_NAME: <your-ecs-service-name>
  TASK_DEFINITION_NAME: <your-task-def-name>

jobs:
  deploy:
    runs-on: ubuntu-latest

    steps:
      - name: Checkout source code
        uses: actions/checkout@v4

      - name: Configure AWS credentials
        uses: aws-actions/configure-aws-credentials@v4
        with:
          aws-access-key-id: ${{ secrets.AWS_ACCESS_KEY_ID }}
          aws-secret-access-key: ${{ secrets.AWS_SECRET_ACCESS_KEY }}
          aws-region: ${{ env.AWS_REGION }}

      - name: Install jq
        run: sudo apt-get update && sudo apt-get install -y jq

      - name: Log in to Amazon ECR
        uses: aws-actions/amazon-ecr-login@v2

      - name: Build, tag, and push Docker image to ECR
        run: |
          IMAGE_URI=${{ secrets.AWS_ACCOUNT_ID }}.dkr.ecr.${{ env.AWS_REGION }}.amazonaws.com/${{ env.ECR_REPO_NAME }}:latest
          echo "IMAGE_URI=$IMAGE_URI" >> $GITHUB_ENV
          docker build -t $IMAGE_URI .
          docker push $IMAGE_URI

      - name: Update ECS Task Definition with new image
        run: |
          aws ecs describe-task-definition \
            --task-definition ${{ env.TASK_DEFINITION_NAME }} \
            --query "taskDefinition | {
              family: family,
              taskRoleArn: taskRoleArn,
              executionRoleArn: executionRoleArn,
              networkMode: networkMode,
              containerDefinitions: containerDefinitions,
              requiresCompatibilities: requiresCompatibilities,
              cpu: cpu,
              memory: memory
            }" > taskdef.json

          cat taskdef.json | \
            jq 'del(.taskRoleArn | select(. == null)) | del(.executionRoleArn | select(. == null))' | \
            jq --arg IMAGE "$IMAGE_URI" '.containerDefinitions[0].image = $IMAGE' > new-taskdef.json

          aws ecs register-task-definition --cli-input-json file://new-taskdef.json

      - name: Deploy updated task to ECS service
        run: |
          NEW_REVISION=$(aws ecs describe-task-definition \
            --task-definition ${{ env.TASK_DEFINITION_NAME }} \
            --query "taskDefinition.revision" \
            --output text)

          aws ecs update-service \
            --cluster ${{ env.ECS_CLUSTER_NAME }} \
            --service ${{ env.ECS_SERVICE_NAME }} \
            --task-definition ${{ env.TASK_DEFINITION_NAME }}:$NEW_REVISION \
            --force-new-deployment
Note: Replace the followings <placeholders> with the actual values:
| <your-ecr-repo-name> | ECR repository name (eg, ecr-repo-for-app) |
| <your-task-def-name> | ECS task definition name (eg, my-app-task-definition) |
| <your-ecs-cluster-name> | ECS cluster name (eg, flask-ecs-cluster) |
| <your-ecs-service-name> | ECS service name (eg, my-app-ecs-service) |
Push Workflow to GitHub
Commit and push the new workflow file to trigger the deployment:
git add .github
git commit -m "Add GitHub Actions workflow for ECS deployment"
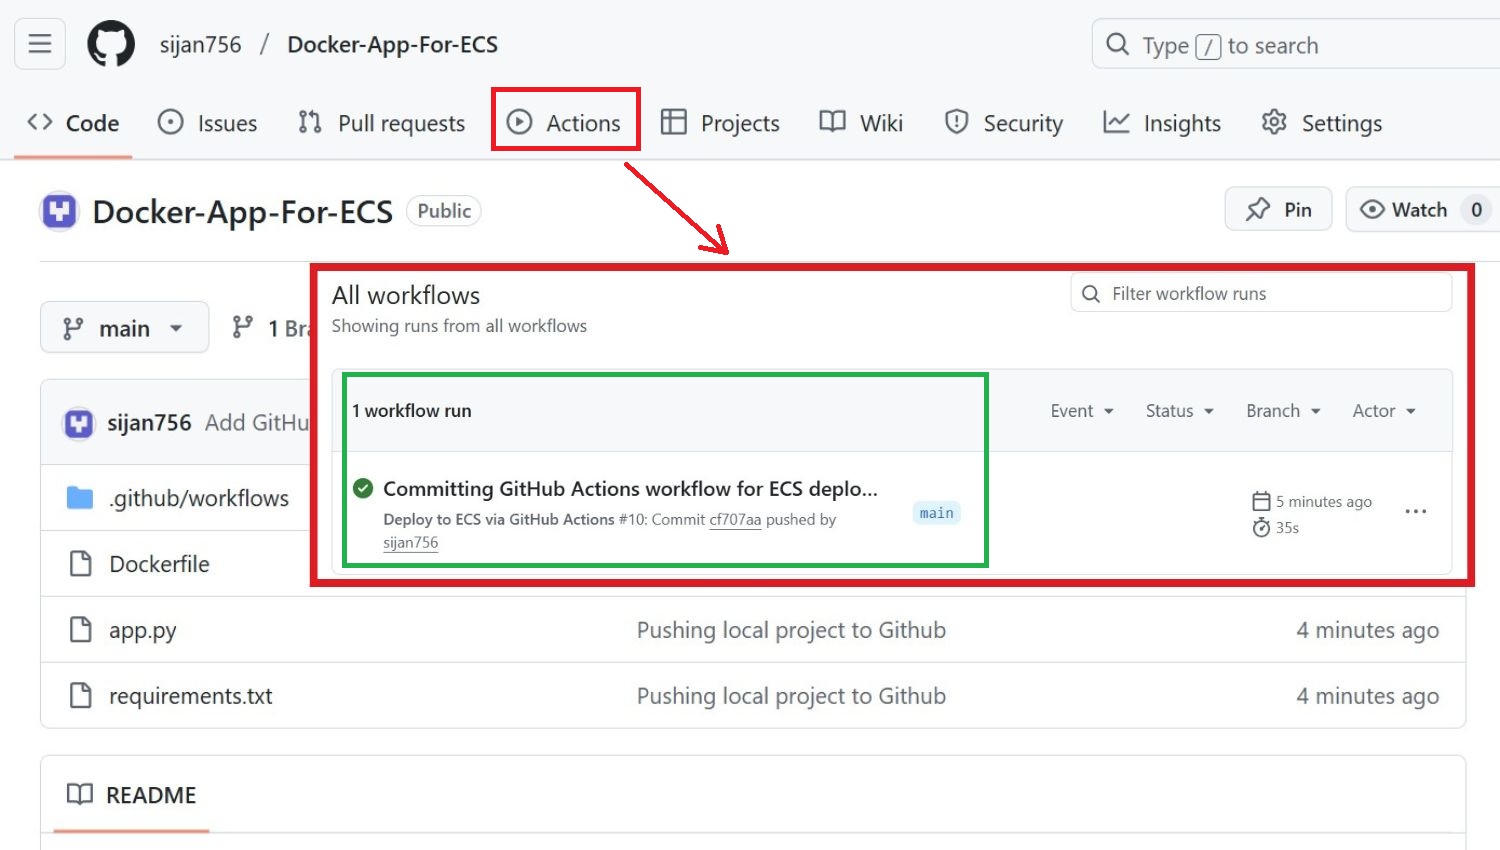
git push origin mainStep 7: Verify Deployment
- In GitHub, go to the Actions tab, check the workflow status; it should complete without errors.
Step 8: Test Deployed Flask App
- In the AWS ECS Console, navigate to Clusters → <your-ecs-cluster> → Services → <your-ecs-service-name>.
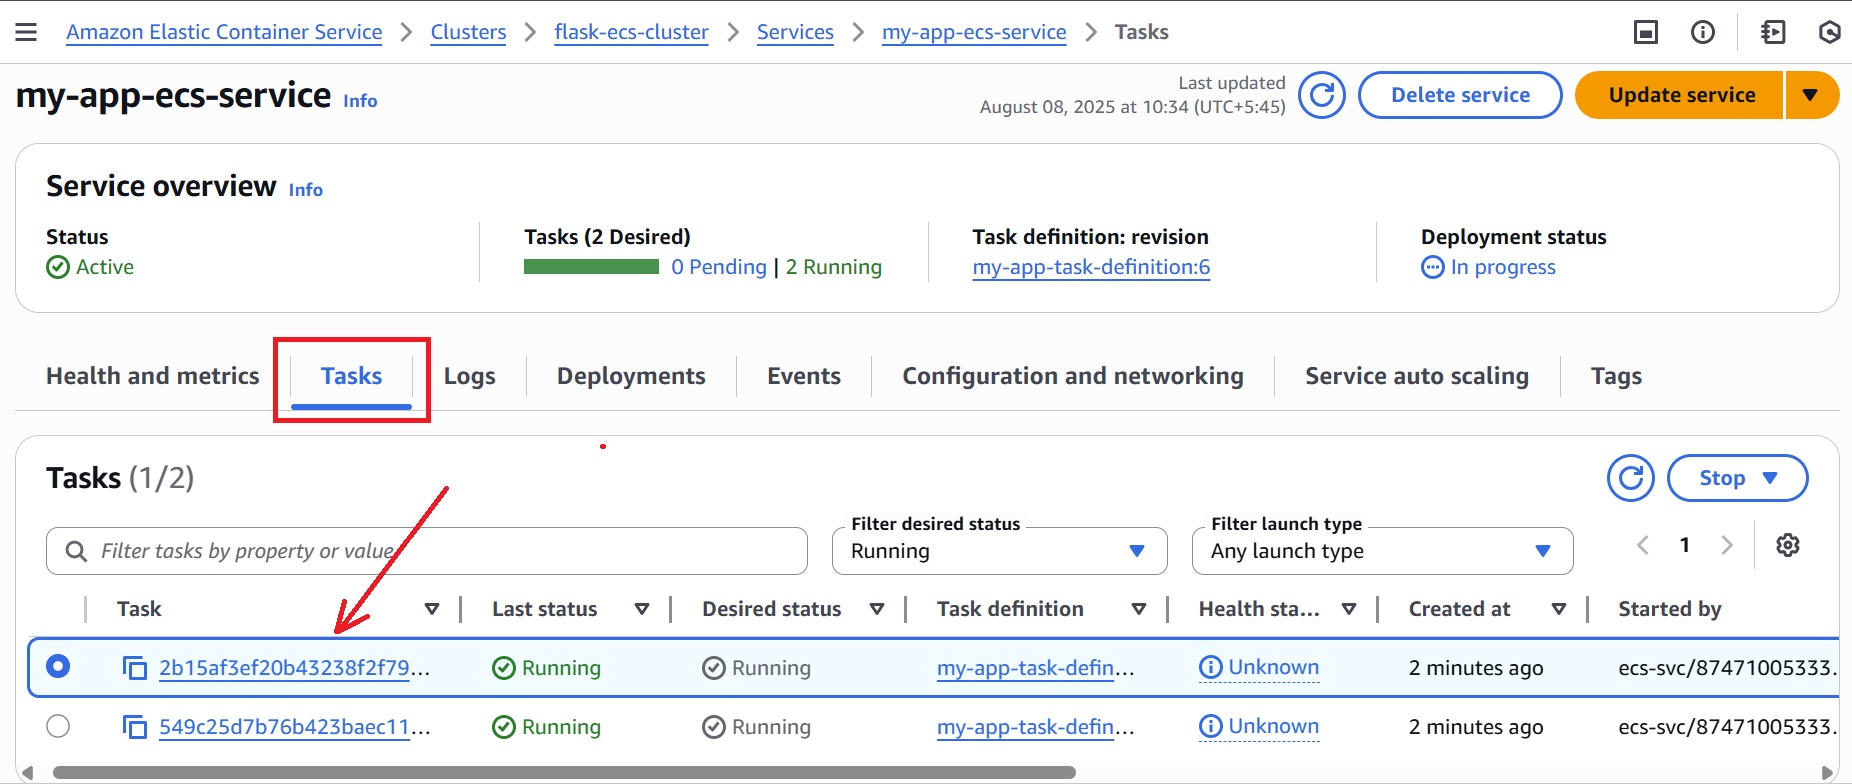
- In the Tasks tab, click on the running task, then scroll down to the Network section to find the Public IP address.
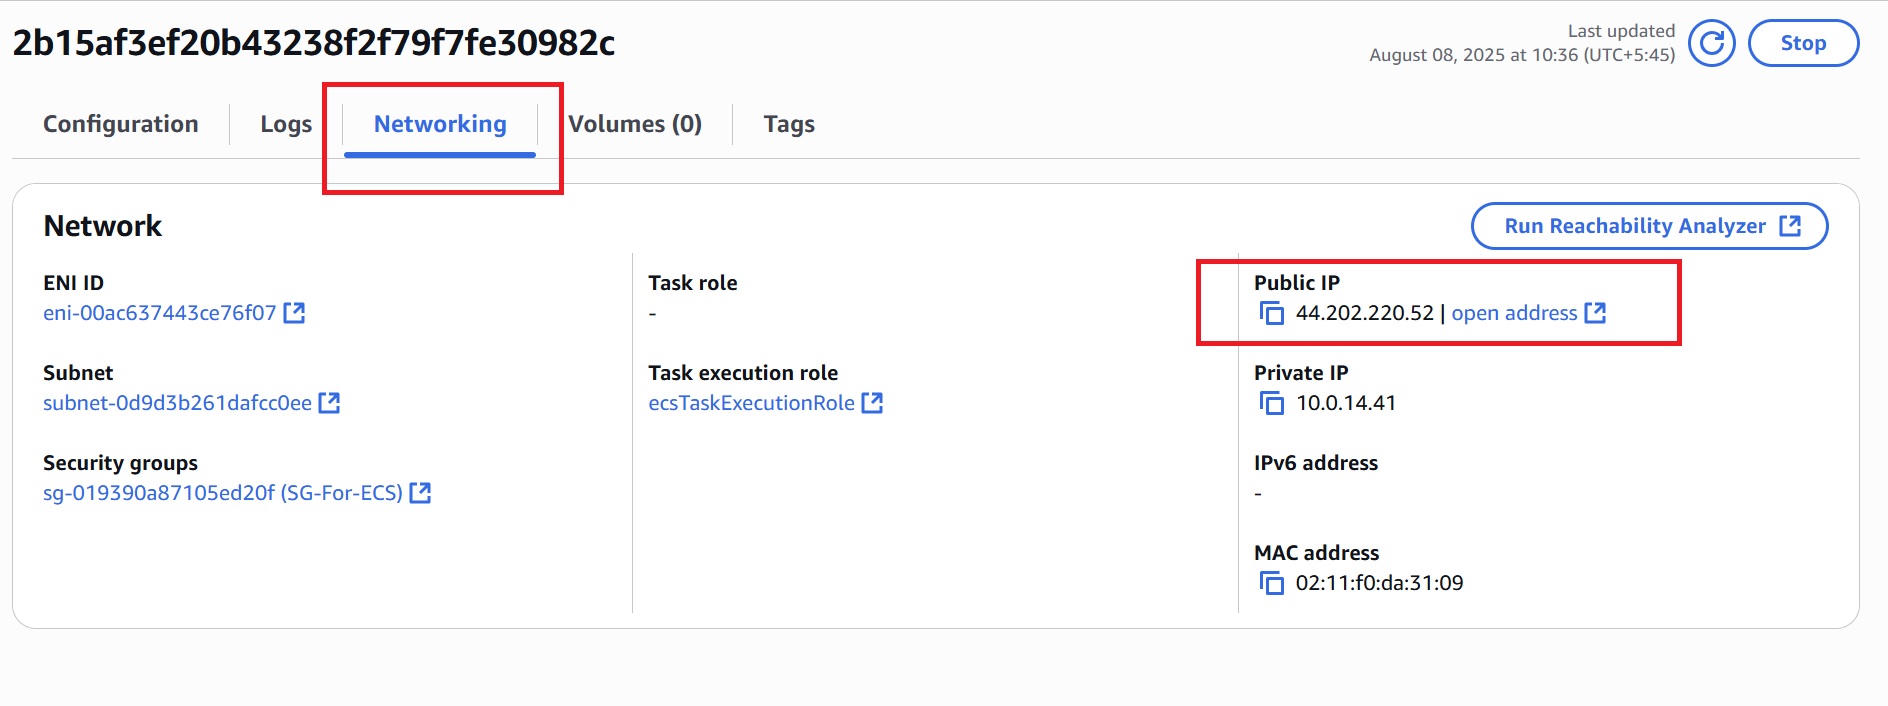
- Open the browser and visit:
http://<public-ip>:5000.

Conclusion
Effective cloud deployments require consistency, scalability, and minimal manual intervention. This guide illustrates how integrating containerization, managed orchestration, and automation can help achieve these objectives.
The deployment process outlined using Docker, AWS ECS, and GitHub Actions ensures environments remain synchronized, updates are applied automatically, and applications are delivered efficiently in production.


