Kubernetes clusters are powerful, but without proper access control, they become vulnerable to security breaches. Role-Based Access Control (RBAC) helps enforce the principle of least privilege, ensuring users and applications can access only the resources they need.
But how are those permissions defined and enforced in a real Kubernetes environment?
This guide walks through the steps to configure RBAC in Kubernetes—from defining roles to assigning permissions and securing access across environments.
What Is RBAC (Role-Based Access Control)?
RBAC (Role-Based Access Control) is an authorization system in Kubernetes that controls what actions users, groups, or service accounts can perform on cluster resources by assigning them specific roles.
Each role bundles a set of permissions and can be applied either within a single namespace or across the entire cluster.
This flexible setup enables fine-grained control over access policies — for example, allowing a developer to view pods in a specific namespace while restricting cluster-wide actions, such as deleting resources.
By defining and enforcing role-based permissions, RBAC ensures effective access management while protecting the security and operational integrity of the Kubernetes environment.
How RBAC Works in Kubernetes
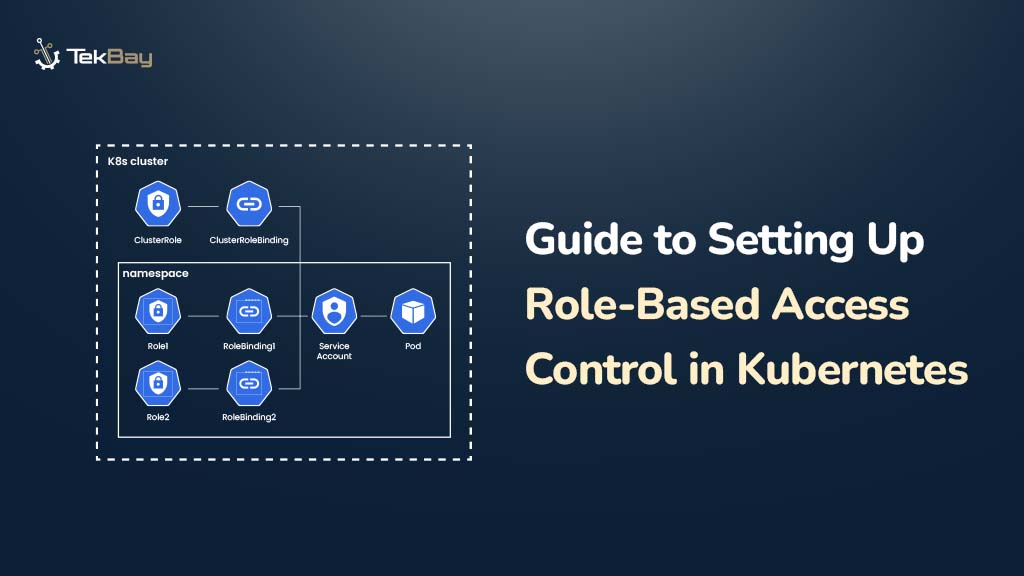
RBAC controls access by defining and enforcing permissions through these key components:
- Roles: Define allowed actions (e.g., get, delete) on resources within a specific namespace.
- ClusterRoles: Define permissions that apply across the entire cluster.
- RoleBindings: Assign Roles to users, groups, or service accounts within a namespace.
- ClusterRoleBindings: Assign ClusterRoles to users, groups, or service accounts cluster-wide.
RBAC enforces these permissions at the namespace level (for example, restricting a team to a development environment) or cluster-wide (for example, granting global monitoring access), ensuring precise and secure access control.
Authentication and Authorization in Kubernetes
Before RBAC controls permissions, Kubernetes verifies user identity through service accounts, certificates, tokens, or external identity providers. Once authenticated, RBAC manages authorization by assigning and enforcing permissions within namespaces or across the cluster.

Applying best practices such as the principle of least privilege, access monitoring, and separation of duties helps administrators maintain a secure and well-governed environment.
Prerequisites
Before starting, ensure you have the following:
- A running Kubernetes cluster.
- The kubectl CLI is installed and properly configured.
- Basic familiarity with managing Kubernetes resources.
Step-by-Step RBAC Setup in Kubernetes
Step 1: Creating a Role
A Role defines permissions for resources within a specific namespace. For example, the following YAML creates a role named pod-reader to allow read-only access to pods in the default namespace.
apiVersion: rbac.authorization.k8s.io/v1
kind: Role
metadata:
  name: pod-reader
  namespace: default
rules:
- apiGroups: [""]
  resources: ["pods"]
  verbs: ["get", "watch", "list"]
Apply and Verify the Role
Once the Role is defined in YAML, apply it so Kubernetes recognizes and enforces its permissions, then verify that it exists in the cluster.
- Apply the Role with:
kubectl apply -f role.yamlVerify the Role with:
kubectl get role pod-reader -n default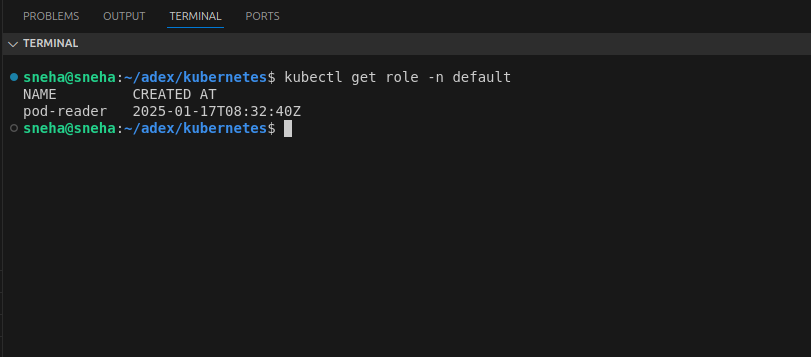
Step 2: Creating and Applying a RoleBinding
In this step, we bind the pod-reader Role to the user jack in the default namespace. The following YAML file (e.g., rolebinding.yaml ) defines the RoleBinding to grant Jack read-only access to Pods in that namespace.
apiVersion: rbac.authorization.k8s.io/v1
kind: RoleBinding
metadata:
  name: read-pods
  namespace: default
subjects:
- kind: User
  name: jack
  apiGroup: rbac.authorization.k8s.io
roleRef:
  kind: Role
  name: pod-reader
  apiGroup: rbac.authorization.k8s.io
Apply and Verify the RoleBinding
Once the RoleBinding YAML file is ready, apply it to your Kubernetes cluster using:
kubectl apply -f rolebinding.yamlAfter applying, verify that the RoleBinding has been created successfully with:
kubectl get rolebinding read-pods -n default
Test Access Permissions
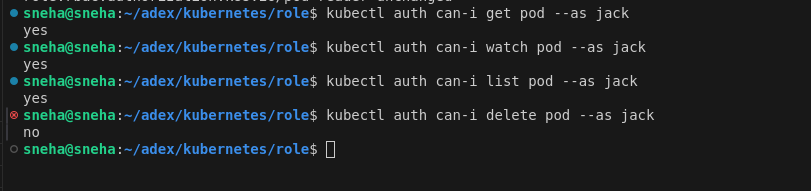
Validate that Jack has the expected permissions. Run these commands to check if Jack can perform various actions on Pods:
kubectl auth can-i get pod --as jack -n default
kubectl auth can-i watch pod --as jack -n default
kubectl auth can-i list pod --as jack -n default
kubectl auth can-i delete pod --as jack -n default
The image below shows that Jack can get, watch, and list Pods (with read-only access), but cannot delete Pods, ensuring the RoleBinding is working as intended.
Step 3: Creating a Cluster Role
A ClusterRole defines permissions for resources across the entire cluster. For example, the following YAML creates a cluster role named secret-reader to allow read-only access to Kubernetes Secrets:
apiVersion: rbac.authorization.k8s.io/v1
kind: ClusterRole
metadata:
  name: secret-reader
rules:
- apiGroups: [""]
  resources: ["secrets"]
  verbs: ["get", "watch", "list"]
Apply the ClusterRole with:
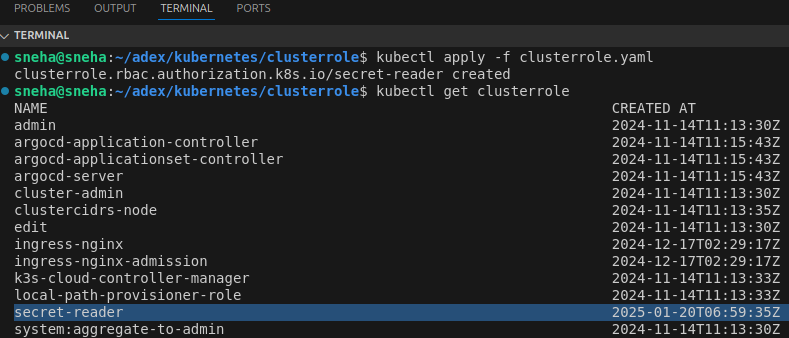
kubectl apply -f clusterrole.yaml
Verify that it’s created successfully:
kubectl get clusterrole
Step 4: Creating a RoleBinding (Namespace-Scoped)
Now, let’s bind the secret-reader ClusterRole to a specific user (eg, dev) but limit their access to just the development namespace. This is done using a RoleBinding.
apiVersion: rbac.authorization.k8s.io/v1
kind: RoleBinding
metadata:
  name: read-secrets
  namespace: development
subjects:
- kind: User
  name: dev
  apiGroup: rbac.authorization.k8s.io
roleRef:
  kind: ClusterRole
  name: secret-reader
  apiGroup: rbac.authorization.k8s.io
If the development namespace doesn’t already exist, create it:
kubectl create namespace developmentApply the RoleBinding:
kubectl apply -f rolebinding.yaml
Test if the user dev can read secrets in development:
kubectl auth can-i get secret --as dev -n development

Step 5: Binding ClusterRole Globally with ClusterRoleBinding
To grant read access to Secrets for a user (e.g., sneha) across all namespaces in the cluster, use a ClusterRoleBinding. This binding is global because it applies cluster-wide, unlike a RoleBinding, which is limited to a single namespace.
apiVersion: rbac.authorization.k8s.io/v1
kind: ClusterRoleBinding
metadata:
  name: read-secrets-global
subjects:
- kind: User
  name: sneha
  apiGroup: rbac.authorization.k8s.io
roleRef:
  kind: ClusterRole
  name: secret-reader
  apiGroup: rbac.authorization.k8s.io
Apply and Verify the ClusterRoleBinding:
This command applies the ClusterRole secret-reader with user sneha across the entire cluster.
kubectl apply -f clusterrolebinding.yamlVerify the ClusterRoleBinding:
kubectl get clusterrolebinding global-secret-readerTest Permissions Globally:
Check if the user sneha can read secrets in all namespaces. The -A flag means “all namespaces” in Kubernetes CLI commands.
kubectl auth can-i get secret --as sneha -A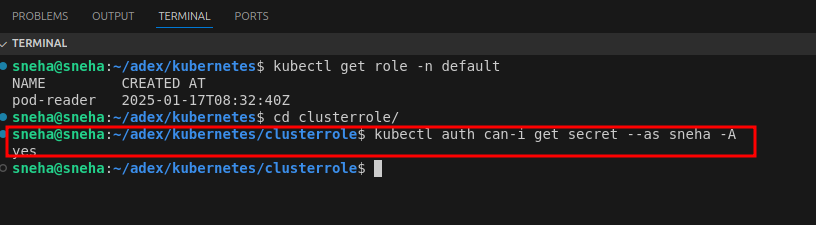
Conclusion
Role-Based Access Control (RBAC) is vital for securing Kubernetes clusters by controlling who can access and modify resources. It enforces the principle of least privilege, thereby reducing risks associated with unauthorized actions and helping organizations maintain a robust security posture.
By following the steps outlined in this guide, granular permissions can be defined and enforced using roles, role bindings, cluster roles, and cluster role bindings. This enables precise control over access at both the namespace and cluster levels, ensuring that users and applications only have the permissions necessary to perform their tasks securely.


